[Motherboard]How to install CPU on Motherboard?

Update : 2024/11/14 17:53

[Motherboard]How to install CPU on Motherboard?


You can install Intel or AMD CPU on the motherboard as follows steps


A. Please check the CPU socket specification before installing the CPU, please do not install other specification CPU into the unsupported socket, if you want to check the CPU supported by the motherboard, please refer to the FAQ:How to query (CPU/memory) QVL List?

B. Please make sure the system power cord is removed beforen installing the CPU

Intel platform

AMD platform


Intel platform

(The following are examples of LGA1851 CPU slot , LGA1700 CPU slot and LGA1200/LGA115X slot)

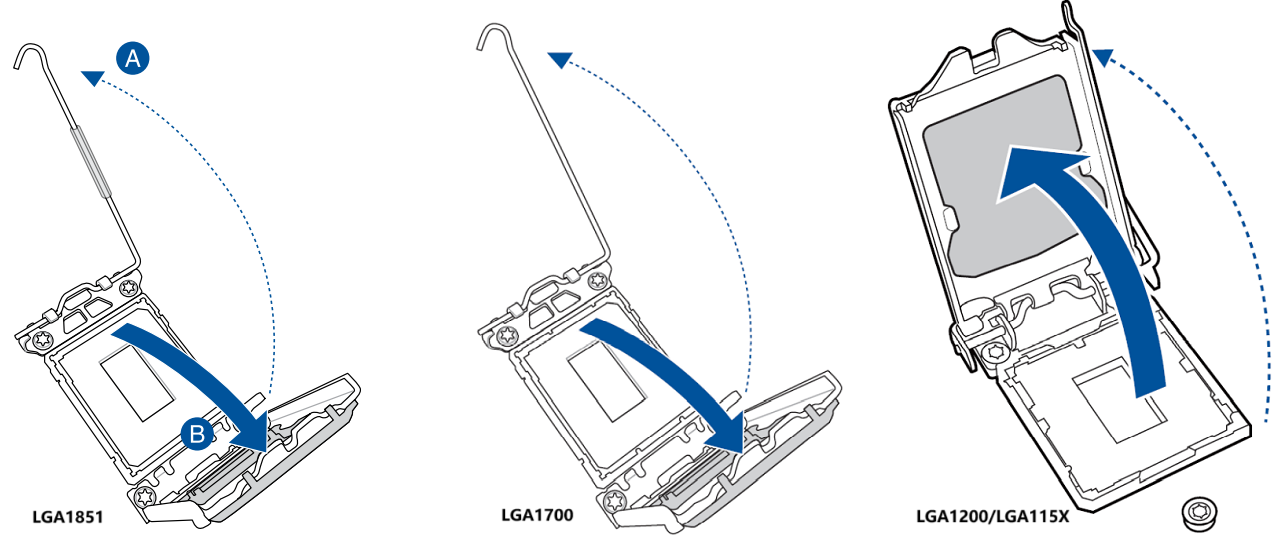
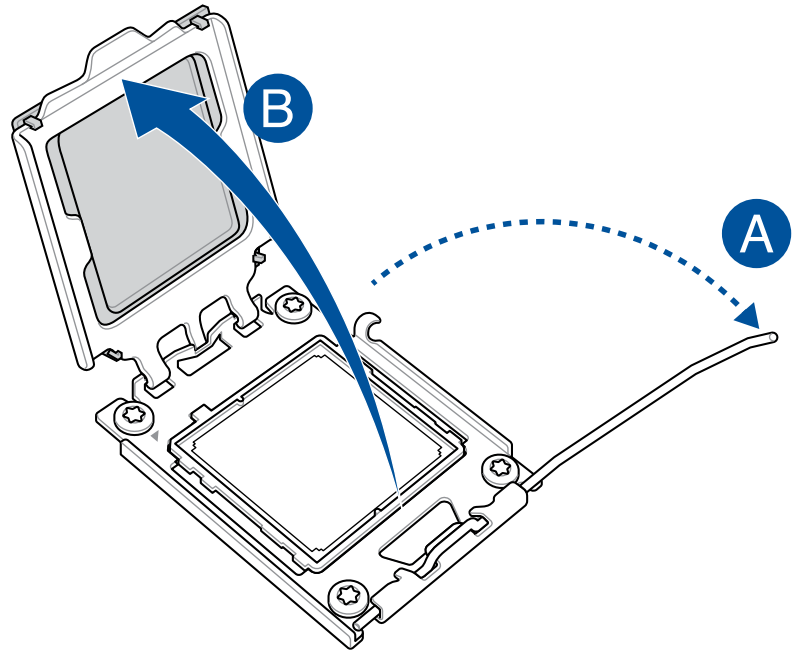
1. Press the lever on the side of the slot to the right and lift it up as shown in steps A and B below, be careful when lifting the lever, make sure to grab the lever when releasing it

2. As shown in the picture below, pull up the lever and open the CPU cover

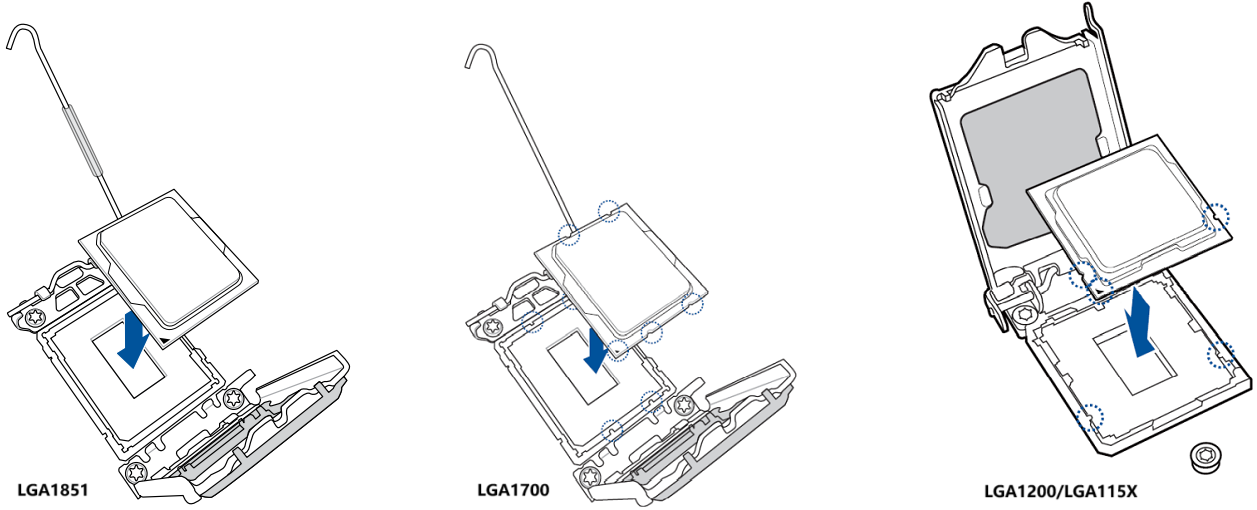
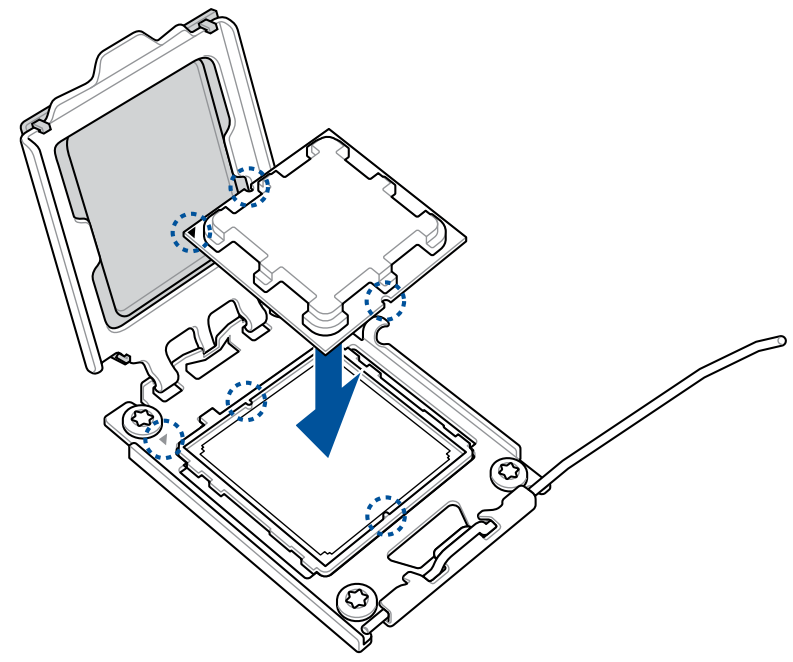
3. Align the triangular mark on the lower left corner of the CPU with the lower left corner of the CPU socket, align the notch of the CPU with the tab of the socket, and place the CPU vertically and smoothly downward

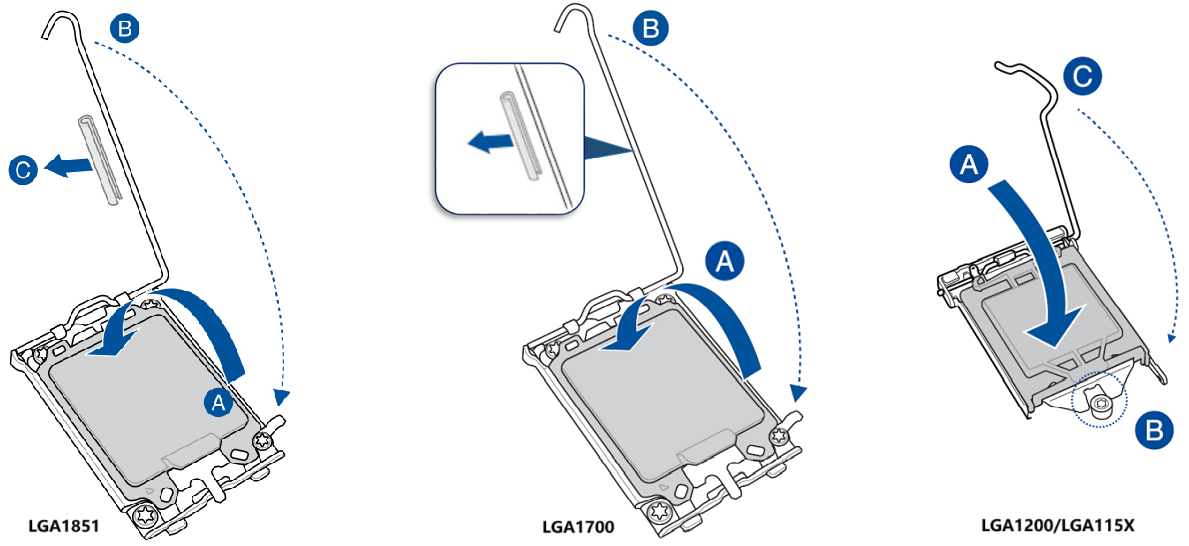
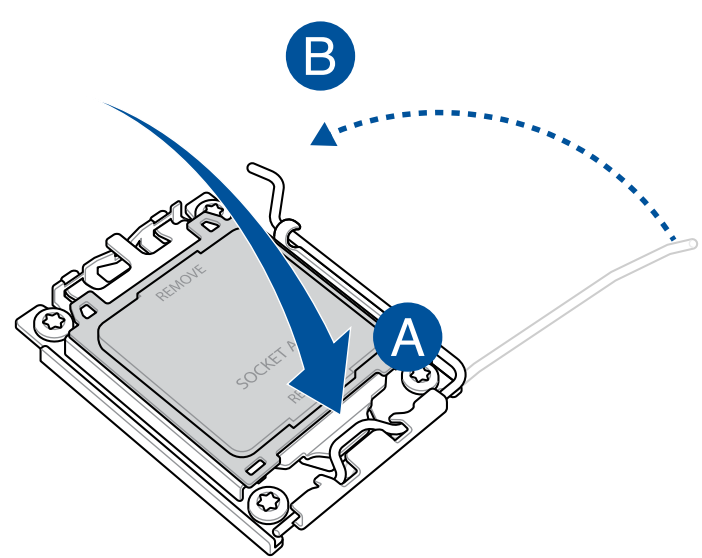
4. After placing the CPU correctly, close the CPU cover first and then press the lever to lock the socket as shown in the figure below

Note: During the CPU installation process, make sure the CPU is properly installed in the socket before pressing the lever. Improper installation may damage the CPU and make it inoperable

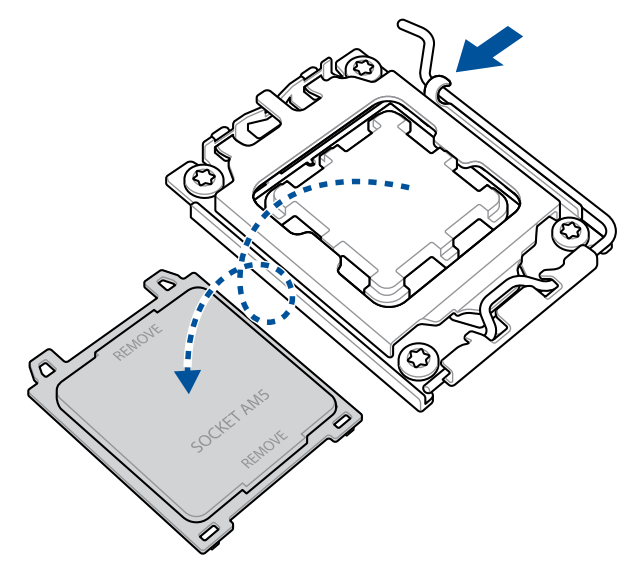
5. The CPU cover will be automatically ejected to complete the CPU installation after the CPU installation is completed and the lever is locked


AMD platform

(The following is an example of AM5 CPU socket)

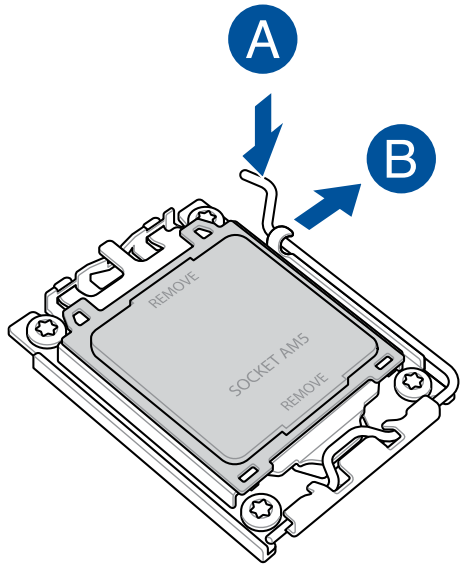
1. Press the lever on the side of the slot to the right and lift it up as shown in steps A and B below, be careful when lifting the lever, make sure to grab the lever when releasing it

2. As shown in the picture below, pull up the lever and open the CPU cover

3. Align the triangular mark on the top left corner of the CPU with the top left corner of the CPU socket, align the notch of the CPU with the tab of the socket, and place the CPU vertically and smoothly downward

4. After placing the CPU correctly, close the CPU cover first and then press the lever to lock the socket as shown in the figure below

Note: During the CPU installation process, make sure the CPU is properly installed in the socket before pressing the lever. Improper installation may damage the CPU and make it inoperable

5. The CPU cover will be automatically ejected to complete the CPU installation after the CPU installation is completed and the lever is locked


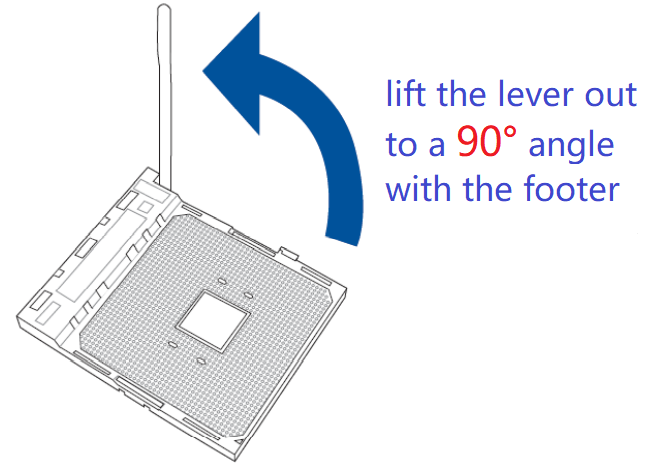
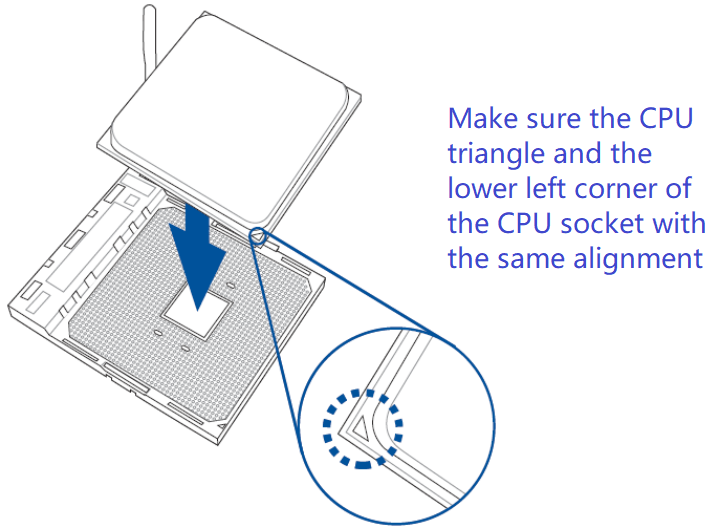
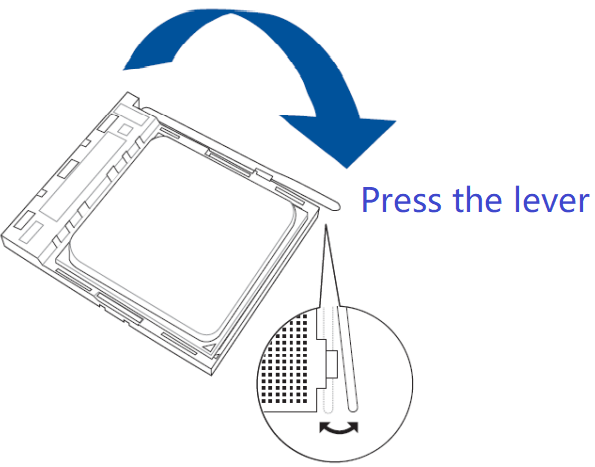
(The following is an example of AM4 CPU socket)

1. First, lift the lever out to a 90° angle with the footer, as shown below

2. In accordance with the CPU triangle and the lower left corner of the CPU socket with the same alignment, vertically down and smoothly placed CPU

3. Press the lever, CPU is locked and installation is complete

Q&A


Q1: System can't boot normally after installing CPU?

A1: Please refer to the FAQ: No Power/No Boot/No Display


Q2: How do I remove the AMD CPU fan?

Q2: Please refer to the FAQ:How to remove AMD CPU Fan Cooler and CPU


Q3: Do you need to keep the CPU protective cover?

If you remove the CPU and no longer use the motherboard (for example, sending it for repair), please reinstall the protective cover that came with your purchase back on the CPU socket to protect the CPU pins from damage.


Notice

Above information might be partly or entirely quoted from exterior websites or sources. please refer to the information based on the source that we noted. Please directly contact or inquire the sources if there is any further question and note that ASUS is neither relevant nor responsible for its content/service.
This information may not suitable for all the products from the same category/series. Some of the screen shots and operations could be different from the software versions.
ASUS provides the above information for reference only. If you have any questions about the content, please contact the above product vendor directly. Please note that ASUS is not responsible for the content or service provided by the above product vendor.