[Motherboard]How to create Intel 600 or late series MB RAID in BIOS Setup
Update : 2026/02/23 15:30
[Motherboard]How to create Intel 600 or late series MB RAID in BIOS Setup
There are some differences on creating RAID between Intel 600 (include)or late series MB and previous series MB. Therefore, if your MB is Intel 600 (include) or late series, please follow below setups to create RAID
※Note: Be cautious when creating or deleting a RAID set. You will lose all data on the hard disk drives when you delete a RAID set, so please back up your data before creating or deleting a RAID set.
(PRIME Z690M-PLUS D4 as example)
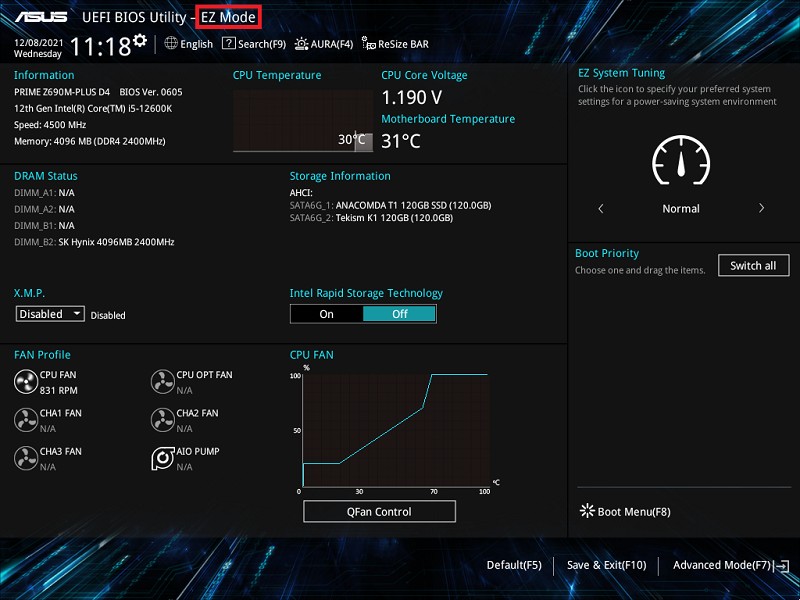
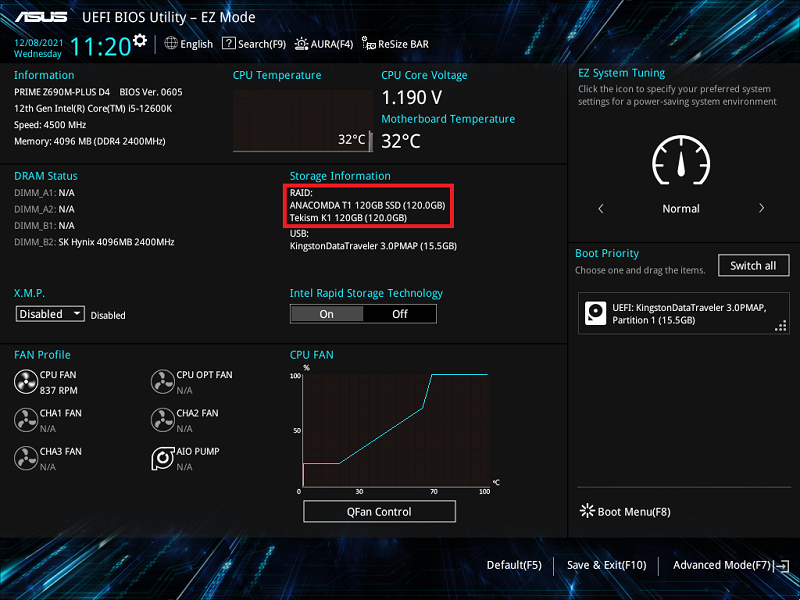
1. Power on the system and immediately press “Delete” key to enter BIOS [EZ Mode]. Check the drive connected in Storage Information
2. Press F7 key and enter [Advanced Mode] as below picture
(If you press “Delete” key to enter [Advanced Mode] directly and then no need to press F7 key)
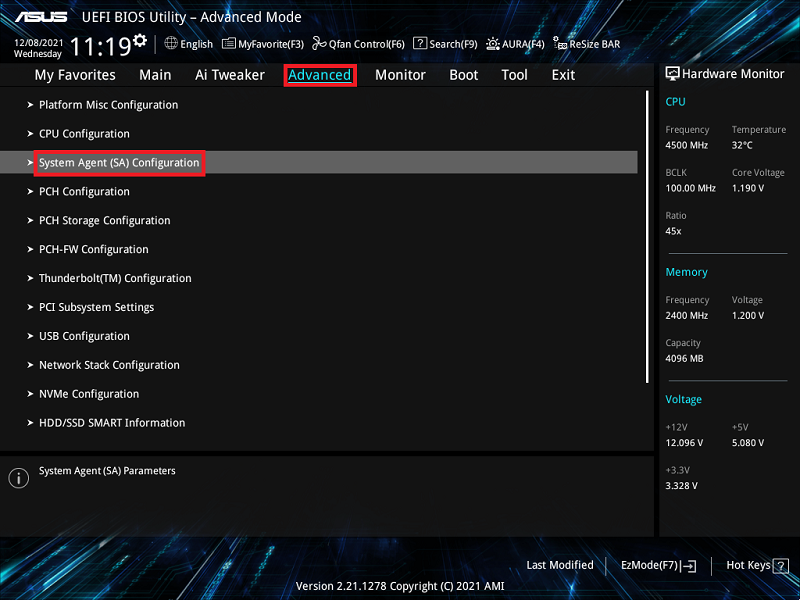
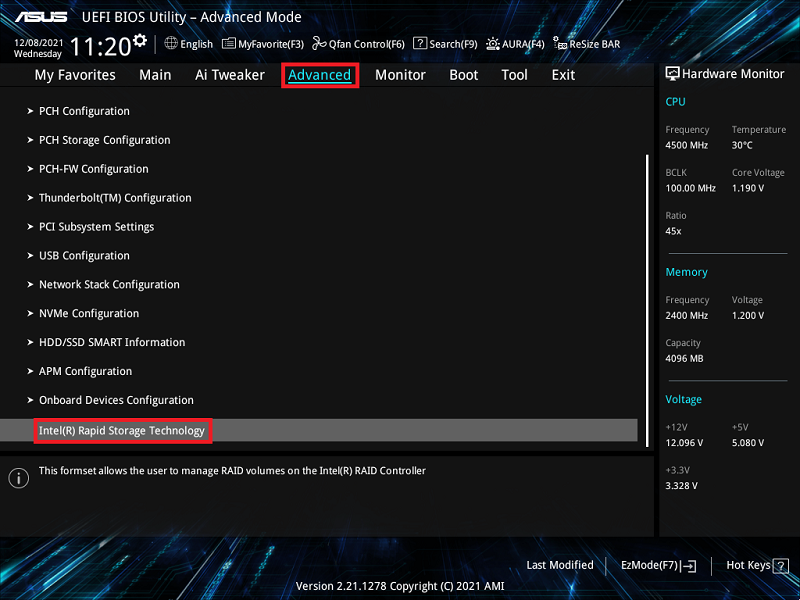
3. Click [System Agent(SA) Configuration] item on Advanced page
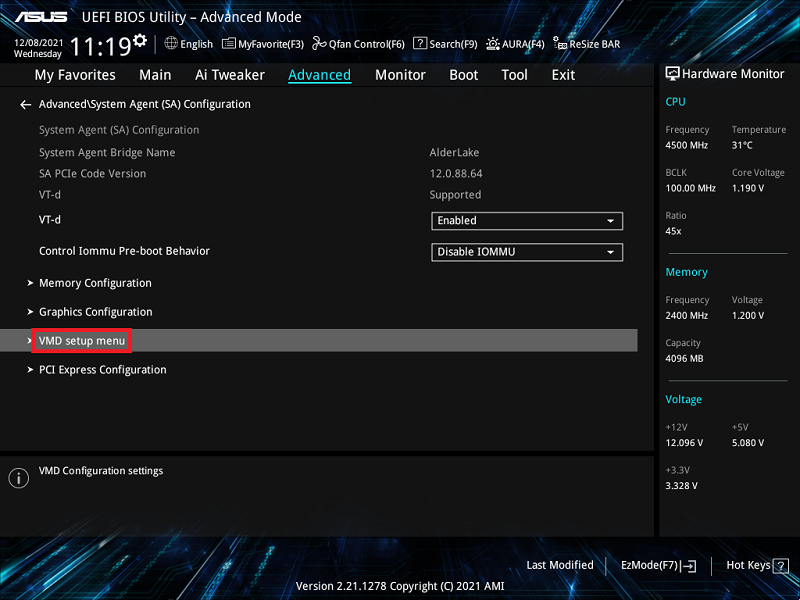
4. Click [VMD setup menu] item
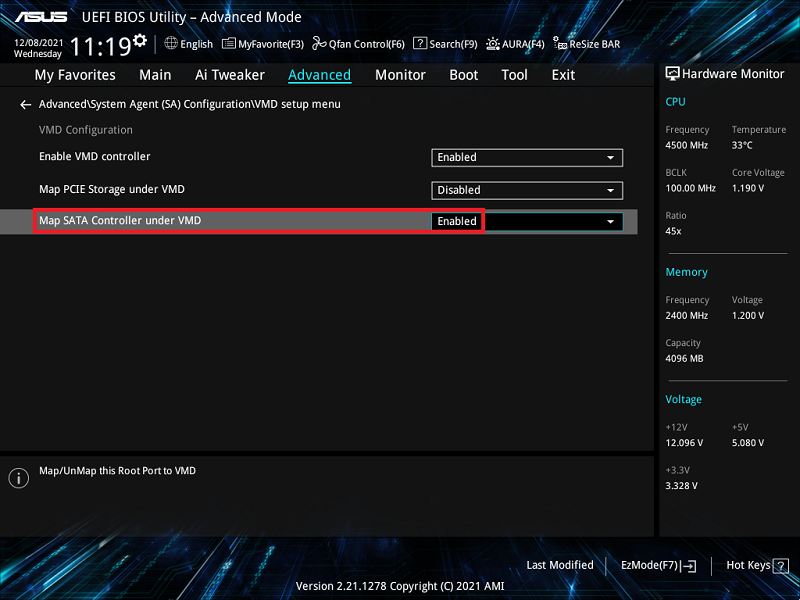
5. If the connected devise is SATA device, please set [Map SATA Controller under VMD] to [Enabled]
If the connected devise is PCIE device, please set [Map PCIE Storage under VMD] to [Enabled]
Below is SATA device as example. Please set [Map SATA Controller under VMD] to [Enabled], as below picture
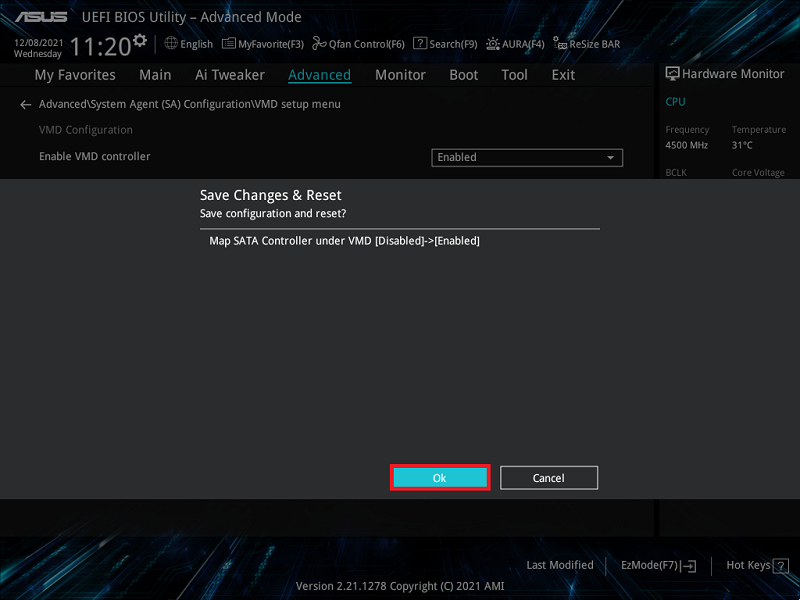
6. Press F10 key and click OK, then the system will auto reboot
7. Press “Delete” key after the system reboots and enter BIOS [EZ Mode]. Now the Storage mode changed from AHCI to RAID mode
8. Press F7 key and enter [Advanced Mode] as below picture
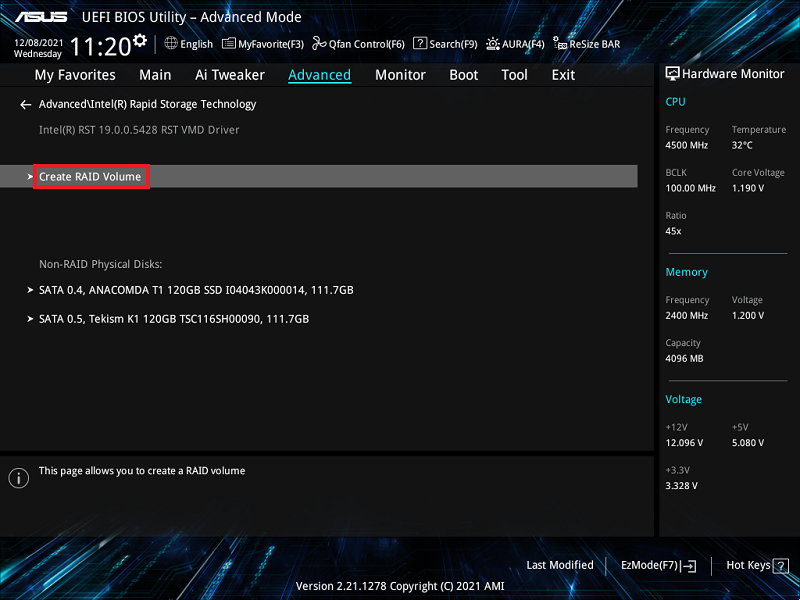
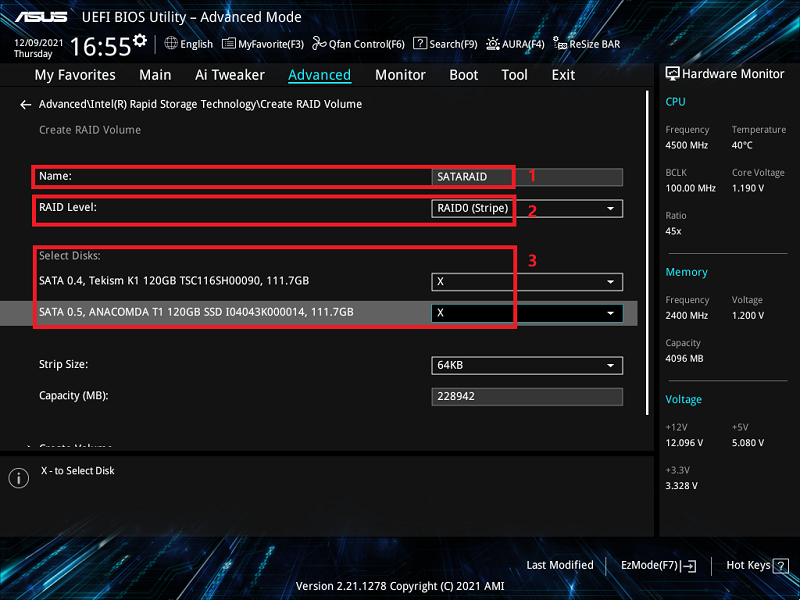
11. Set RAID name. For example: SATARAID, as below picture mark red 1
Choose RAID Level, for example: RAID0(Stripe), as below picture mark red 2
Select the disks that you want to create and set to [X],as below picture mark red 3
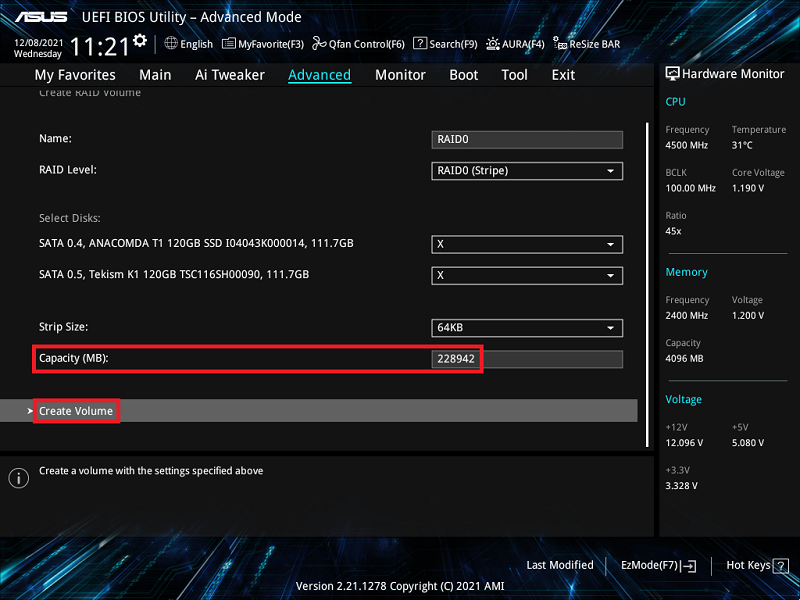
12. Set RAID capacity and click [Create Volume] to create RAID
Below is set the max RAID capacity
※Note: Be cautious when creating or deleting a RAID set. You will lose all data on the hard disk drives when you delete a RAID set, so please back up your data before creating or deleting a RAID set.
Q&A:
Q1: How to Install the RAID controller driver during Windows® 10 or Windows® 11 OS installation?
A1:Please follow Windows Setup to Install the RAID controller driver during Windows® 10 or Windows® 11 OS installation:
Boot the computer using the Windows® 10 or Windows® 11 OS installation disc. Follow the screen instructions to start installing Windows® 10 or Windows® 11
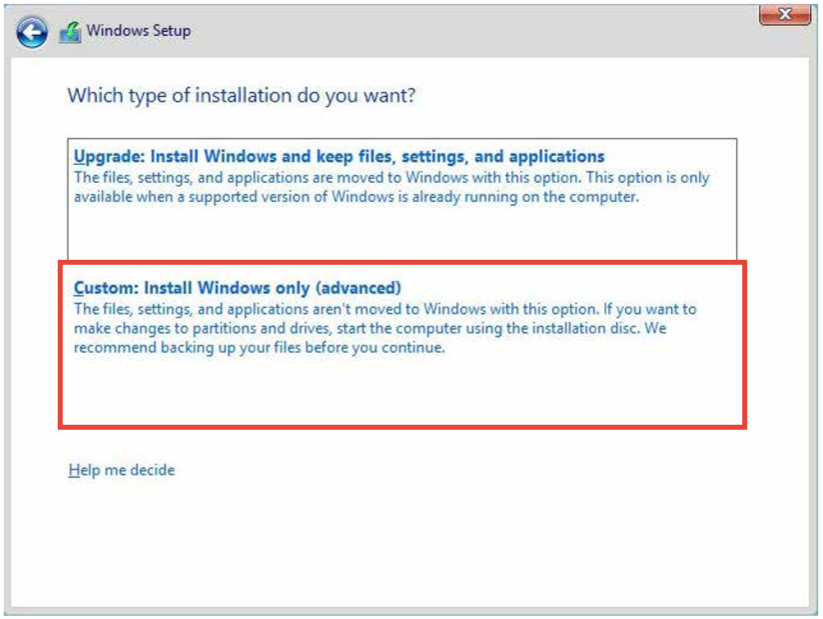
When prompted to choose a type of installation, click Custom: Install Windows only (advanced).
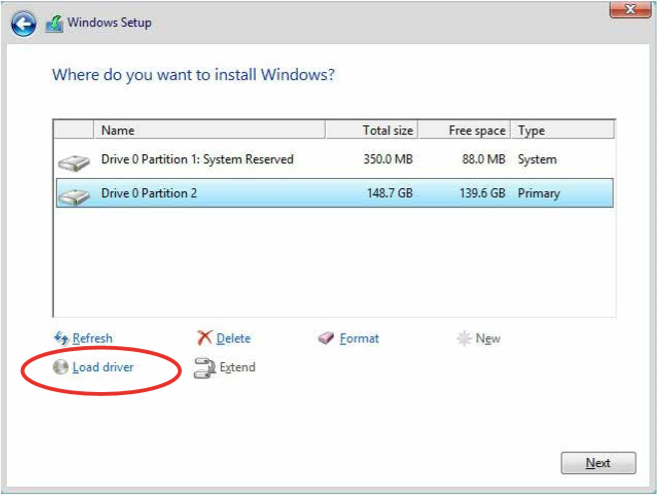
3. Click [Load Driver]
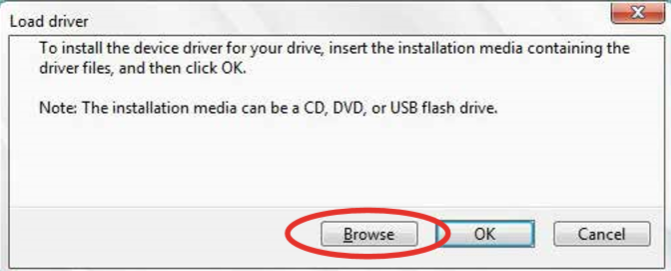
4. A message appears, reminding you to insert the installation media containing the driver of the RAID controller driver , Click Browse to continue
a. If you have only one optical drive installed in your system, eject the Windows OS installation disc and replace with the motherboard Support DVD into the optical drive
b.If you don’t have optical drive ,please copy the RAID driver to a USB Drive
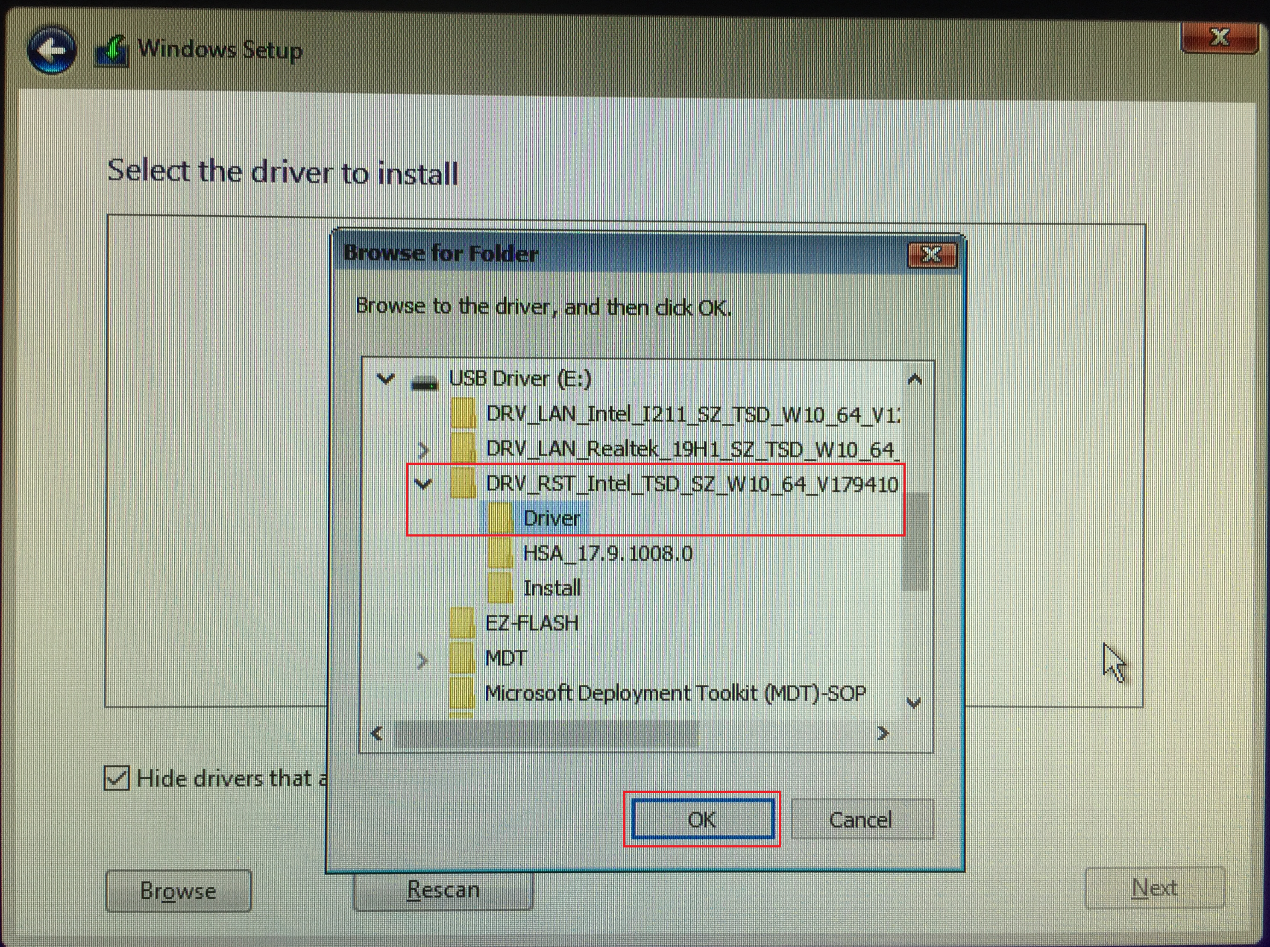
5. Locate the driver in the corresponding folder of the Support DVD then click OK to continue
Q2: How to delete a RAID set?
A2:
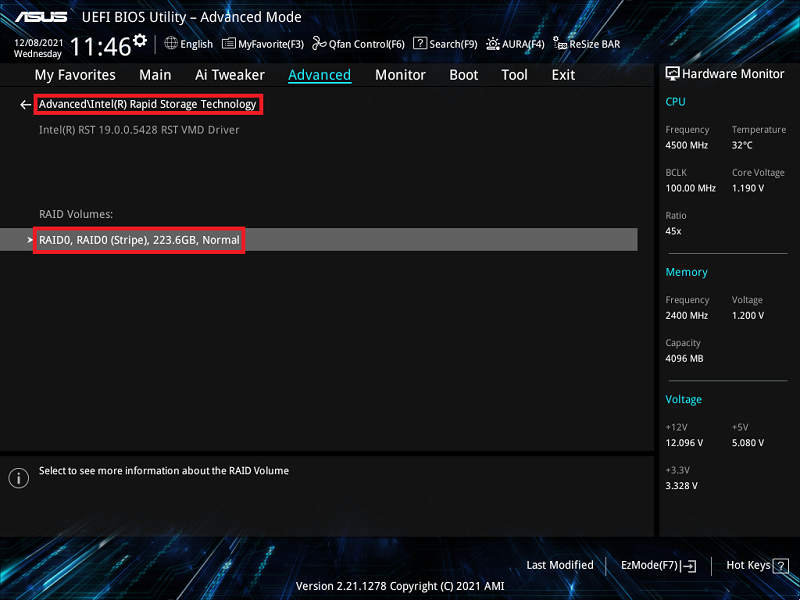
1. From the Intel® Rapid Storage Technology menu, select the RAID volume you want to delete and press <Enter>. The following screen appears:
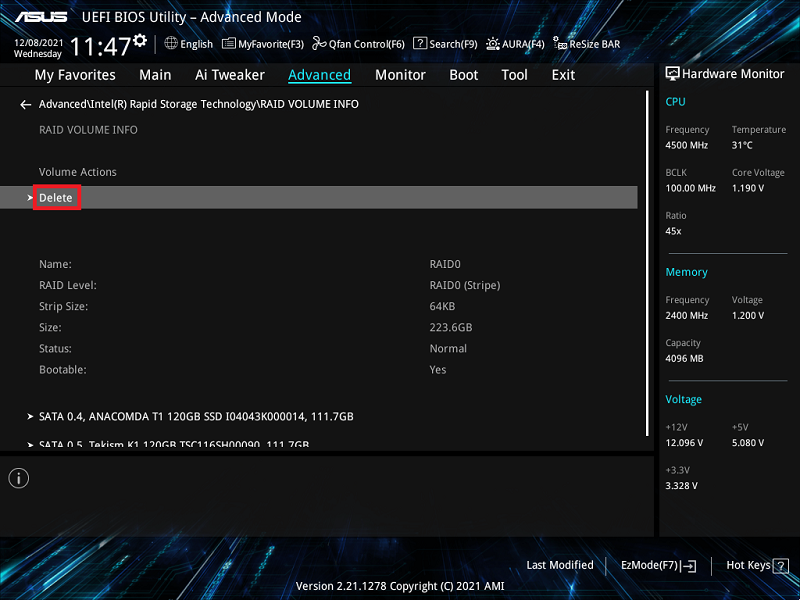
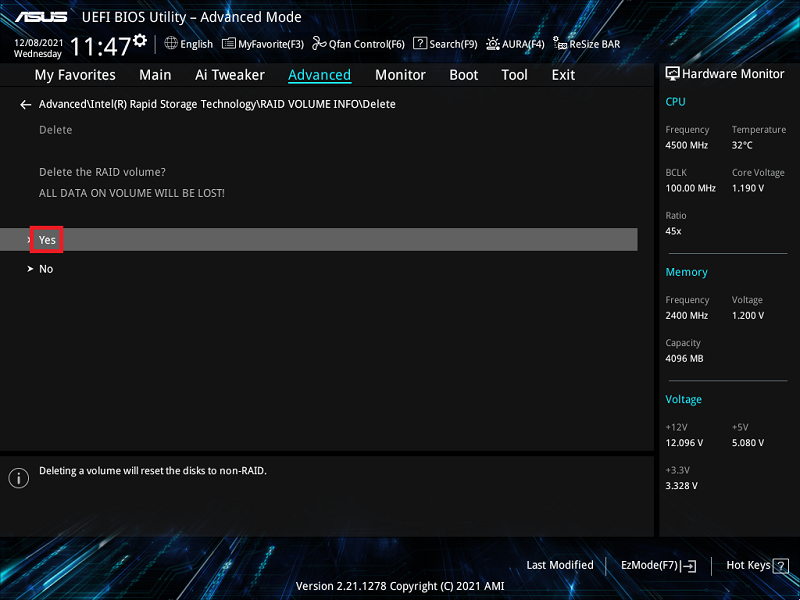
2. When the Deleted item is selected, press <Enter>, then select Yes to delete the RAID volume and return to the Intel® Rapid Storage Technology menu, or select No to cancel.
※Note: Be cautious when creating or deleting a RAID set. You will lose all data on the hard disk drives when you delete a RAID set, so please back up your data before creating or deleting a RAID set.
3. Click [Yes] to delete RAID setting
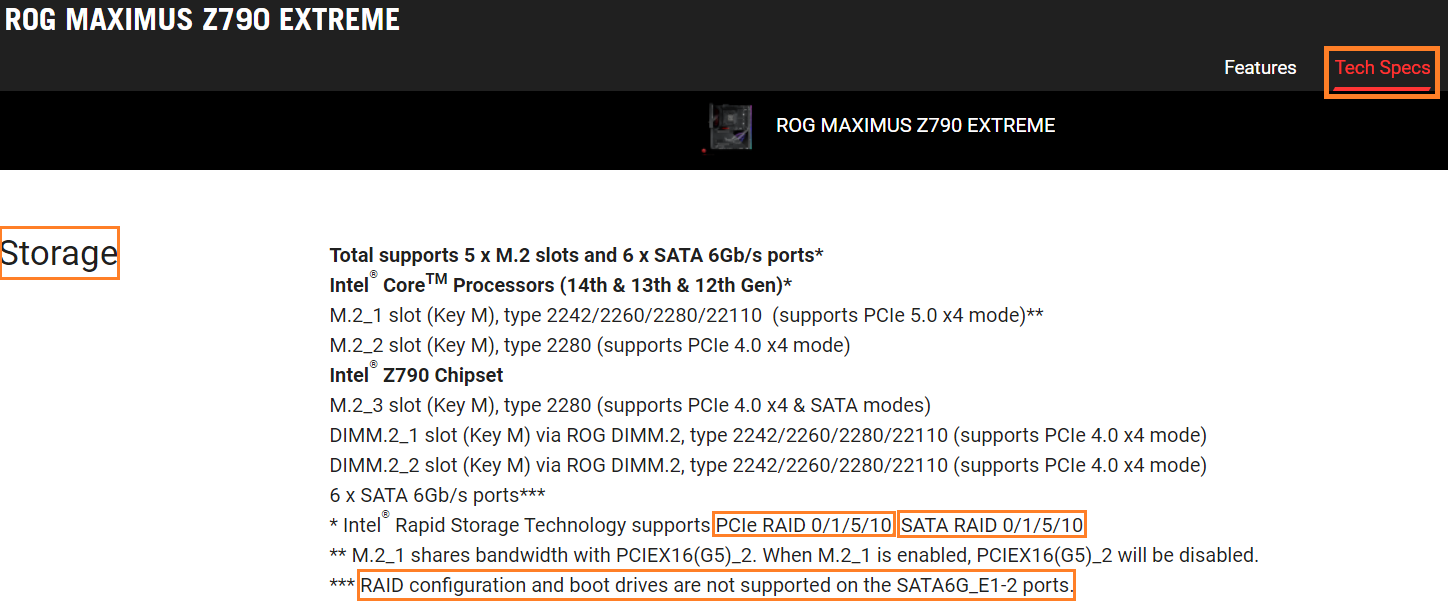
Q3: How to verify whether motherboard installed can support which RAID mode?
A3: Please refer to Tech Specs of your motherboard model to confirm it supports SATA RAID or PCIE RAID.
Q4: Crate RAID 5 with five or more M.2 or SATA HDDs, but the RAID status shows Initialize in BIOS setup? A4: This is normal state of RST driver, it will always show Initialize and will not switch to normal state.
Q5: What to do if already have AHCI OS and then build a new data RAID Volume ?
a. If the newly created RAID and the operating system reside on the same type of disk (for example: the existing operating system is on an M.2 SSD, and the newly created RAID is also on M.2 SSD), it is recommended to reinstall the operating system. (Note: Be sure to back up your data before reinstalling the operating system.)
b. If the newly created RAID and the operating system reside on different types of disks (for example: the existing operating system is on a SATA Port SSD or HDD, and the newly created RAID is on an M.2 SSD), it is not necessary to reinstall the operating system. However, after booting into the system, the newly created RAID volume requires the installation of the Intel(R) Rapid Storage Technology Driver Software.
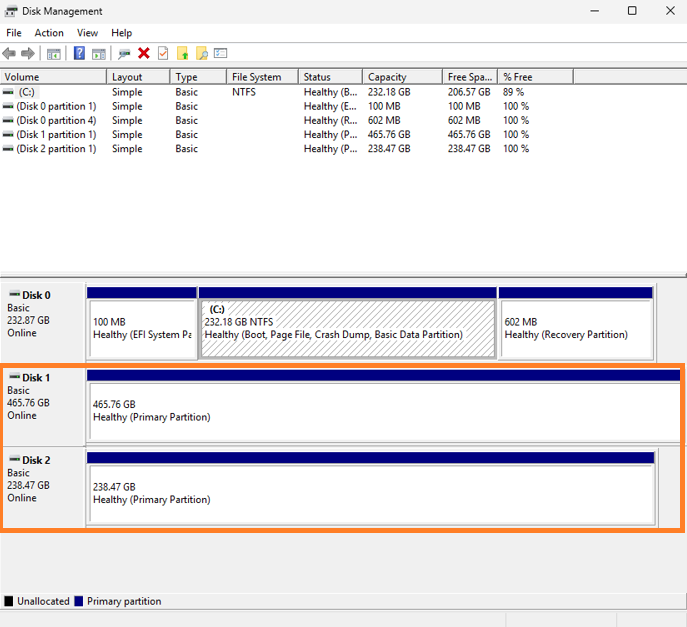
Q6: What to do if disk still show independent disk as below picture but already set BIOS to RAID mode and build a new data RAID Volume ?
A6: Please download and install Intel(R) Rapid Storage Technology Driver Software(Intel platform ) or AMD RAIDXpert2(AMD platform) from website depend on you Motherboard platform
Notice
Above information might be partly or entirely quoted from exterior websites or sources. please refer to the information based on the source that we noted. Please directly contact or inquire the sources if there is any further question and note that ASUS is neither relevant nor responsible for its content/service. This information may not suitable for all the products from the same category/series. Some of the screen shots and operations could be different from the software versions.
ASUS provides the above information for reference only. If you have any questions about the content, please contact the above product vendor directly. Please note that ASUS is not responsible for the content or service provided by the above product vendor.