[Windows 11/10] How to Connect One or More External Monitors
Applicable Products: Notebook, Desktop, All-in-One PC, Gaming Handheld
This article introduces how to connect the external monitor to your device, and to adjust the settings for each one, such as rearrange the displays, change the display resolution/size, or choose a display option, etc.
To connect your PC to the external monitor , please make sure that you have used the correct type of cable, and all accessories properly connected. The following are common connectors you will use:
HDMI connector
HDMI (High-Definition Multimedia Interface) is a digital connection type for transferring the uncompressed audio/video signal and is HDCP compliant for DVD, Blu-ray, and other protected content playbacks.

USB Type-C connector
Please type your details
USB Type-C (USB-C) has multiple functions, but it’s not all USB Type-C connectors have a display-supported feature. For more details, please refer to How to determine the function of USB Type-C to learn more about your PC whether it has a display output function or not.

DisplayPort connector
DisplayPort (DP) is a digital interface used to connect a video source, such as a computer, to a display device like a monitor. Developed by the Video Electronics Standards Association (VESA), it can also carry digital audio, USB, and other types of data over a single cable.

Mini DisplayPort connector
Mini DisplayPort is a smaller size of DisplayPort, and it is commonly utilized on laptops.

DVI connector
Digital Visual Interface (DVI) is a video display interface developed by the Digital Display Working Group (DDWG). The digital interface is used to connect a video source, such as a video display controller, to a display device, such as a computer monitor. It was developed with the intention of creating an industry standard for the transfer of uncompressed digital video content.
The DVI connector on a device is given one of three names, depending on which signals it implements:
- DVI-I (integrated, combines digital and analog in the same connector; digital may be single or dual link)
- DVI-D (digital only, single link or dual link)
- DVI-A (analog only)

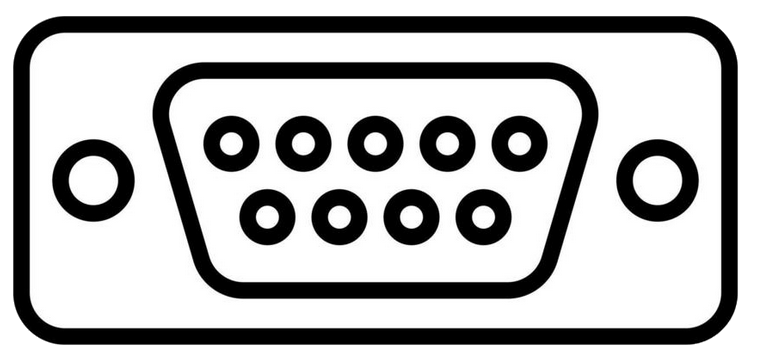
VGA Connector
The Video Graphics Array (VGA) connector is a standard connector used for computer video output. Originating with the 1987 IBM PS/2 and its VGA graphics system, the 15-pin connector went on to become ubiquitous on PCs, as well as many monitors, projectors and HD television sets.
The following takes you to adjust the external monitor settings in Windows, please go to the corresponding instruction based on the current Windows operating system on your device:
Windows 11 operating system
Rearrange your displays
You will see this option when Windows detects more than one display. Each display will be numbered to help you identify them more easily.
- Please select [Start]
 ①, then select [Settings]
 ②.
②.
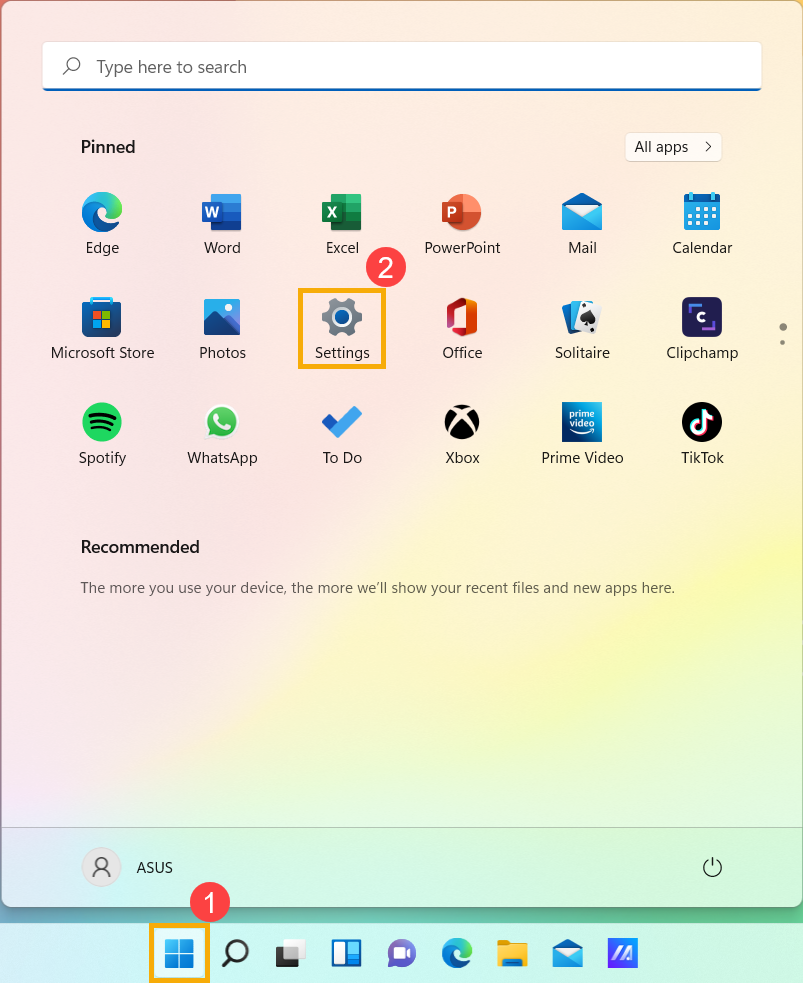
- Select [Display]③.
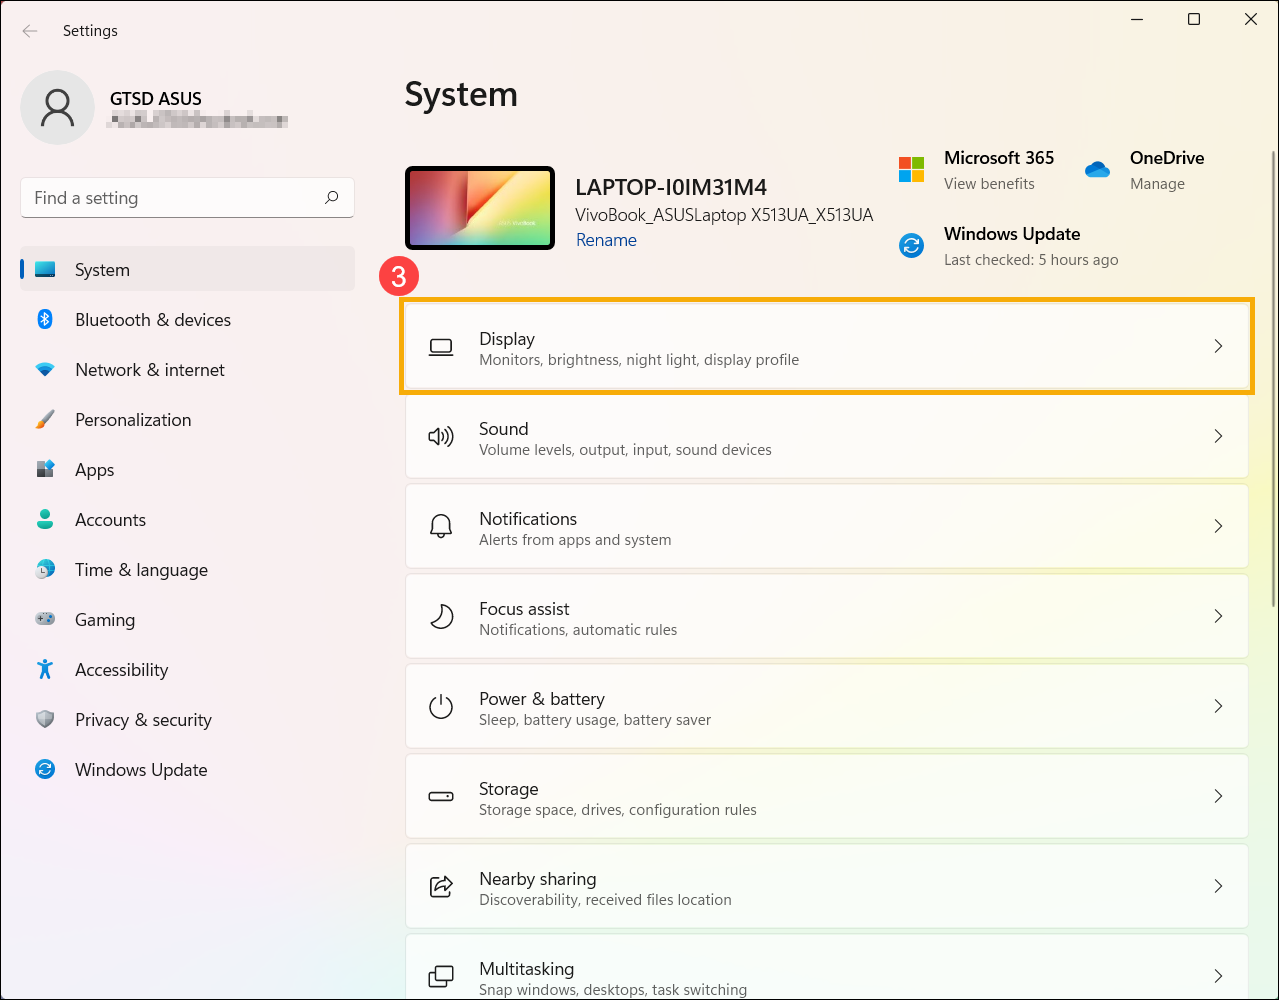
- You’ll see the relevant settings for external displays.

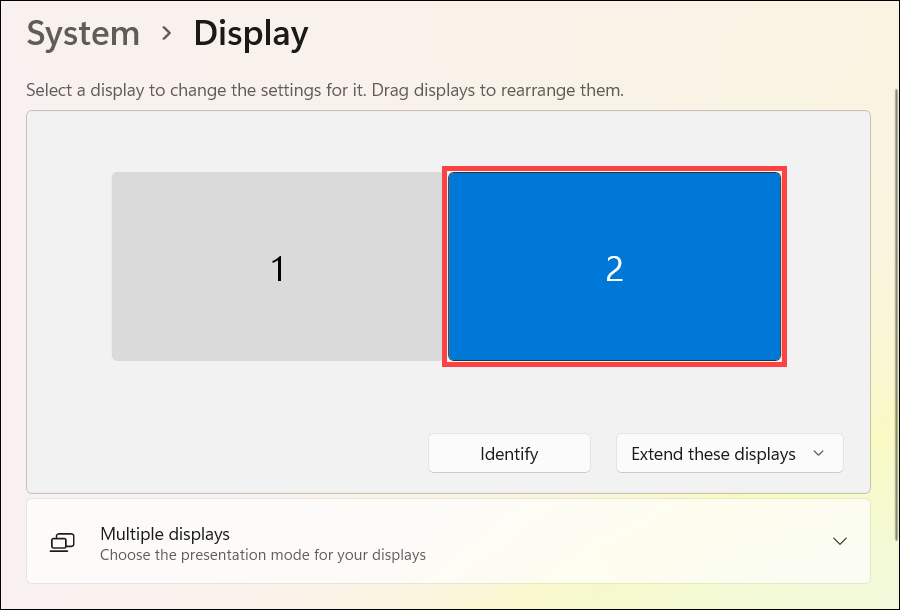
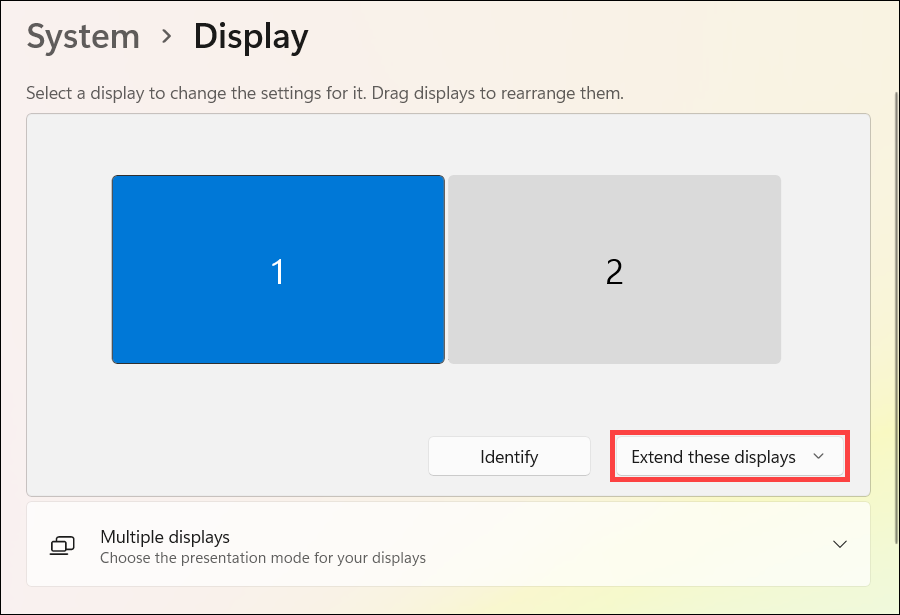
Identify a display
To see which number corresponds to a display, please select [Identify] in Display settings and then a number appears on the screen of the display it’s assigned to.
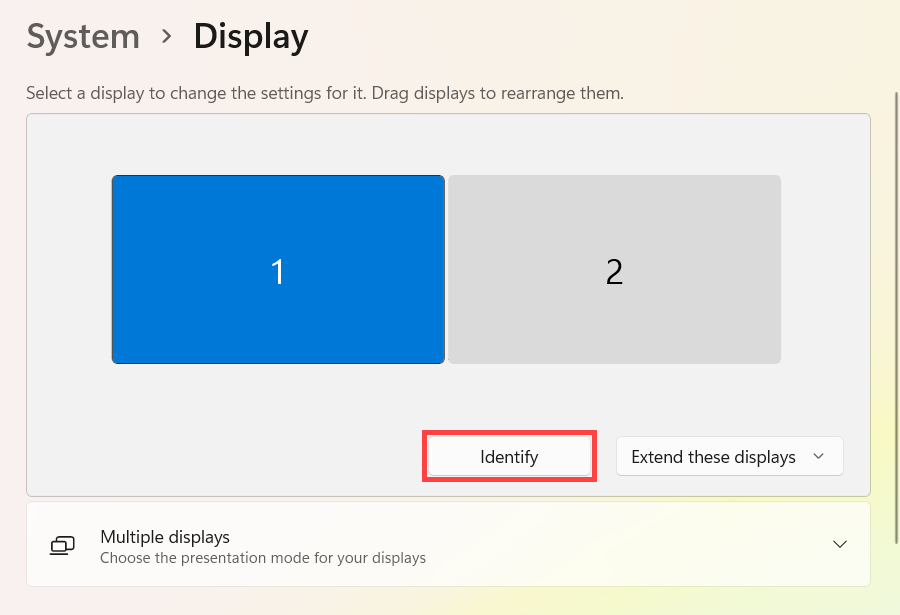
As shown below, monitor 1 is set as the primary display, while monitor 2 represents the additional external monitor.

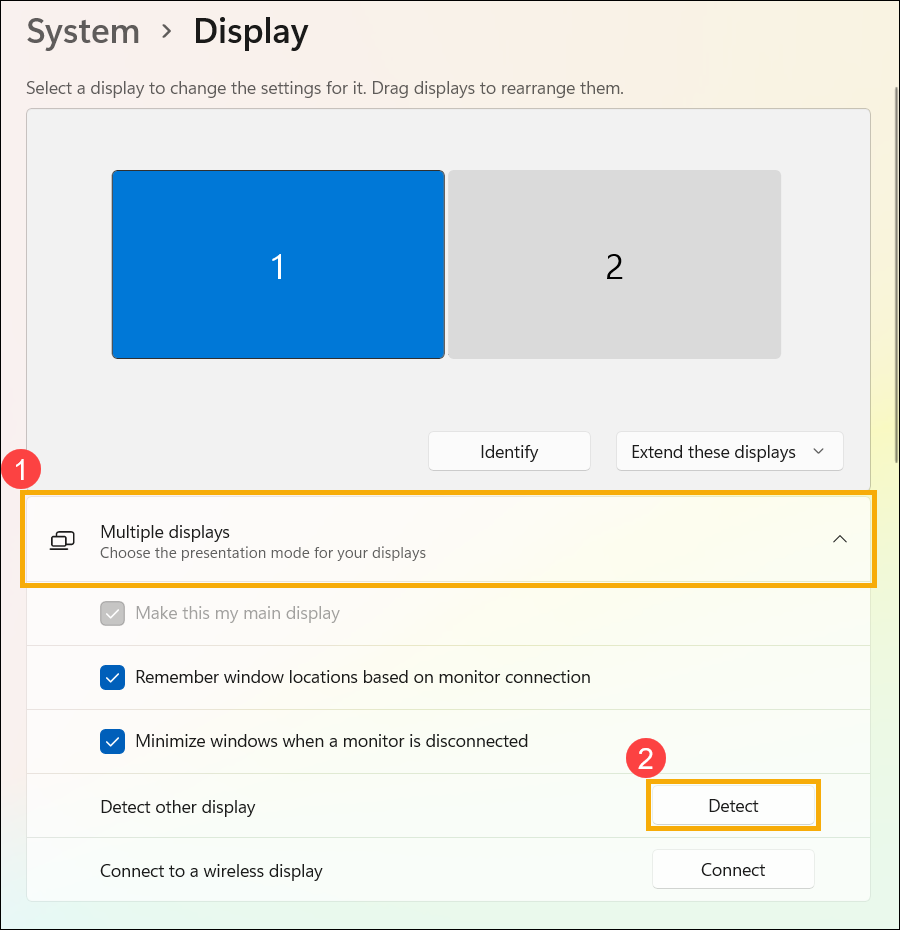
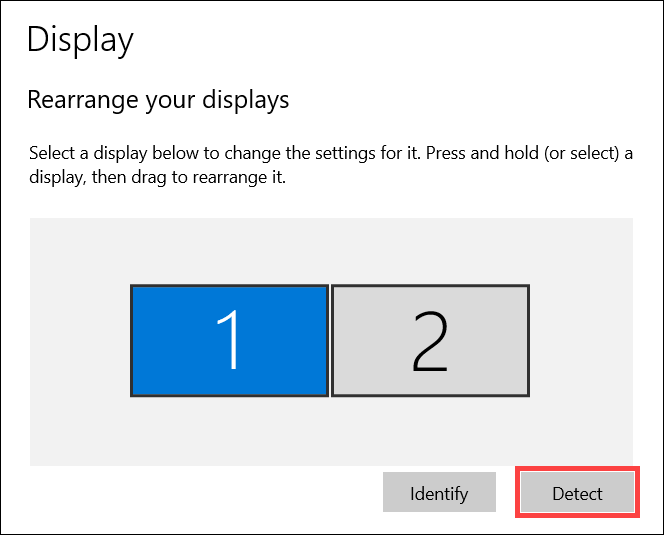
Detect a display
If you connect another display and it isn’t showing in settings, please select [Multiple displays]①, then select [Detect]②.
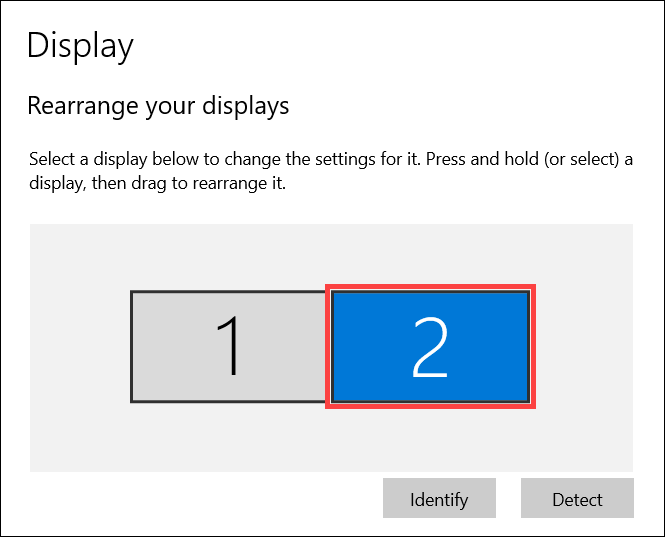
Arrange your displays
If you want your displays to match how they’re set up in your home or office, and move your mouse cursor across the different displays, you can rearrange the display layout.
In Display settings, select and drag the display to where you want, then select [Apply].
Change display options
After you’re connected to your external displays, you can change the size of text and windows on the desktop, or display resolution to fit your personal preferences.
Note: You need to select the number corresponding to a monitor and then change display settings, so that the new settings will be applied to this monitor.
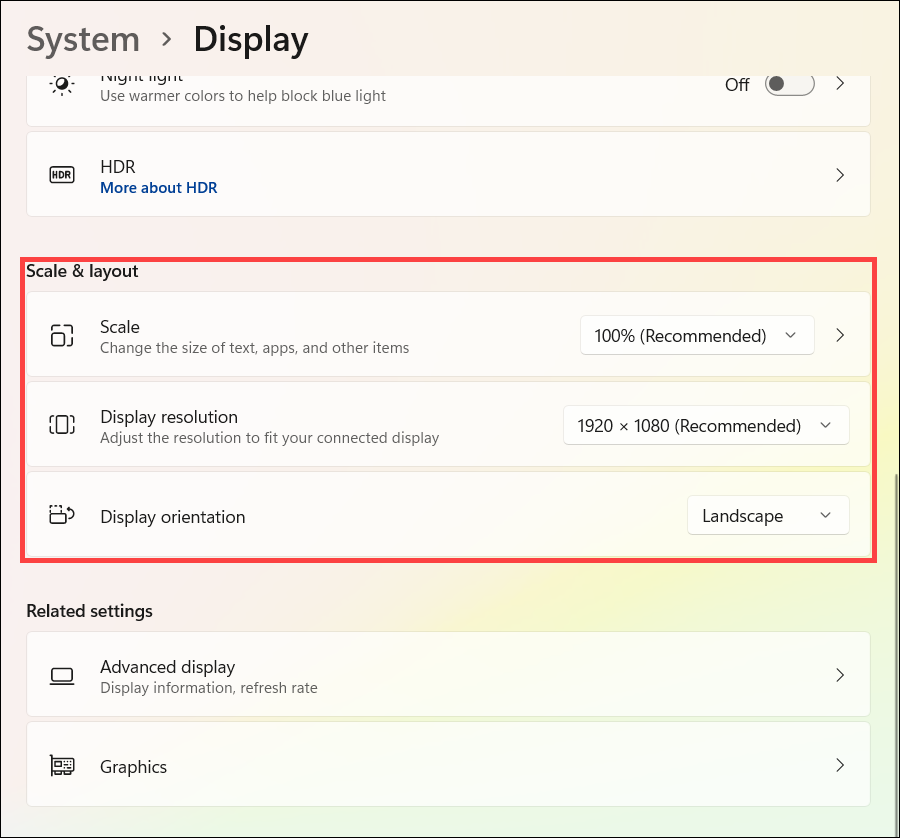
In Display settings, scroll down to Scale & layout:
- If you would like to change the size of text, apps, and other items, please select the size you want from the [Scale] field.
- If you would like to adjust the resolution, please select a resolution you want from the [Display resolution] field.
- You can also adjust the display orientation, which includes Landscape, Portrait, Landscape (flipped), or Portrait (flipped) in the [Display orientation] section
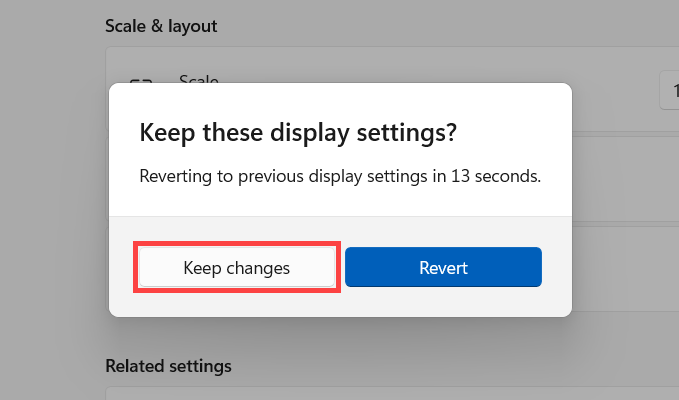
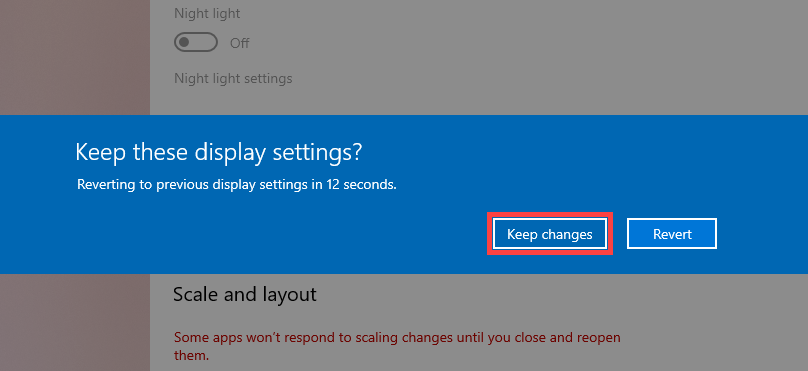
You may receive the following notification after adjusting the display settings, please select [Keep changes] to enable your settings.
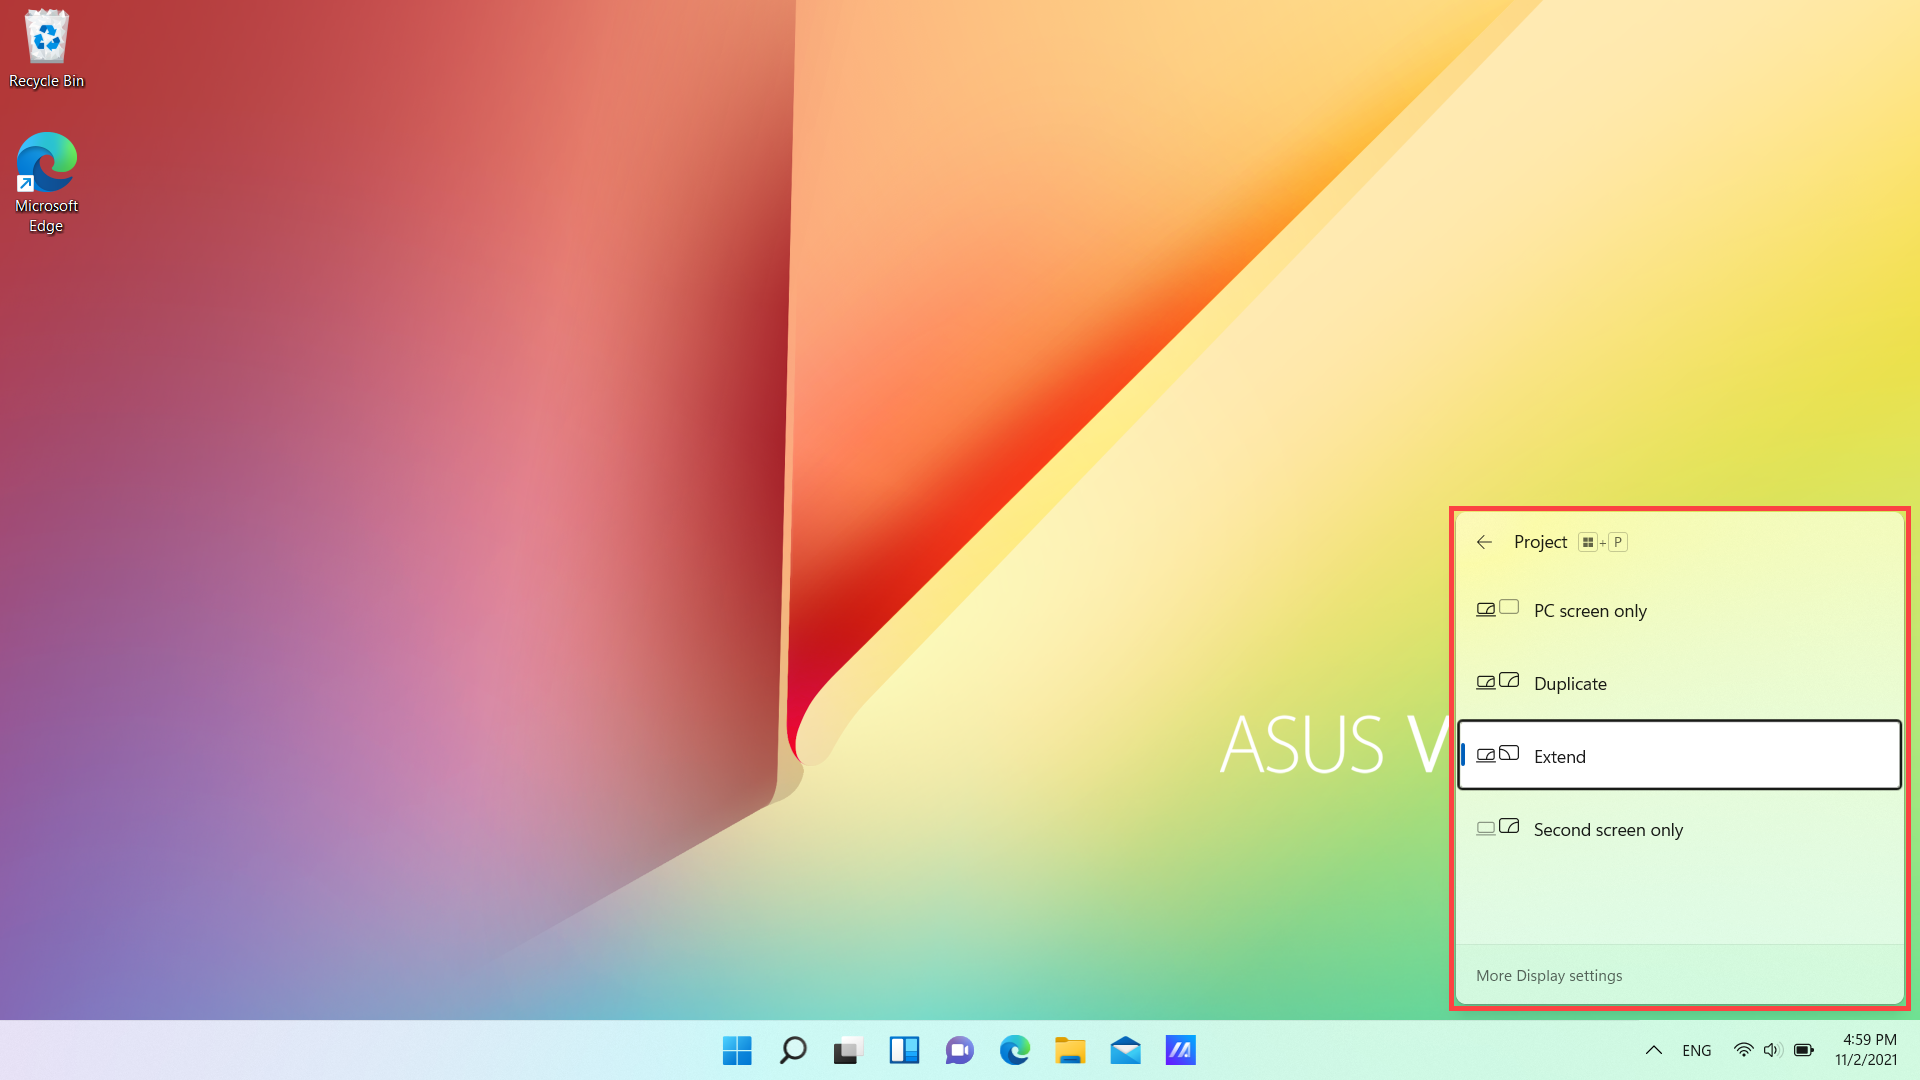
Choose a display option
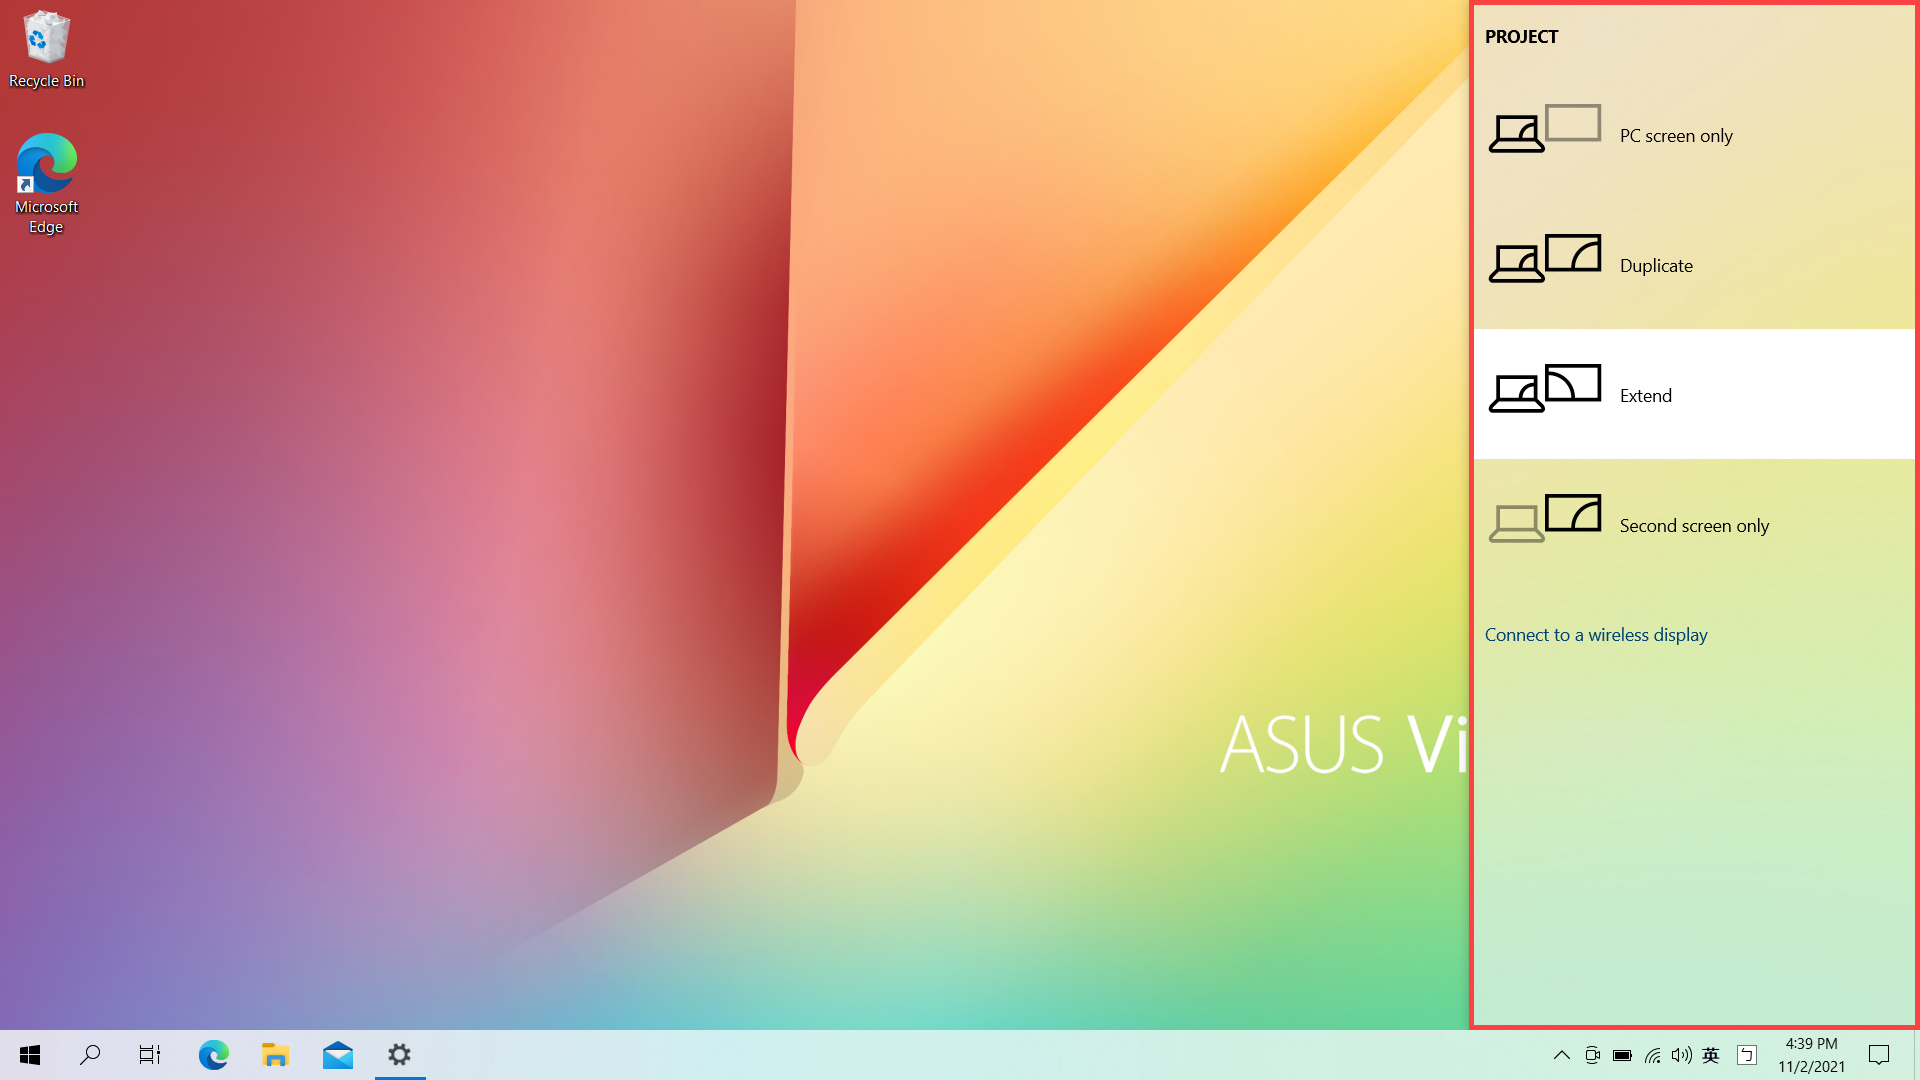
The following is what you can choose:
- PC screen only: See things on one display only. (It means the internal monitor for Notebook or AIO products.)
- Duplicate: See the same thing on all your displays.
- Extend: See your desktop across multiple screens. When you have displays extended, you can move items between the two screens.
- Second screen only: See everything on the second display only.
To change what shows on your displays, press Windows logo key + P on the keyboard. The Project options will appear on the right side of the screen.
Or, you are able to change a display option in Display settings:
Windows 10 operating system
Rearrange your displays
You will see this option when Windows detects more than one display. Each display will be numbered to help you identify them more easily.
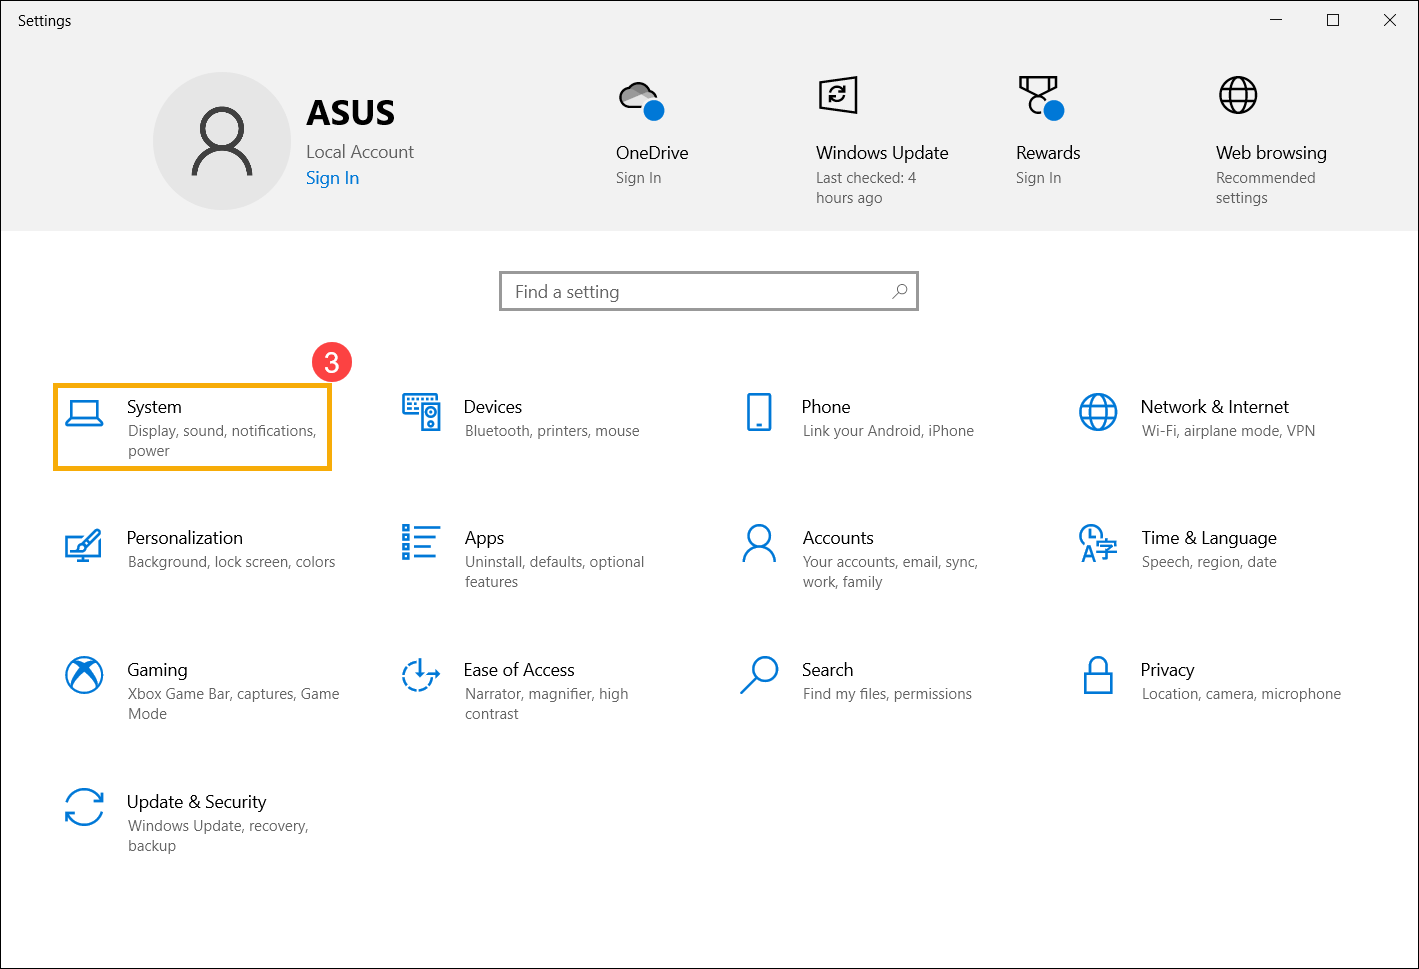
- Please select [Start]
 ①, then select [Settings]
 ②.
②.
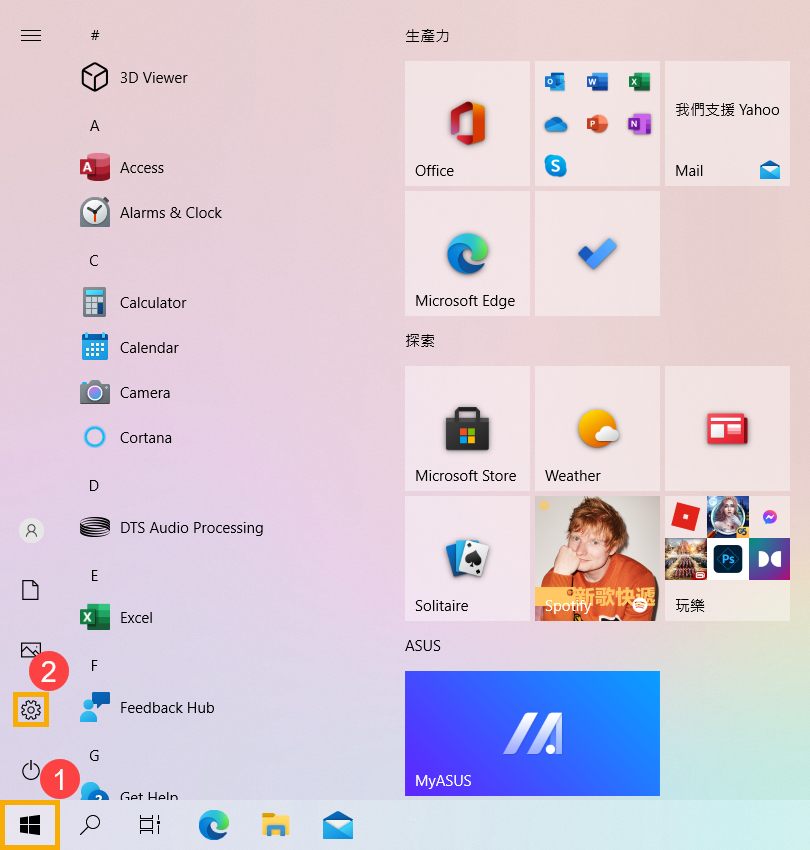
- Select [System]③.
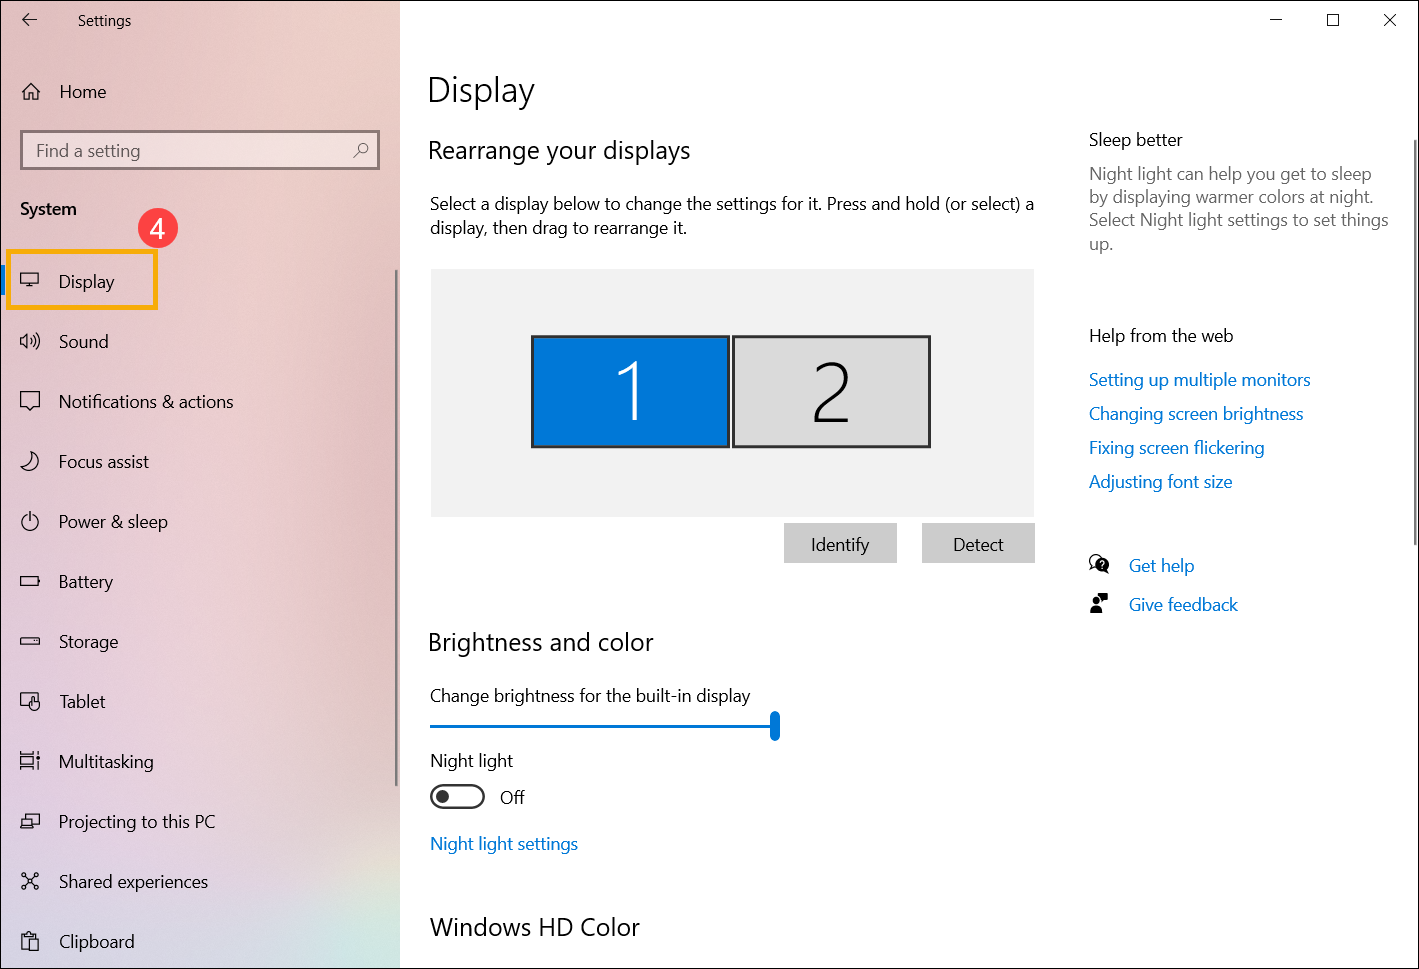
- Select [Display]④, you’ll see the relevant settings for external displays.
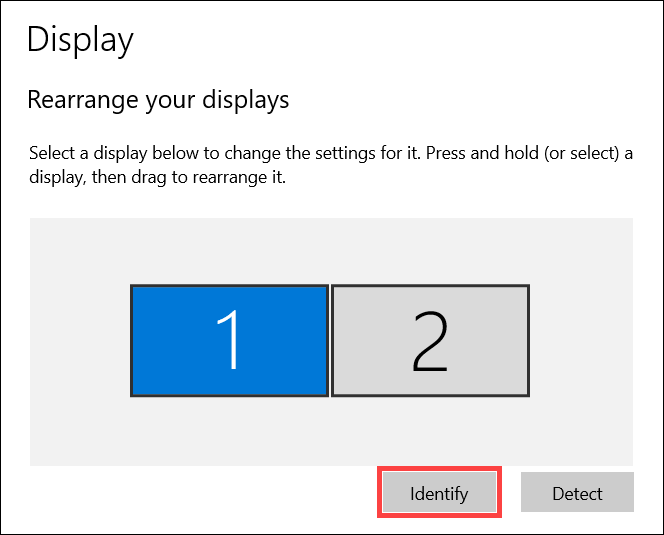
Identify a display
To see which number corresponds to a display, please select [Identify] in Display settings and then a number appears on the screen of the display it’s assigned to.
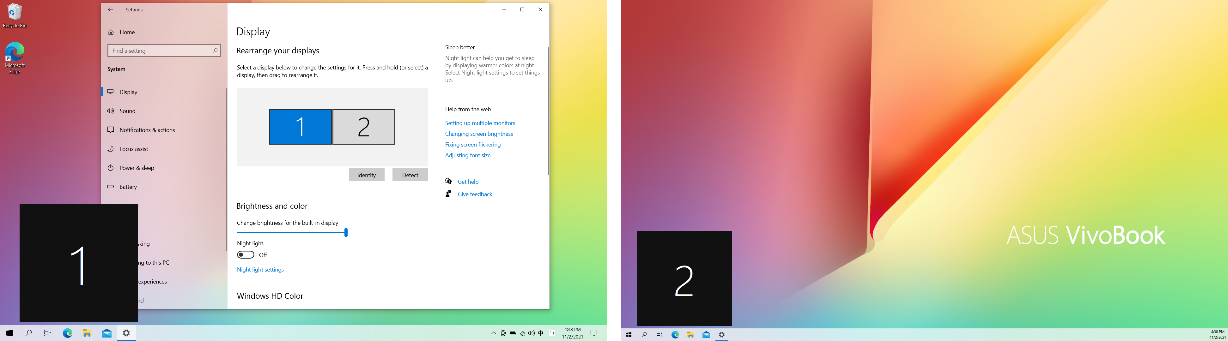
As shown below, monitor 1 is set as the primary display, while monitor 2 represents the additional external monitor.
Detect a display
If you connected another display and it isn’t showing in settings, please select [Detect].
Arrange your displays
If you want your displays to match how they’re set up in your home or office, and move your mouse cursor across the different displays, you can rearrange the display layout.
In Display settings, select and drag the display to where you want, then select [Apply].
Change display options
After you’re connected to your external displays, you can change the size of text and windows on the desktop, or display resolution to fit your personal preferences.
Note: You need to select the number corresponding to a monitor and then change display settings, so that the new settings will be applied to this monitor.
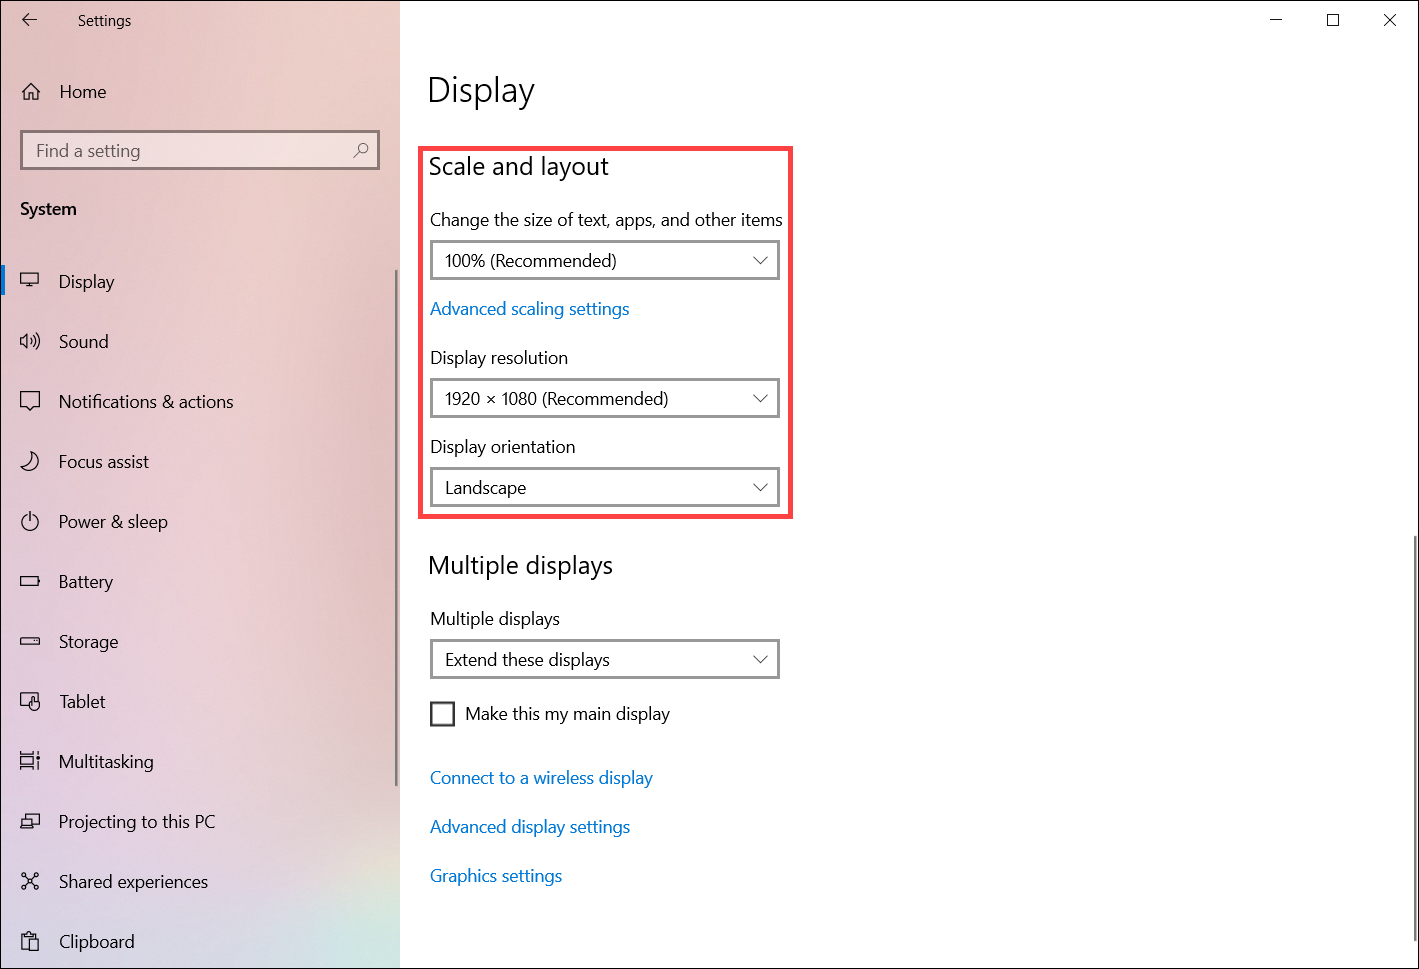
In Display settings, scroll down to Scale & layout:
- If you would like to change the size of text or apps, please select the size you want from the [Change the size of text, apps, and other items] field.
- If you would like to adjust the resolution, please select a resolution you want from the [Display resolution] field.
- You can also adjust the display orientation, which includes Landscape, Portrait, Landscape (flipped), or Portrait (flipped) in the [Display orientation] section
You may receive the following notification after adjusting the display settings, please select [Keep changes] to enable your settings.
Choose a display option
The following is what you can choose:
- PC screen only: See things on one display only. (It means the internal monitor for Notebook or AIO products.)
- Duplicate: See the same thing on all your displays.
- Extend: See your desktop across multiple screens. When you have displays extended, you can move items between the two screens.
- Second screen only: See everything on the second display only.
To change what shows on your displays, press Windows logo key + P on the keyboard. The Project options will appear on the right side of the screen.
Or, you are able to change a display option in Display settings:

Notice
Above information might be partly or entirely quoted from exterior websites or sources. please refer to the information based on the source that we noted. Please directly contact or inquire the sources if there is any further question and note that ASUS is neither relevant nor responsible for its content/service.
This information may not suitable for all the products from the same category/series. Some of the screen shots and operations could be different from the software versions.
ASUS provides the above information for reference only. If you have any questions about the content, please contact the above product vendor directly. Please note that ASUS is not responsible for the content or service provided by the above product vendor.