[Motherboard] Audio I/O connections setting and Audio 2, 4, 5.1 or 7.1-channel configuration

Update : 2024/10/31 10:53

[Motherboard] Audio I/O connections setting and Audio 2, 4, 5.1 or 7.1-channel configuration

15 Jack Audio I/O connections setting 

1-1:2 channel configuration

1-2:4 channel configuration

1-3:5.1 channel configuration

1-4:7.1 channel configuration

23 Jack Audio I/O connections setting 

1-1:2 channel configuration

1-2:4 channel configuration

1-3:5.1 channel configuration

1-4:7.1 channel configuration

3Windows 10 OS Audio 2, 4, 5.1 or 7.1-channel configuration


1. 5 Jack Audio I/O connections setting

Motherboard 5 Jack Audio I/O port :

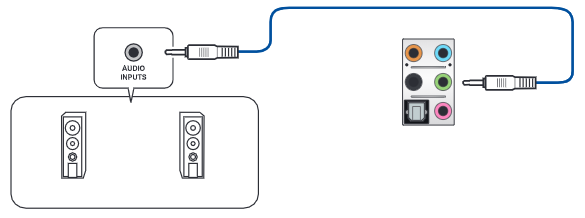
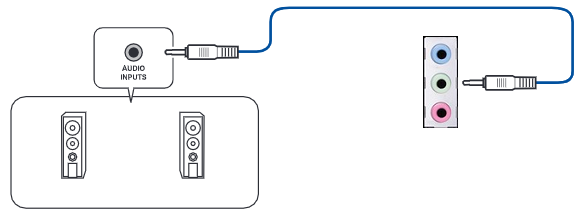
1-1:2 channel connections setting

Connect headphone or 2-channel speakers to lime port 

Connect to Headphone

Connect to 2-channel speakers

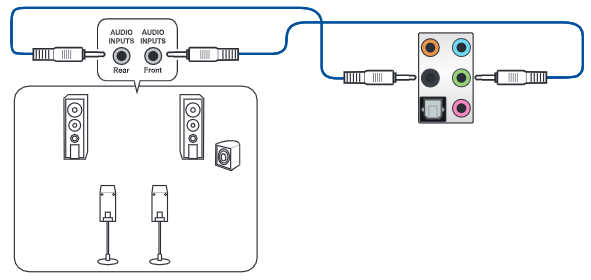
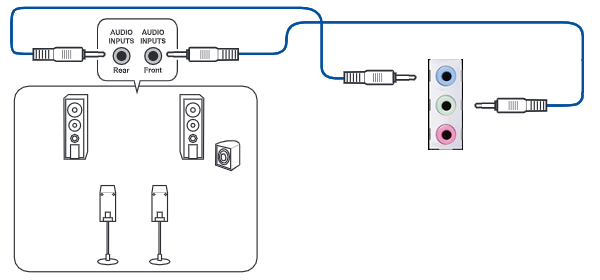
1-2:Connect to 4-channel speakers:

Connect front speaker to lime port, connect rear speaker to black port as shown below:

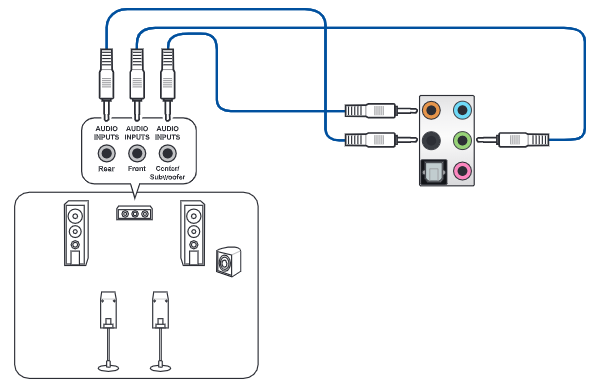
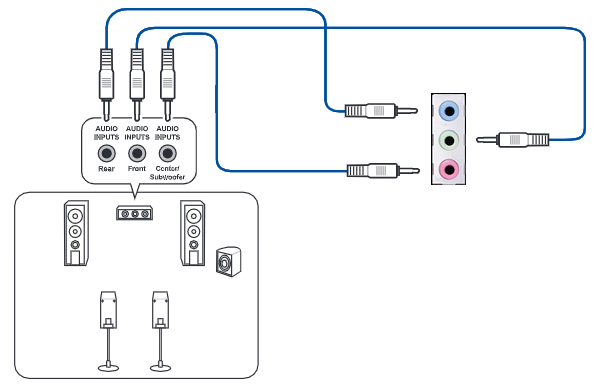
1-3:Connect to 5.1-channel speakers:

Connect front speaker to lime port, connect rear speaker to black port, connect center/subwoofer speaker to orange port as shown below:

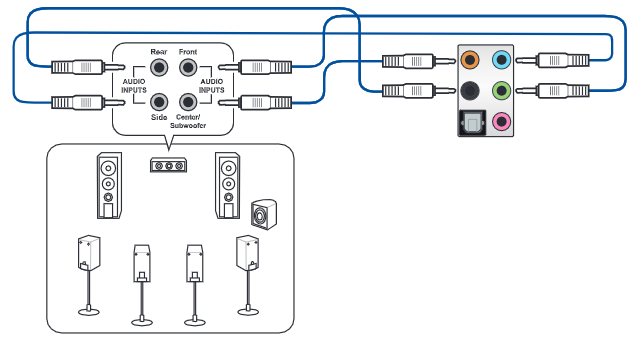
1-4:Connect to 7.1-channel speakers

Connect front speaker to lime port, connect rear speaker to black port,  connect center/subwoofer speaker to orange port, connect side speaker to light blue port as shown below:


2. 3 Jack Audio I/O connections setting 

Motherboard 3 Jack Audio I/O port :

2-1:2 channel connections setting:

Connect headphone or 2-channel speakers to lime port 

Connect to Headphone

Connect to 2-channel speakers

2-2:Connect to 4-channel speakers:

Connect front speaker to lime port, connect rear speaker to light blue port as shown below:

2-3:Connect to 5.1-channel speakers:

Connect front speaker to lime port, connect rear speaker to light blue port, connect center/subwoofer speaker to pink port as shown below:

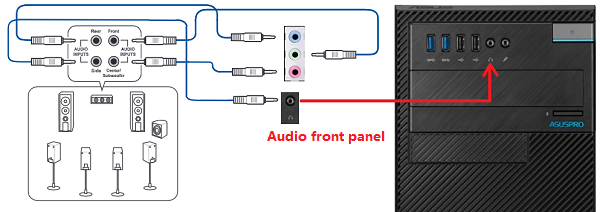
2-4:Connect to 7.1-channel speakers

Connect front speaker to lime port, connect rear speaker to light blue port, connect center/subwoofer speaker to pink port, connect side speaker to front panel audio headphone port of computer case,

as shown below:

3. Windows 10 OS Audio 2, 4, 5.1 or 7.1-channel configuration

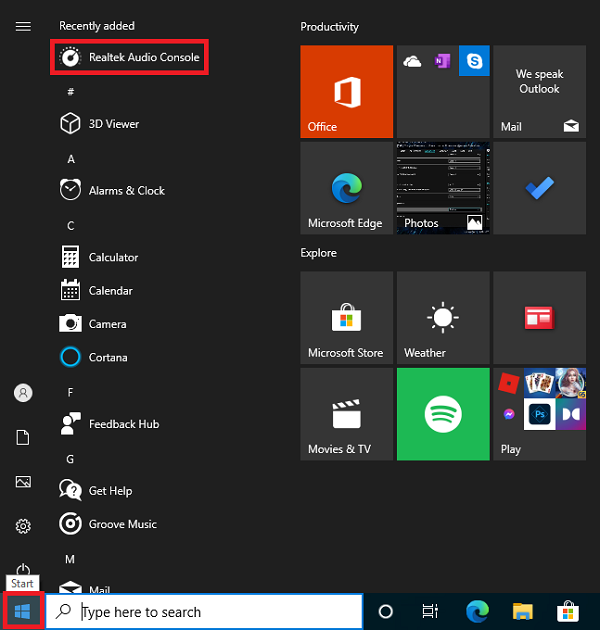
3-1: click Windows startup menu,click [Realtek Audio Console] item

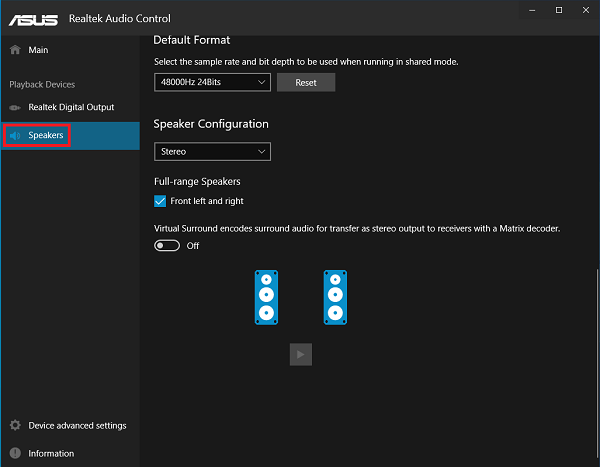
3-2:click speakers in Realtek Audio Control APP

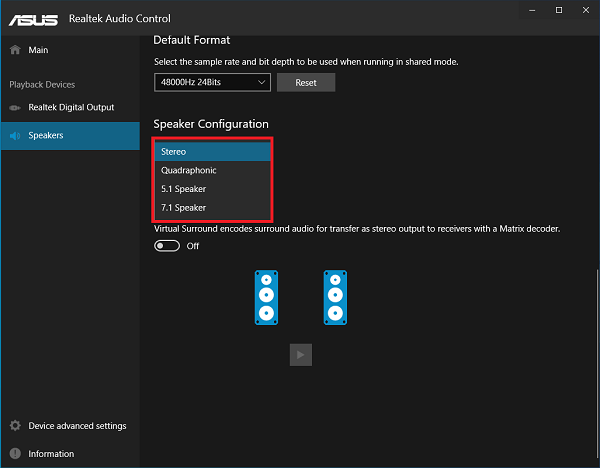
3-3:Select the channel in the submenu of speakers

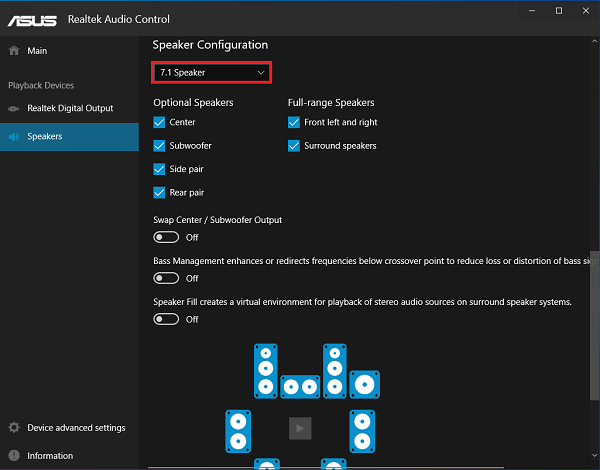
3-4:Select 7.1 channel speakers as below


Q&A

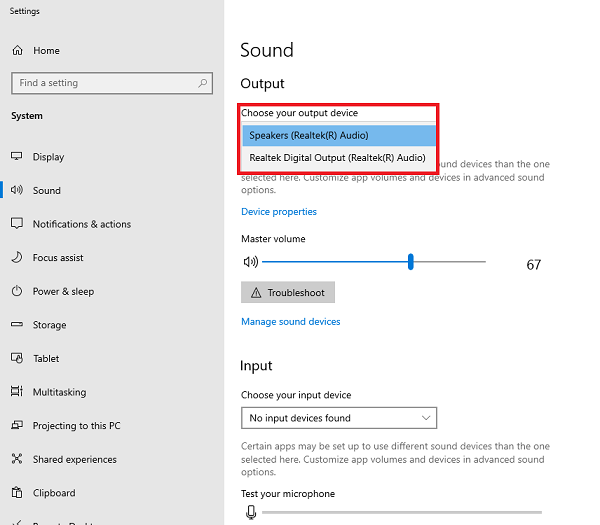
Q1: No audio output from Motherboard  Audio I/O port?

A1: Please confirm whether the correct output device was selected or not.

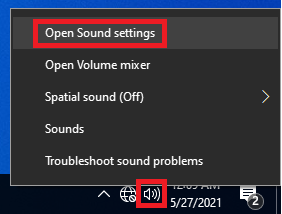
a. right-click the audio icon in the right side of the system and select [Open Sound settings] as shown below : 
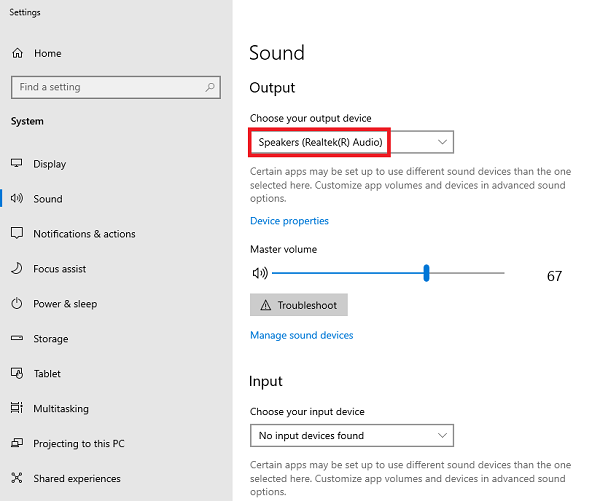
b. Choose your output device in the submenu of output sound

c. Select[Speakers(Realtek(R) Audio)] if your output device is speakers

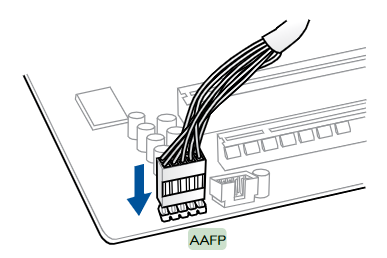
Q2:How to connect front panel audio cable to AAFP?(10-1 pin AAFP)

A2: Please install front panel audio cable to motherboard AAFP connector

Q3: How to check Motherboard support SupremeFX function or not ?

A3: Please check the AUDIO spec on Motherboard Tech Specs page as below picture

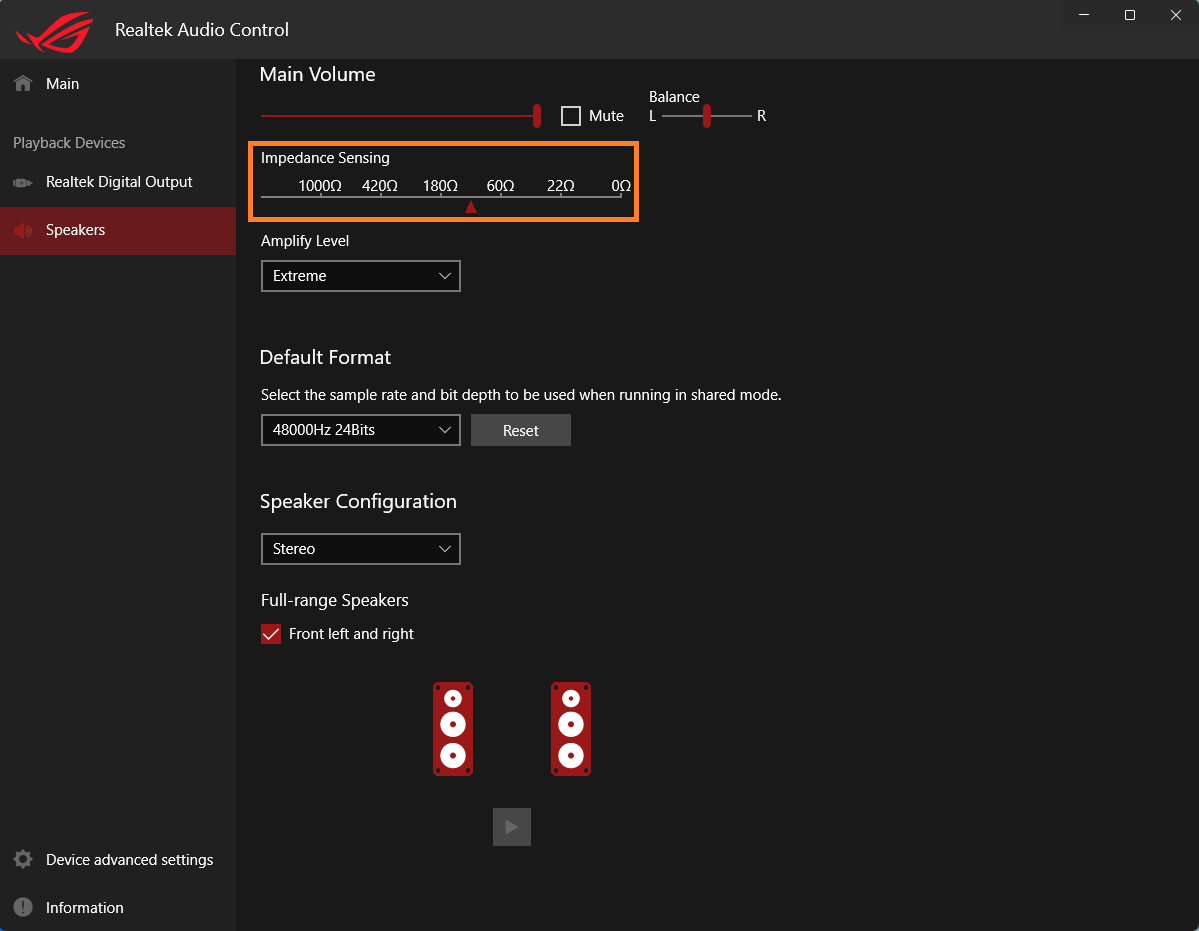
Q4: How to check the Ohm of the headphone ?

A4: When the motherboard supports SupremeFX technology, connect headphones or speakers to the rear audio output (green jack).

The audio driver will detect the impedance of the audio output device and adjust the corresponding amplification level accordingly. 

If a prompt for headphone impedance detection automatically appears, it is normal.

Notice

Above information might be partly or entirely quoted from exterior websites or sources. please refer to the information based on the source that we noted. Please directly contact or inquire the sources if there is any further question and note that ASUS is neither relevant nor responsible for its content/service.
This information may not suitable for all the products from the same category/series. Some of the screen shots and operations could be different from the software versions.
ASUS provides the above information for reference only. If you have any questions about the content, please contact the above product vendor directly. Please note that ASUS is not responsible for the content or service provided by the above product vendor.