-
Solutions
Solutions
Leverage our innovations with new technologies to deploy intelligence and connectivity from core to cloud.
View All SolutionsFeature AIDC ASUS Infrastructure Deployment Center ACC Data Center Edition Liquid-Cooling Solutions ASUS AI Hub ASUS Storage Solutions AI Solutions for Finance AI Server and Infrastructure Solutions Hybrid Cloud SolutionsIntel 3rd Gen Intel Xeon Scalable Processors Intel® Xeon® 6 Scalable Processors 5th Gen Intel® Xeon® Scalable Processors Intel Xeon E-2300 Processors Intel Optane Persistent MemoryAMD AMD EPYC 9006 Processors AMD EPYC 9005 Processors AMD EPYC 9004 Processors AMD EPYC 7003 ProcessorsNVIDIA NVIDIA Vera Rubin NVL72 NVIDIA HGX Rubin NVL8 NVIDIA GB300 NVL72 NVIDIA GB200 NVL72 NVIDIA HGX B300, RTX Pro Server ASUS AI Factory NVIDIA L40S Servers for Generative AI NVIDIA Omniverse Enterprise
View All Solutions
-
Products
Products
Accelerate workloads of different platform types and size with ASUS servers and workstations.
View All ProductsView All Products
-
Resources
Resources
Engage with us to find out our news, media, events and stories.
-
Support
Support
We offer a variety of ways to get support, including sales, products and technical issues.
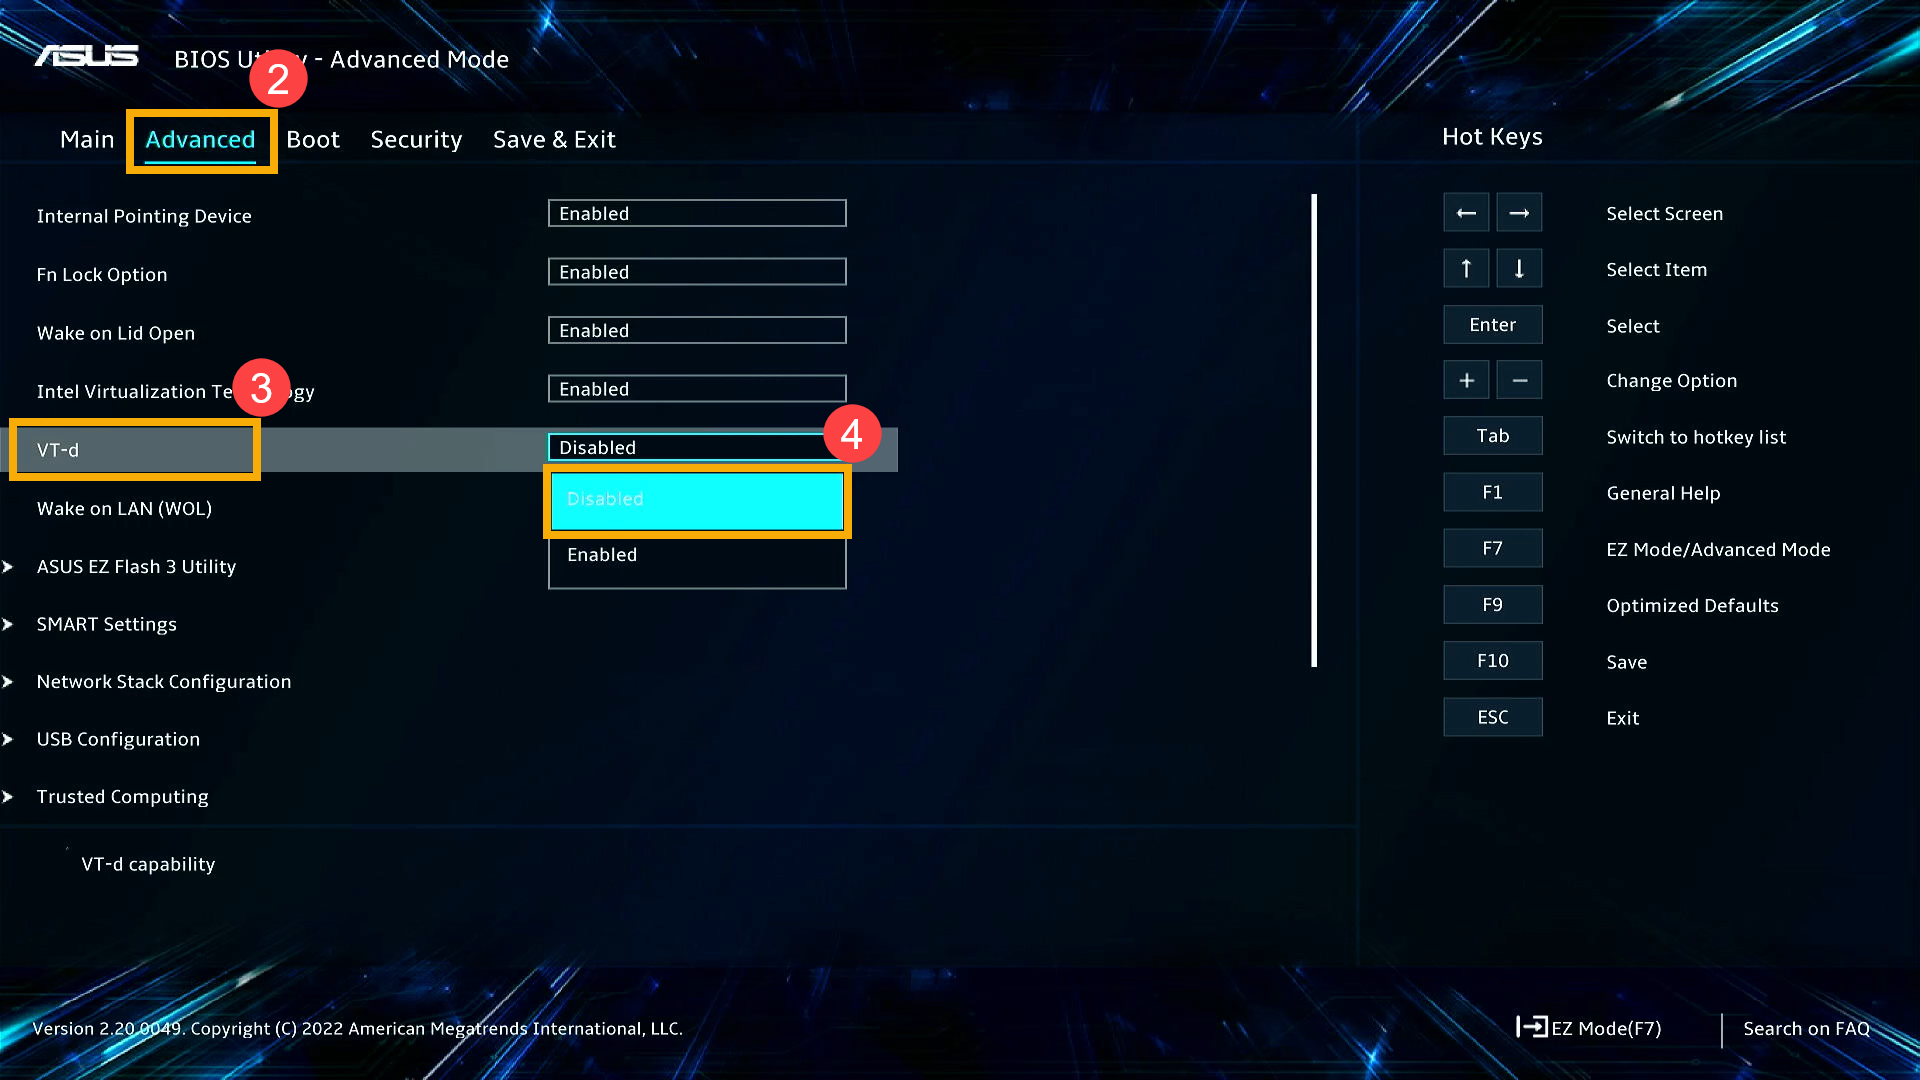
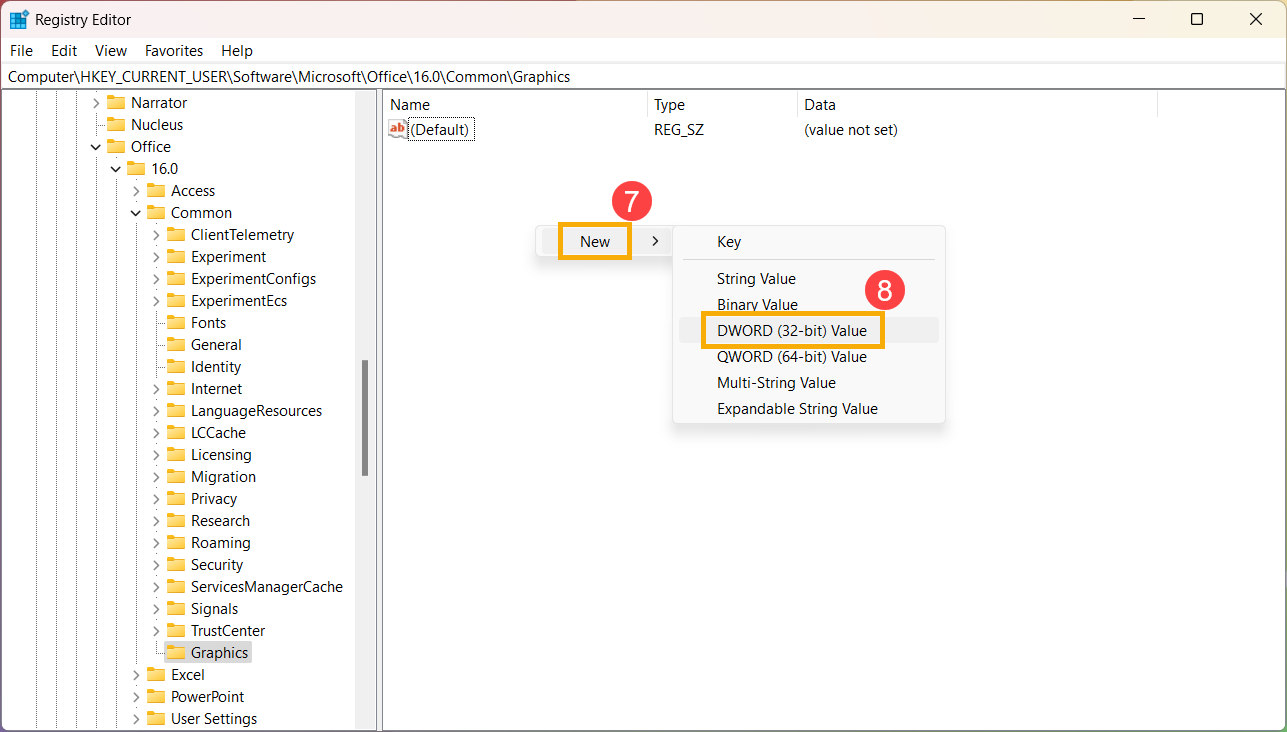
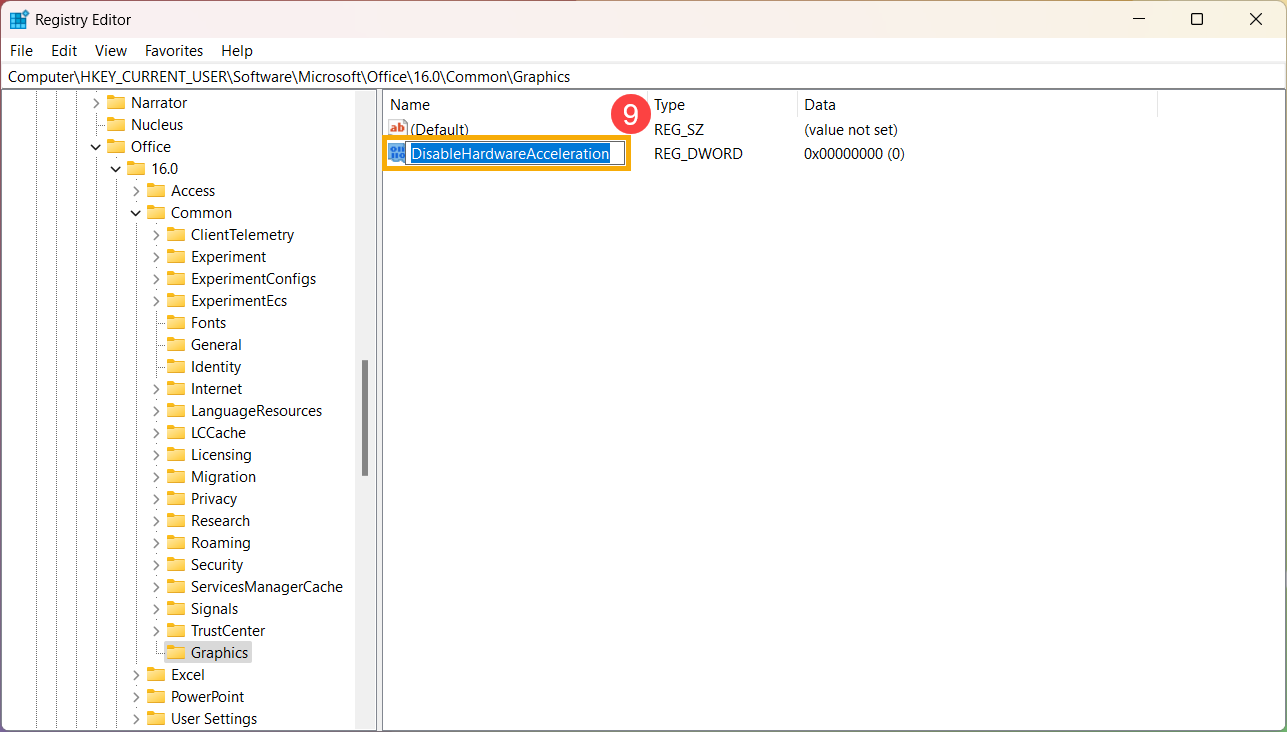
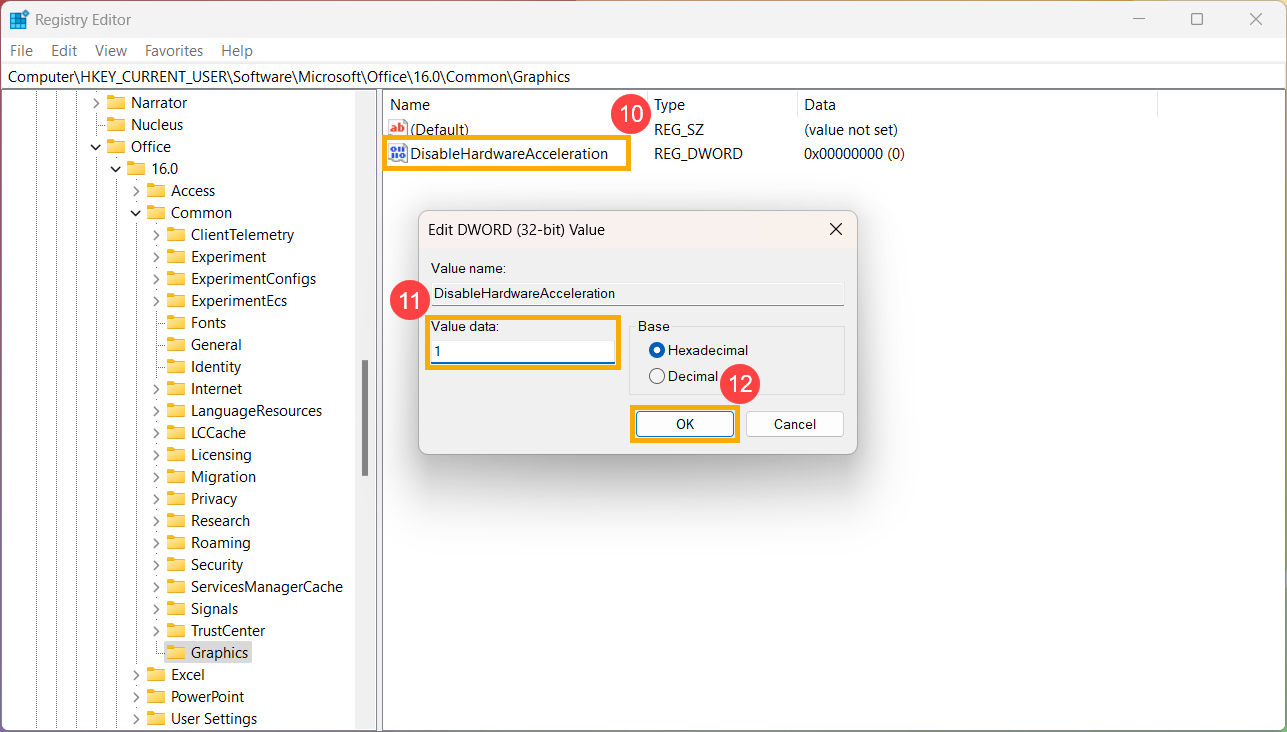
 + R on the keyboard to open Run app, enter [regedit]
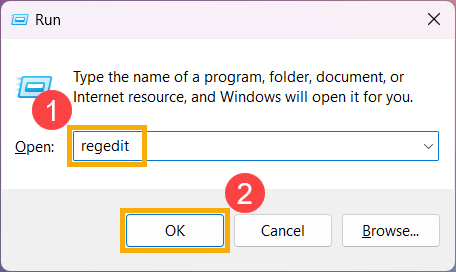
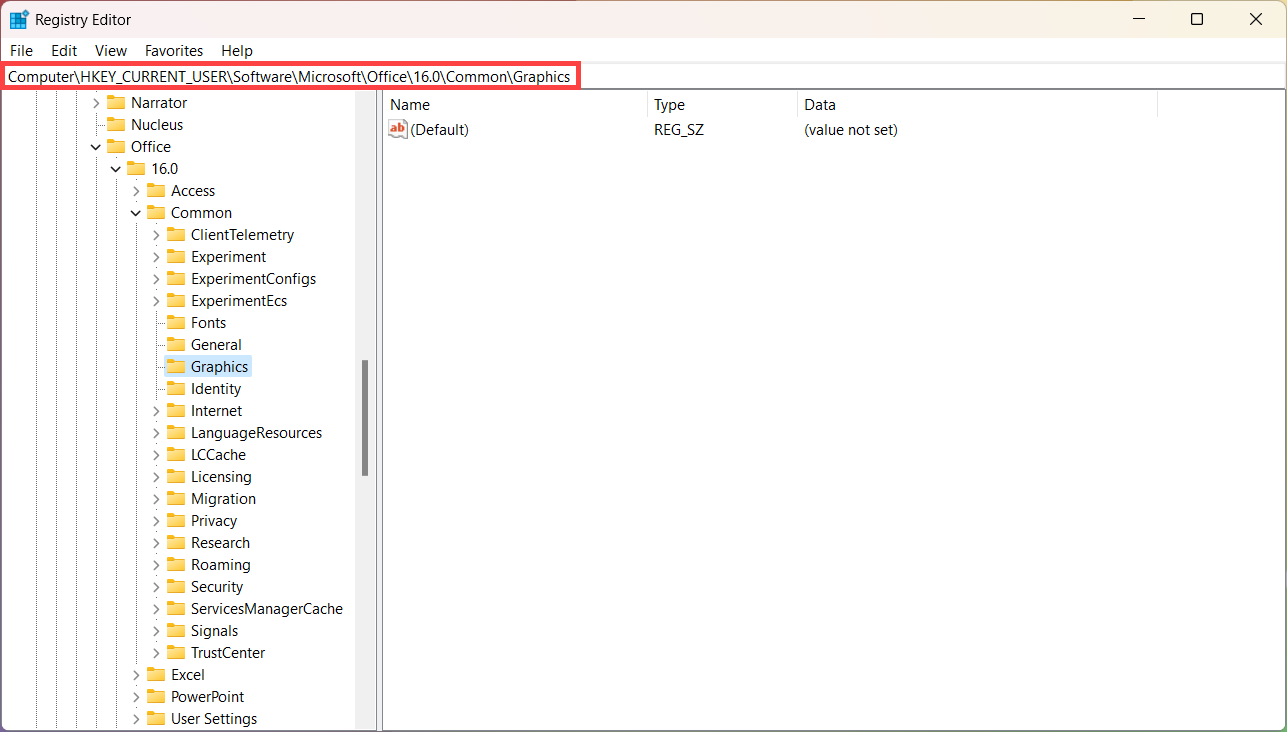
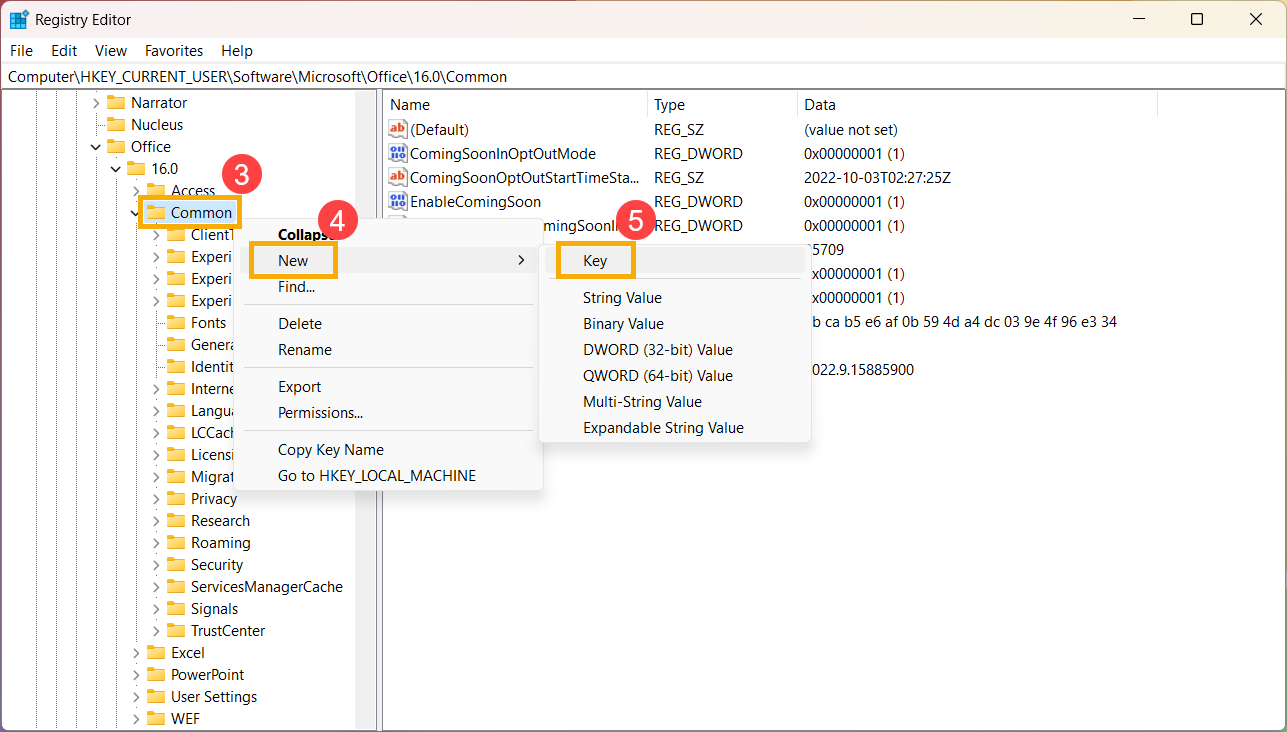
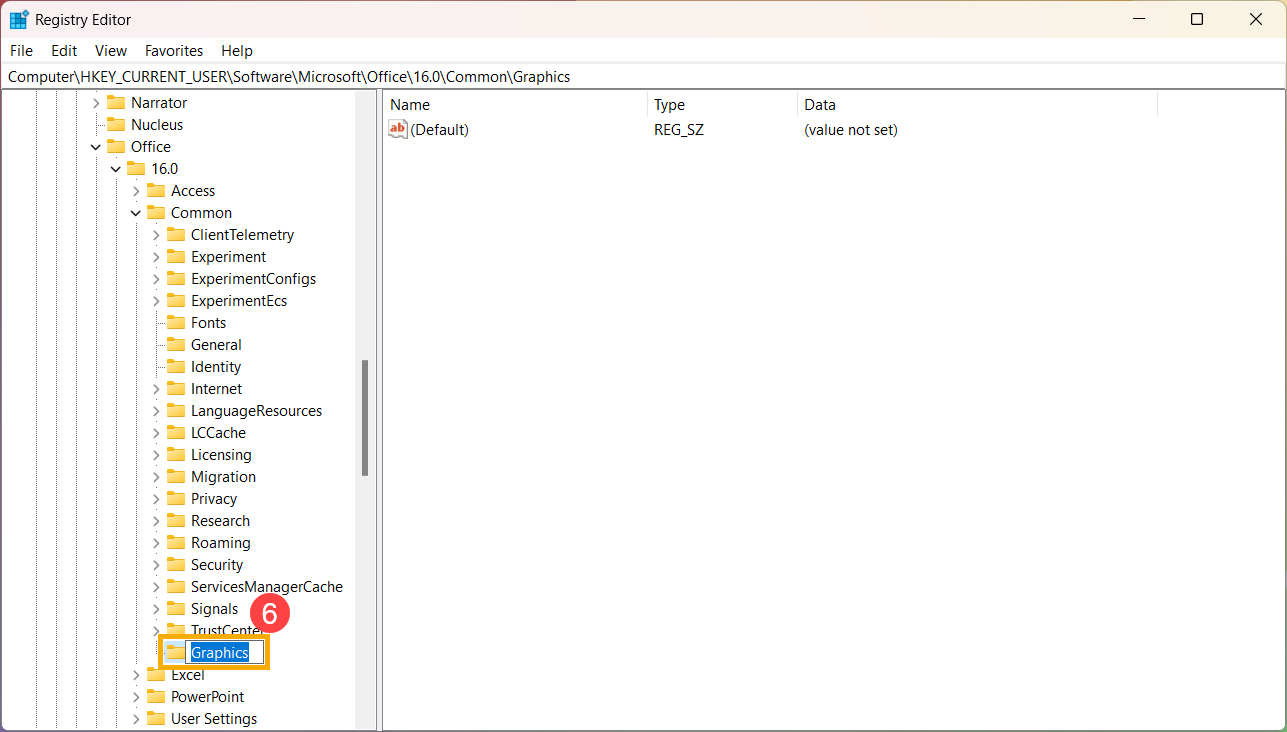
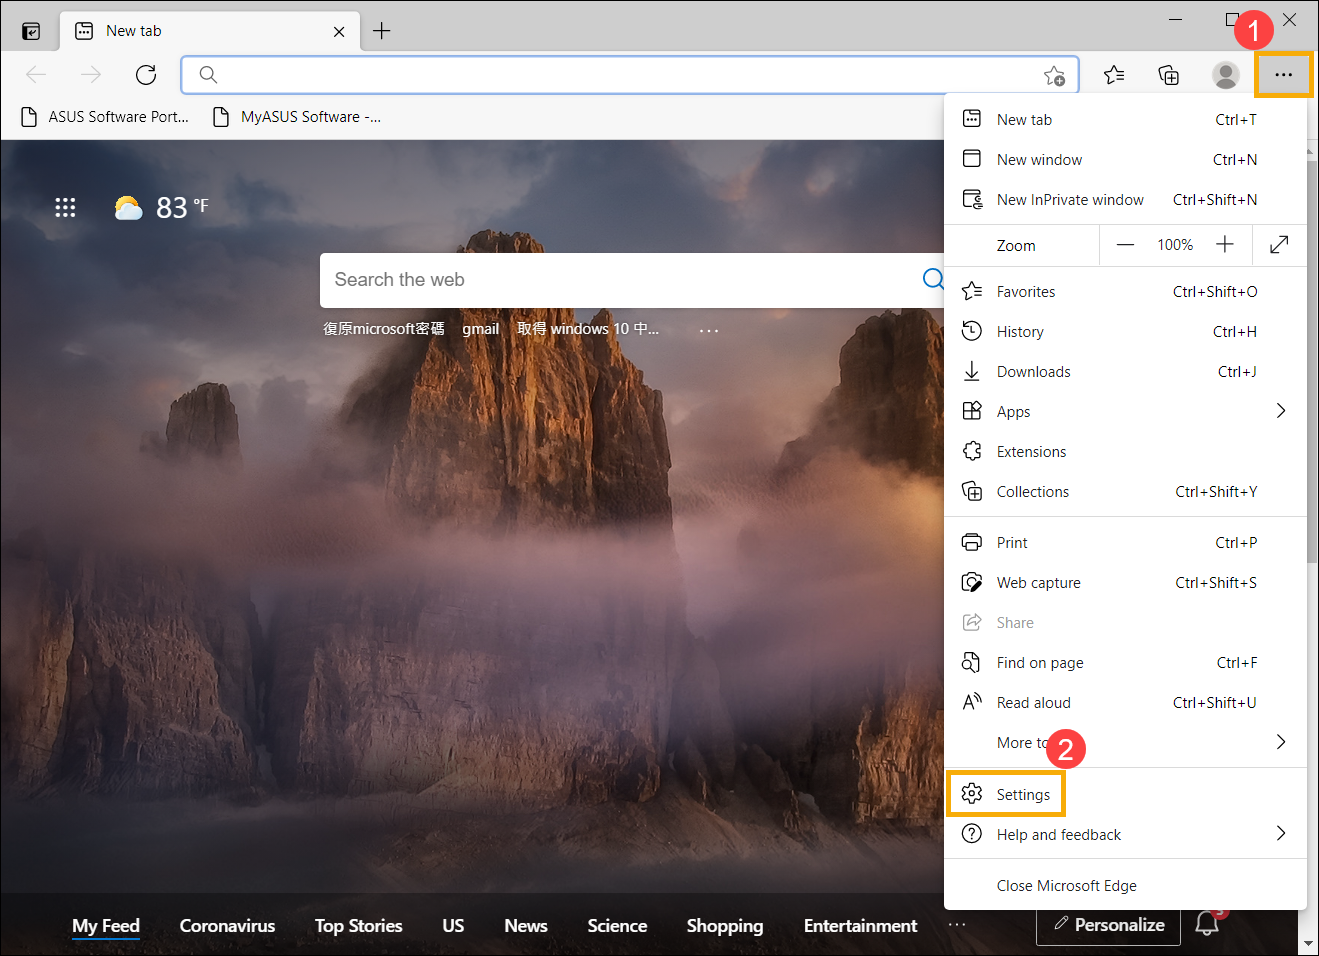
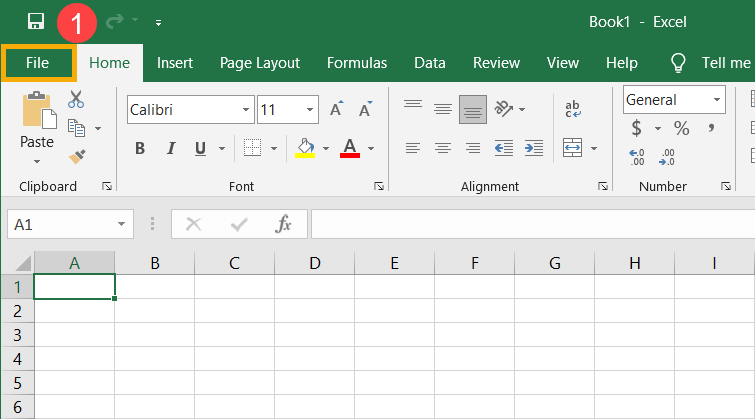
 at the upper-right corner
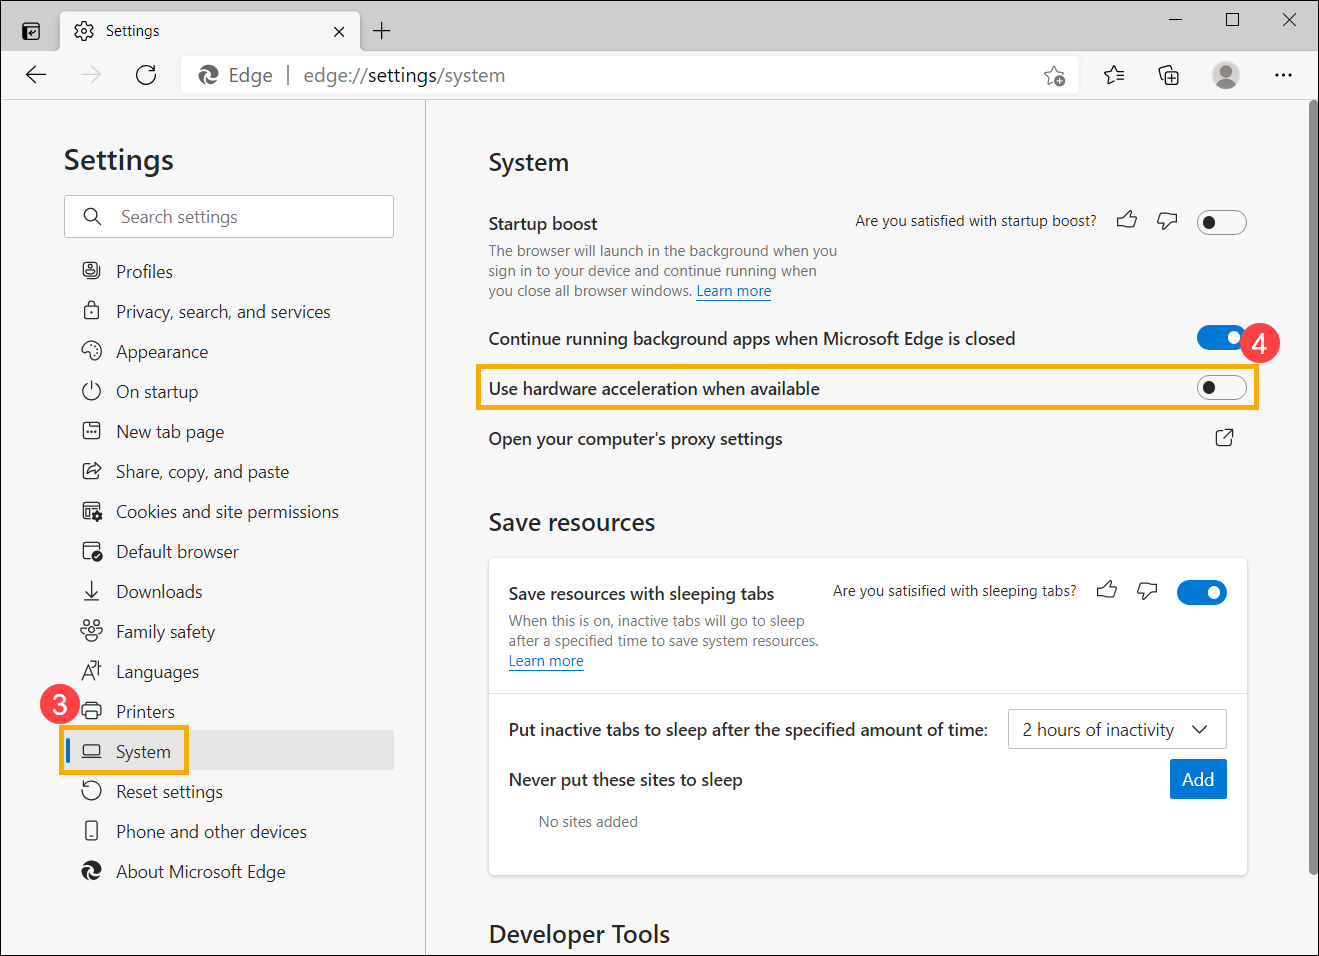
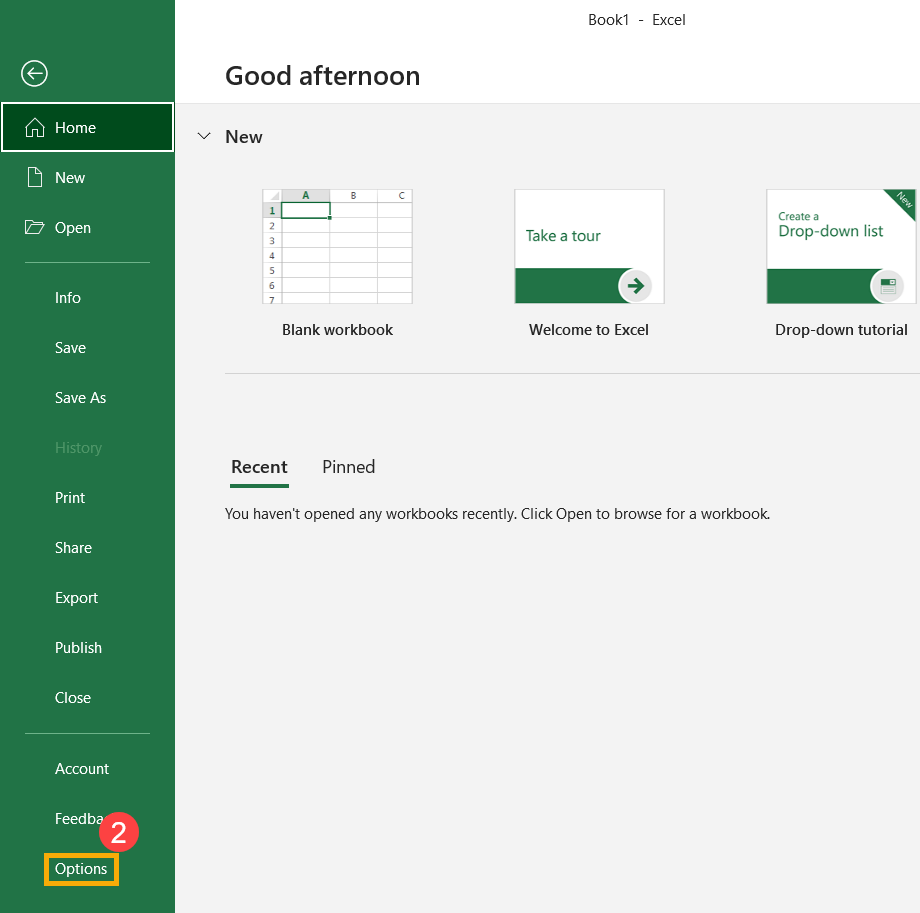
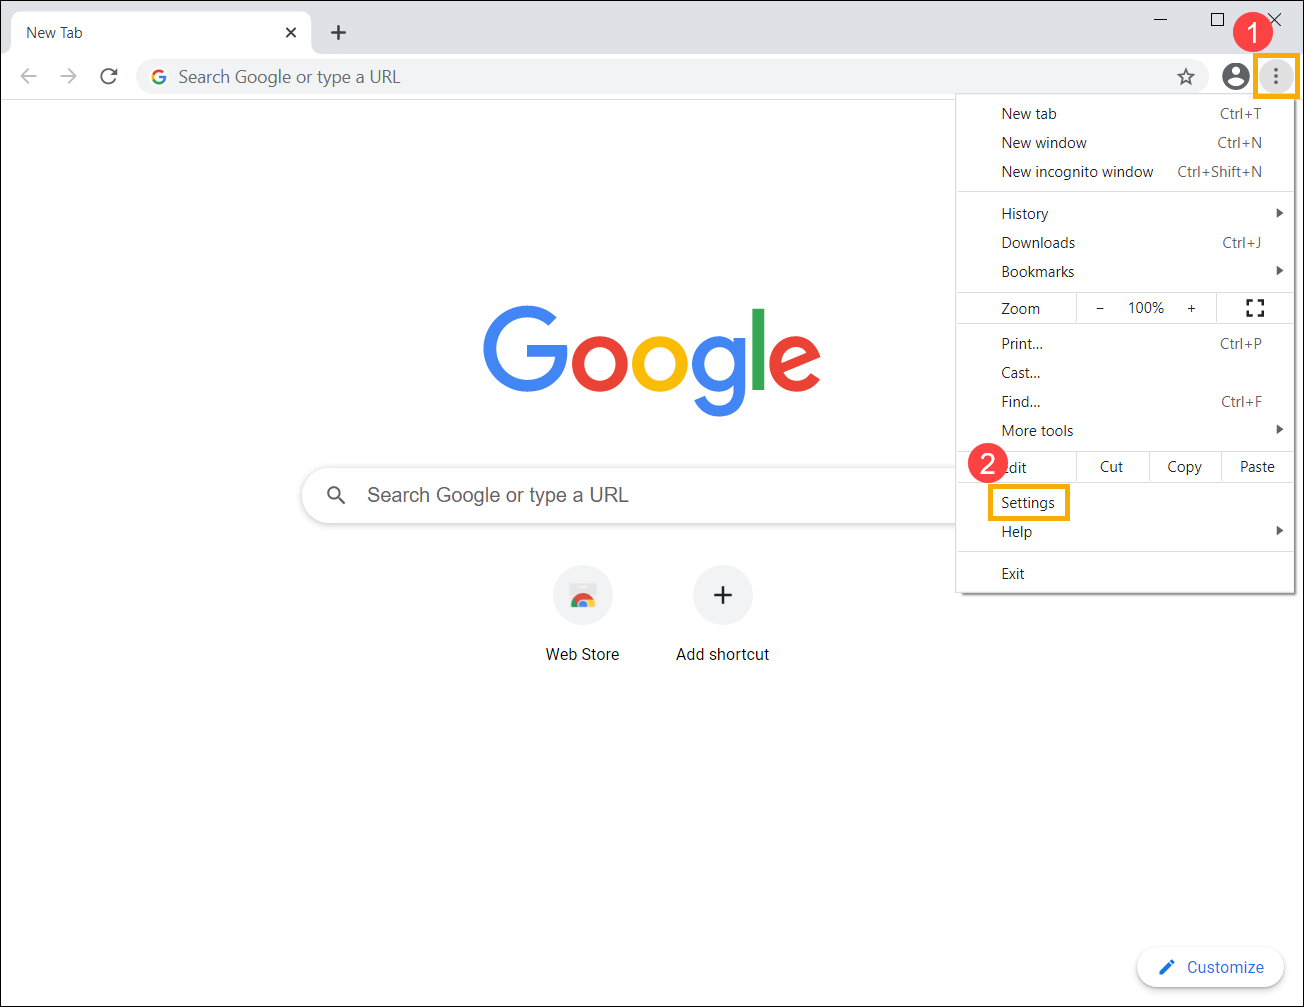
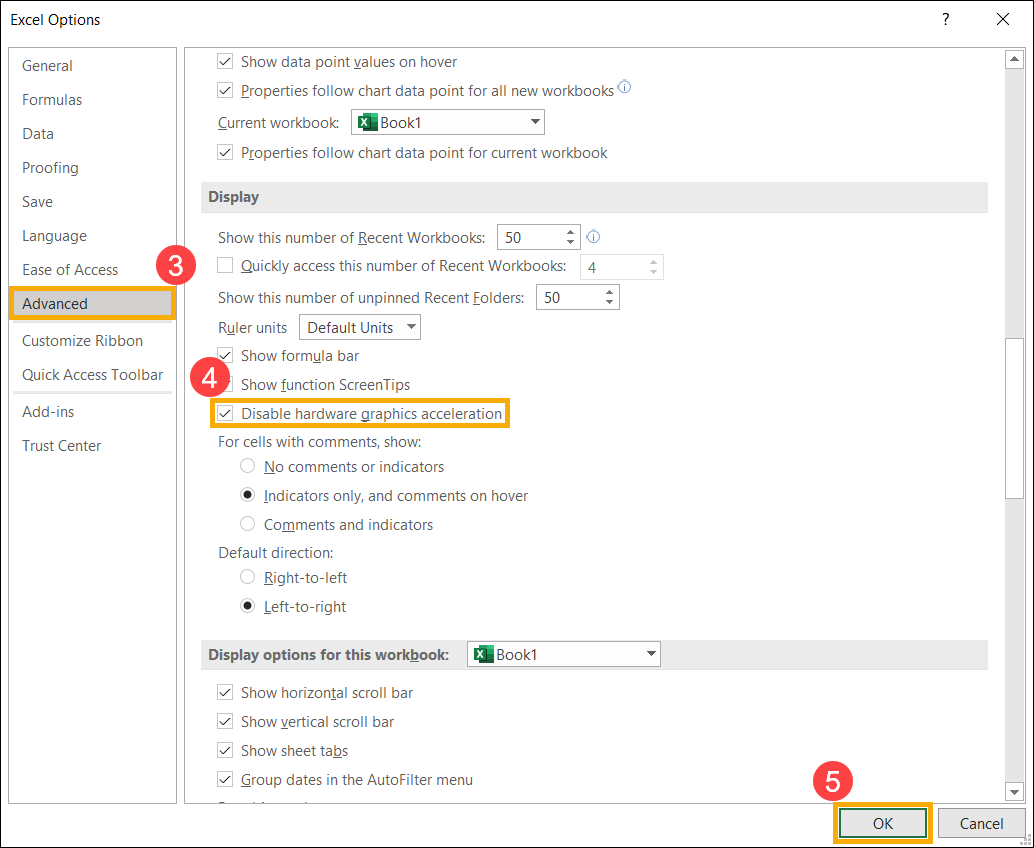
 at the upper-right corner