MyASUS System Diagnosis - Reset my PC and create a Recovery drive

Update : 2024/01/16 14:30

MyASUS System Diagnosis - Reset my PC and create a Recovery drive

Applicable Products: Notebook, Desktop, All-in-One PC, Gaming Handheld


When you use MyASUS system diagnosis and have followed the troubleshooting suggestions provided by MyASUS, and the device still persists with issues, you can refer to this article to perform a device reset or create a system recovery drive. Learn more about the introduction of System reset and Recovery drive.


Table of Contents: 

Reset my PC
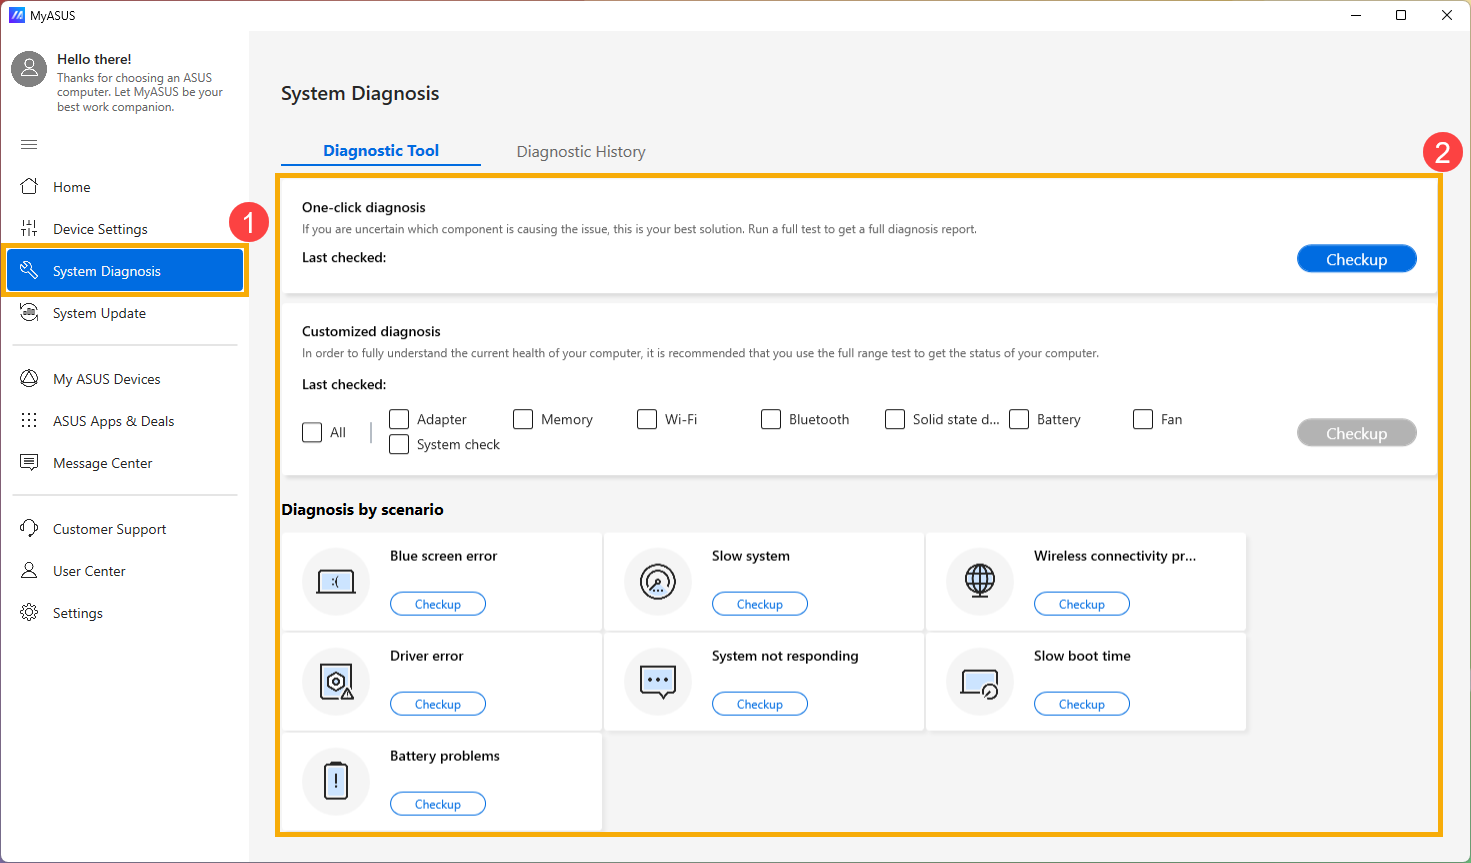
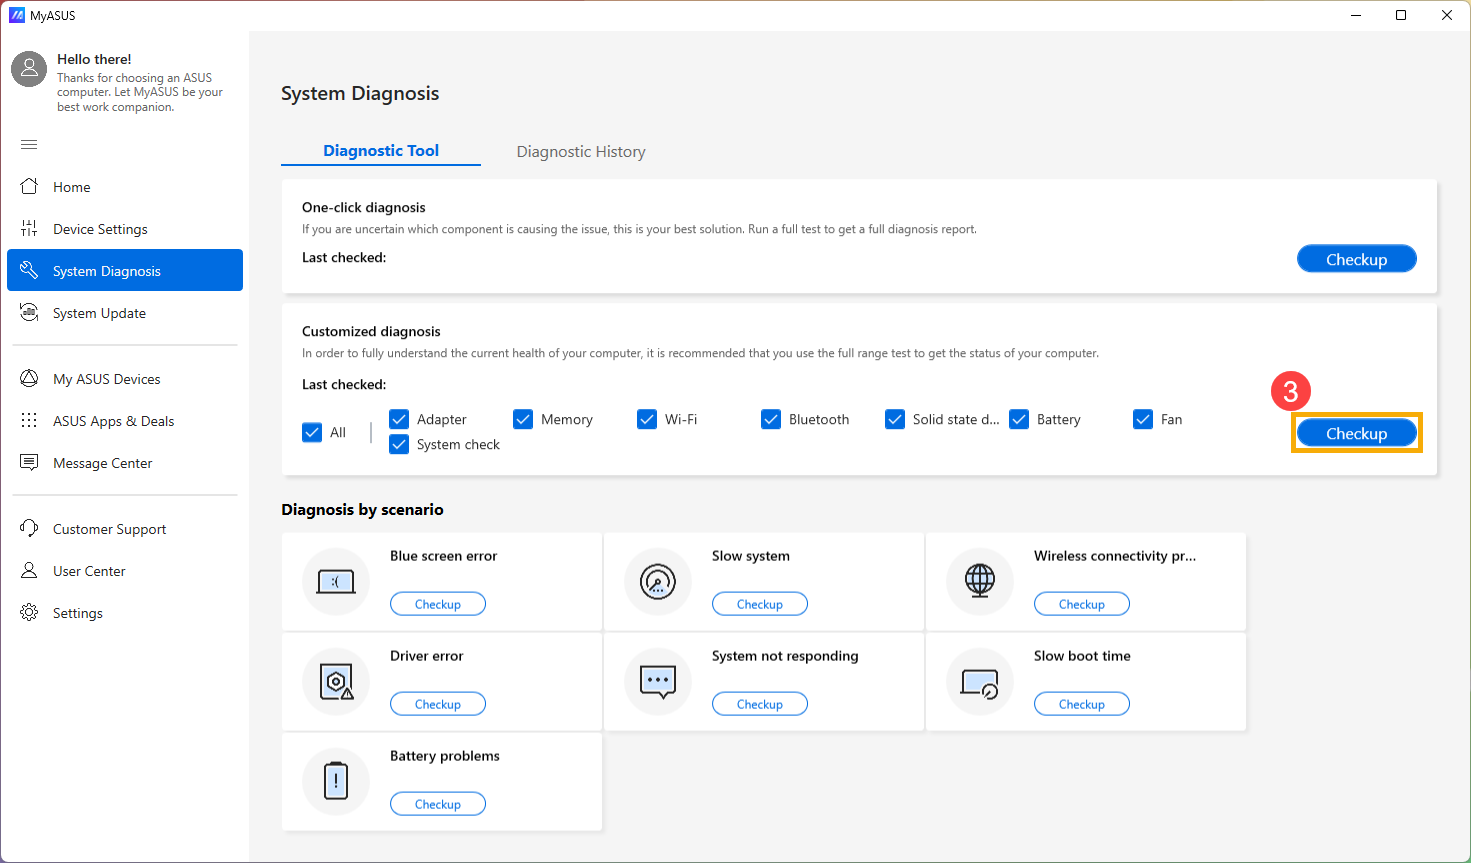
  1. After entering MyASUS, click on the [System Diagnosis] from the left menu. Select the section you want to testand click [Checkup].  
     
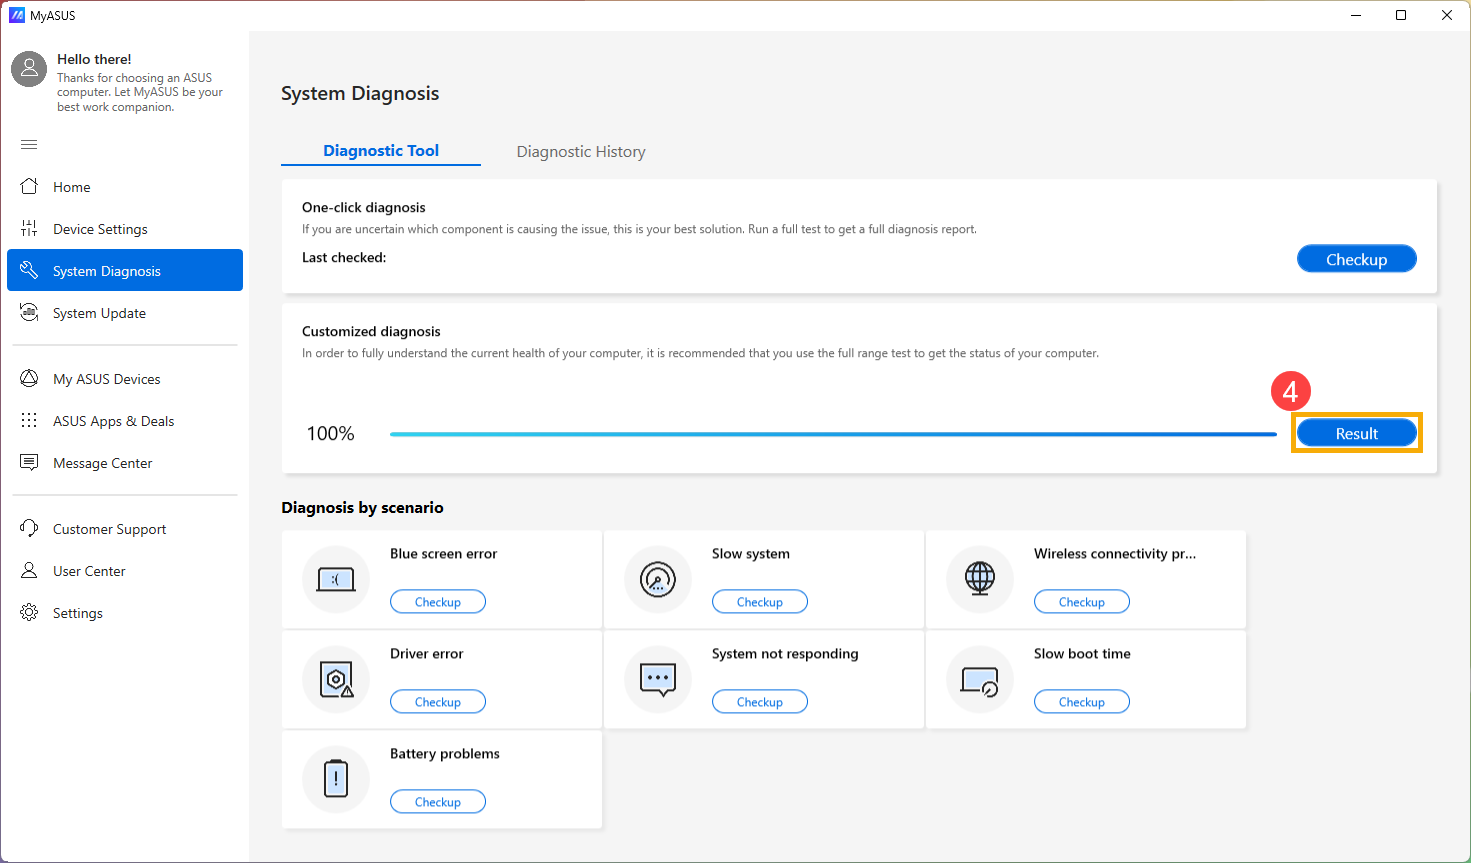
  2. As soon as the test is completed, click on the [Result].   
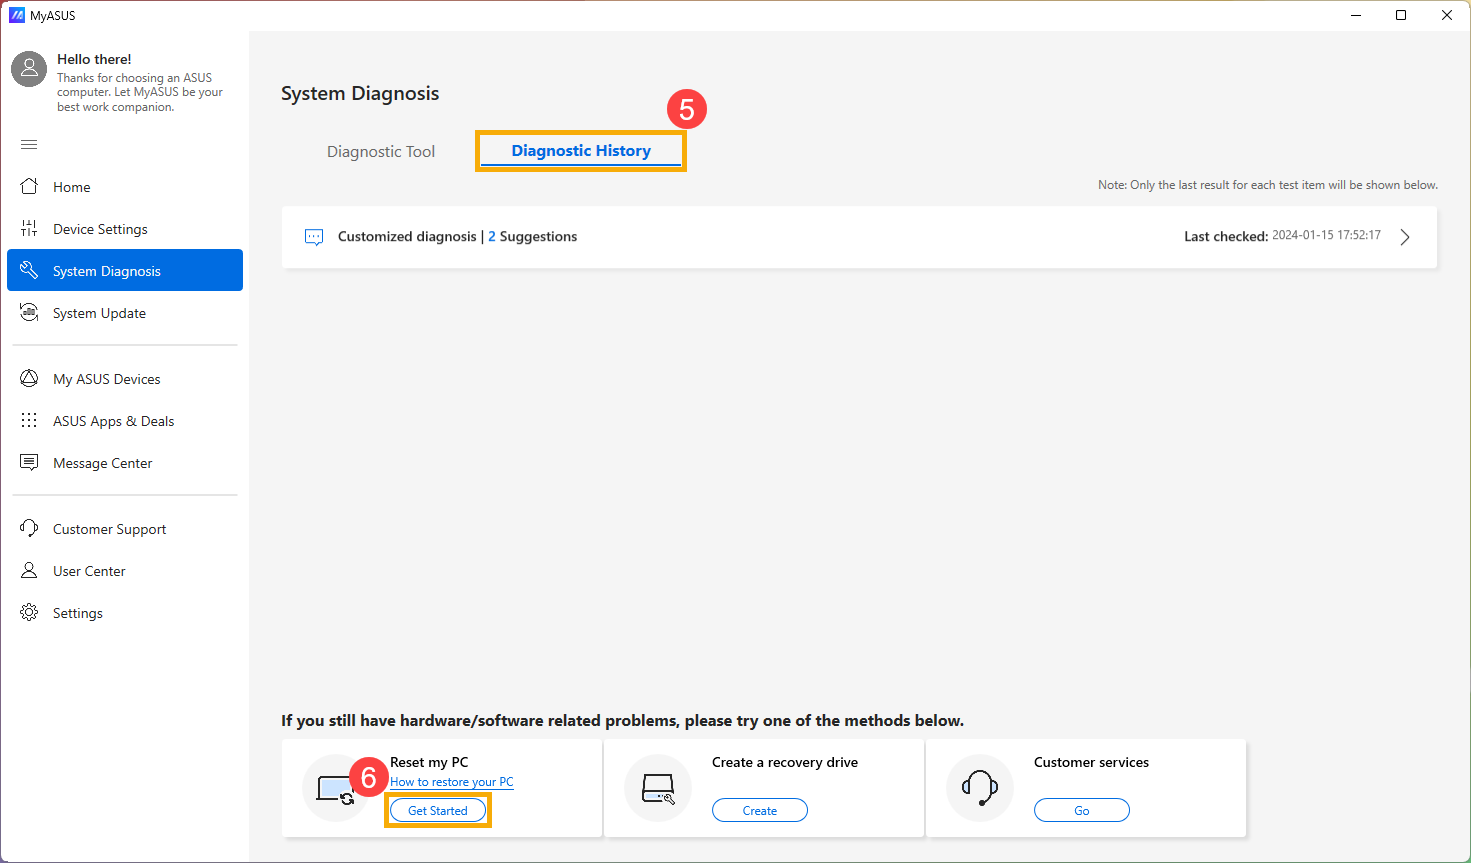
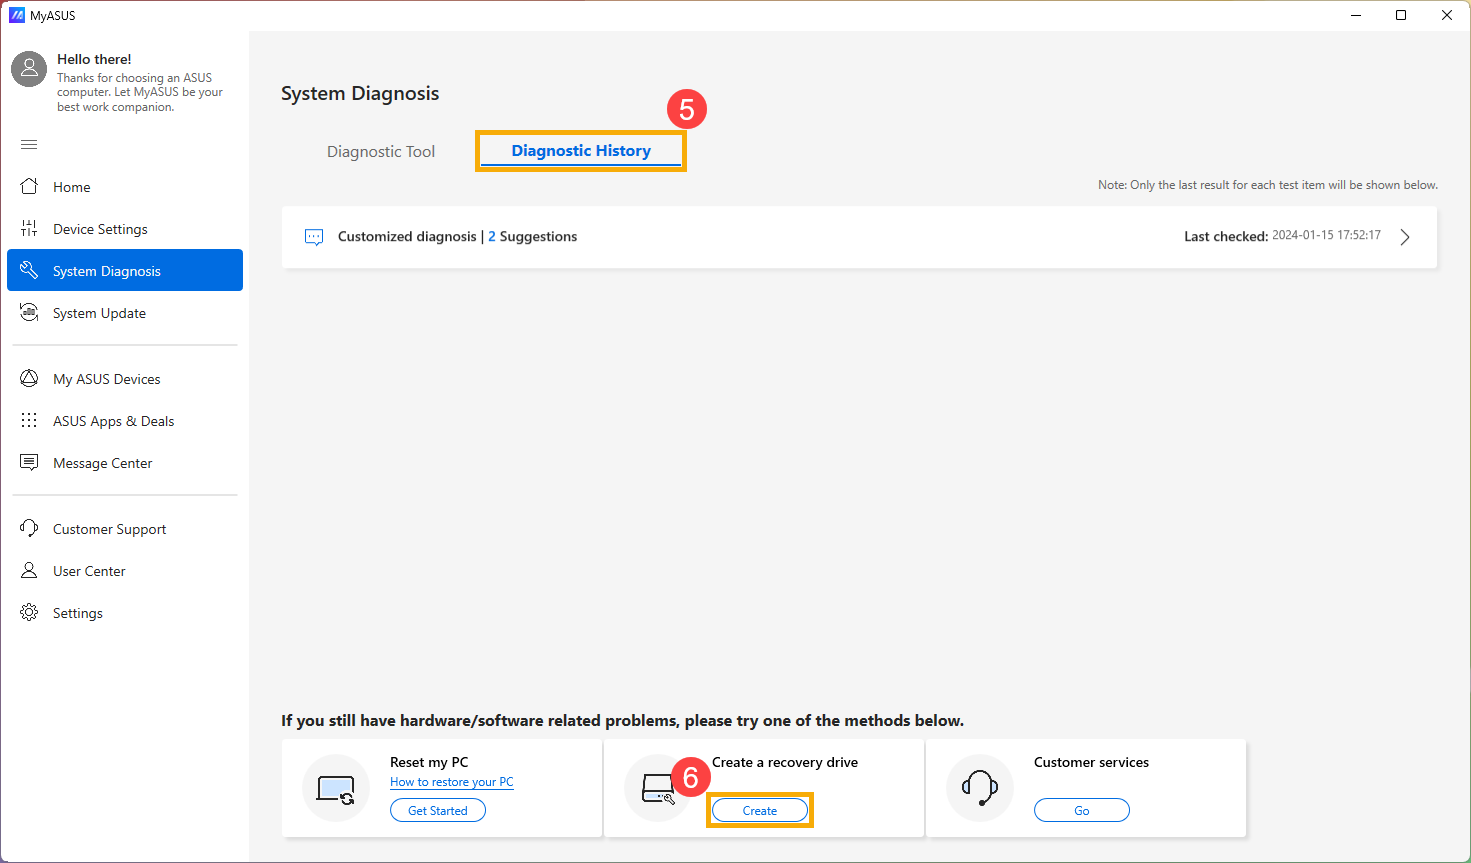
  3. After checking the result, go to [Diagnostic History]and click [Get Started]on the Reset my PC section.  
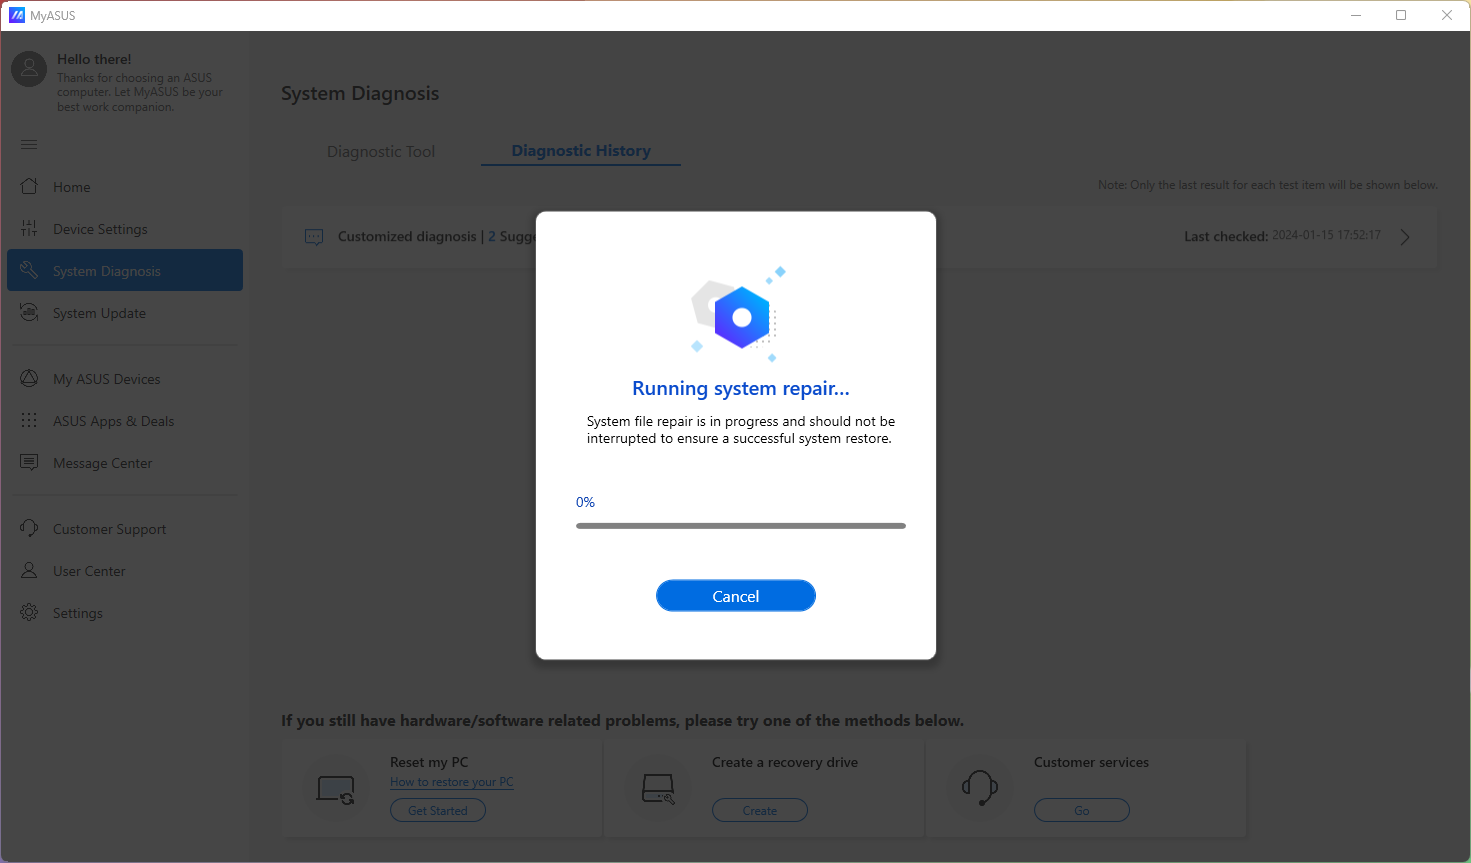
  4. After clicking 「Get Started」, the system will run system repair before resetting your device.  
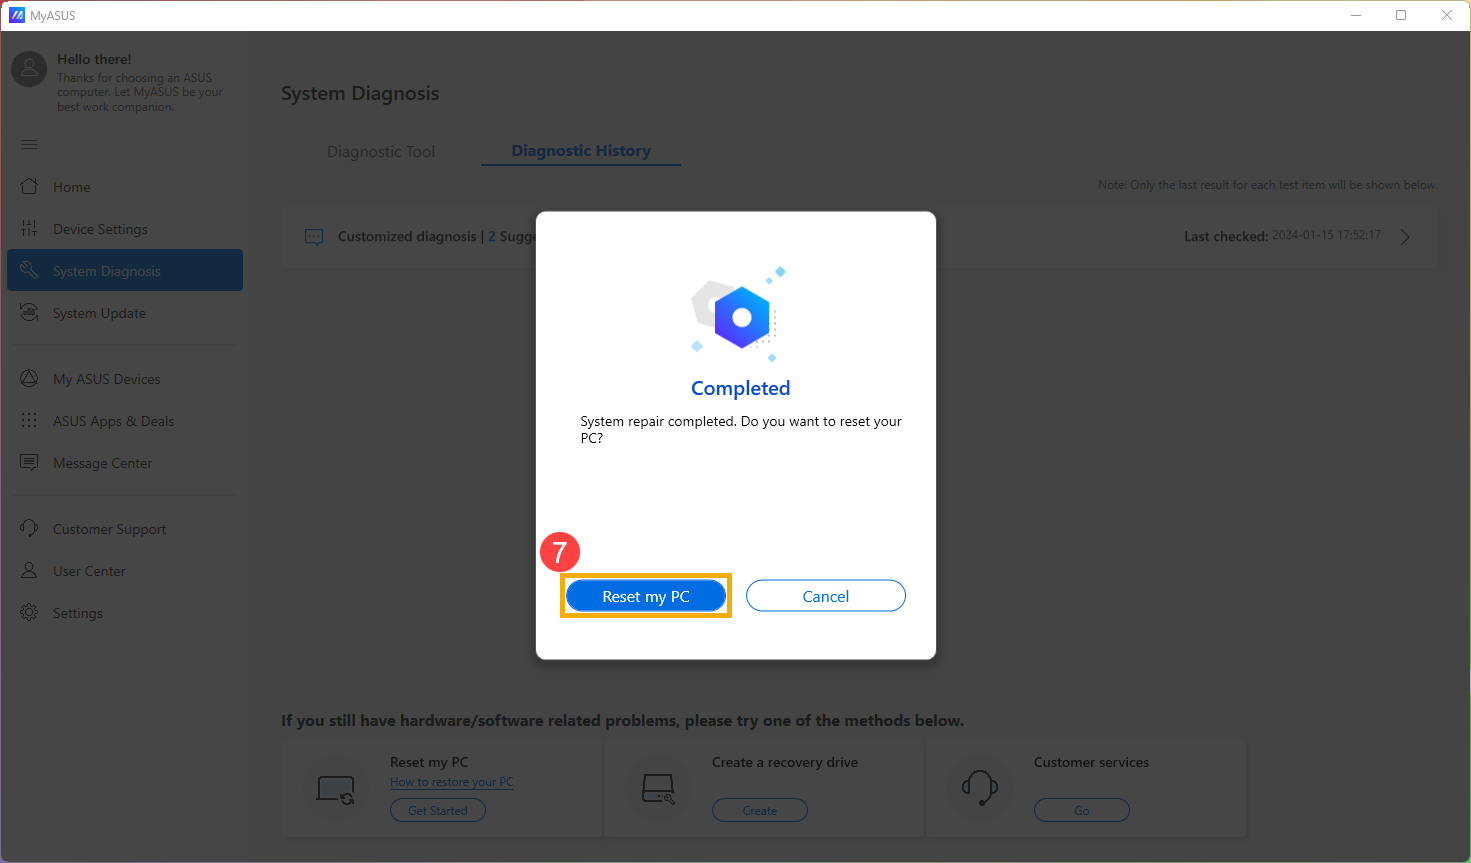
  5. When system repair is completed, click [Reset my pc].  
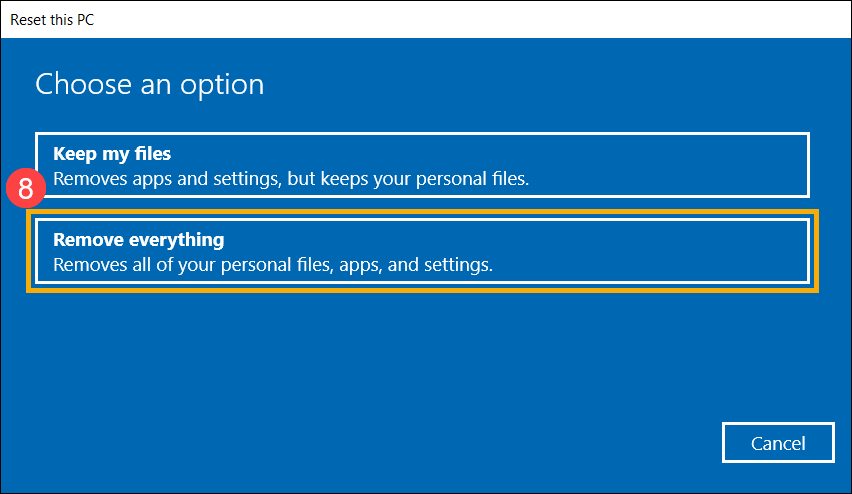
  6. The following step will delete all the personal files. Please be sure to back up all your files if necessary. Click on [Remove everything].  
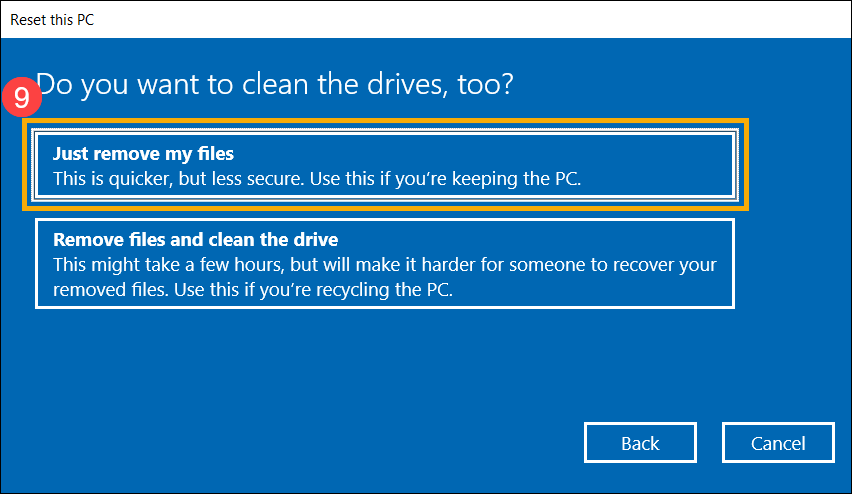
  7. Click [Just remove my files].  
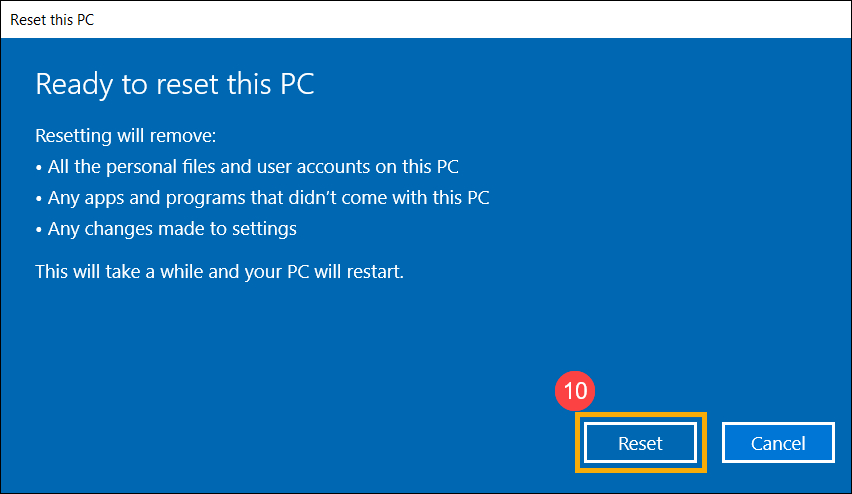
  8. Click [Reset]to start resetting the PC, then the system will restart for several times. As soon as it's completed, the PC will start the initialization.  

Back to Table of Contents


Create a Recovery drive
  1. After entering MyASUS, click on the [System Diagnosis] from the left menu. Select the section you want to testand click [Checkup].  
     
  2. As soon as the test is completed, click on the [Result].   
  3. After checking the result, go to [Diagnostic History] and click [Create]on the Create a recovery drive section. 
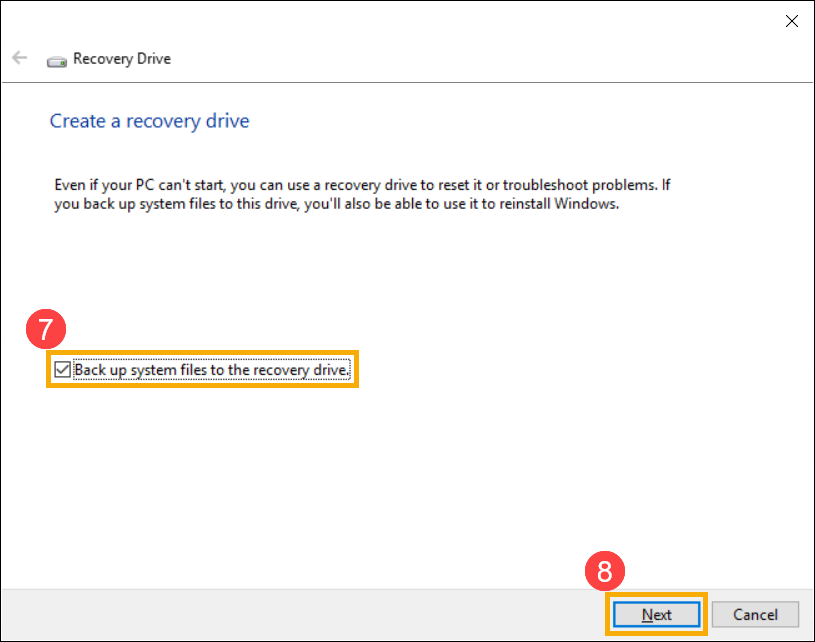
  4. A window pop-up will appear on the MyASUS for creating a recovery drive. Insert a USB flash drive with the storage capacity at least 16GB to the PC. Be aware that everything on the drive will be totally deleted after this process. Select [Back up system files to the recovery drive], then click on [Next]and wait for a few minutes. 
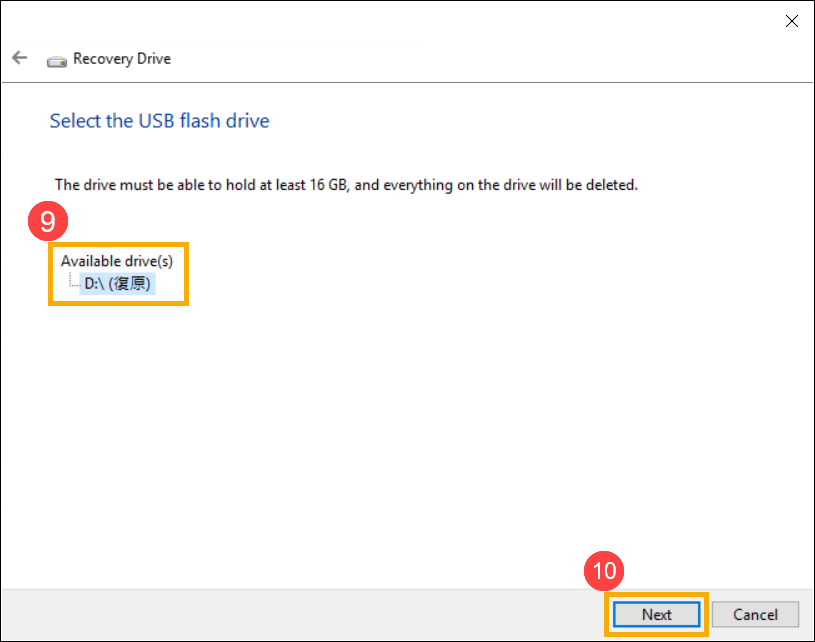
  5. Please confirm the drive letter of the USB flash drive is the one intended for creating the recovery drive (drive D: is assigned to the USB flash drive, as shown), in order to prevent data or files from being mistakenly deleted in the wrong USB flash drive. Click [Next]
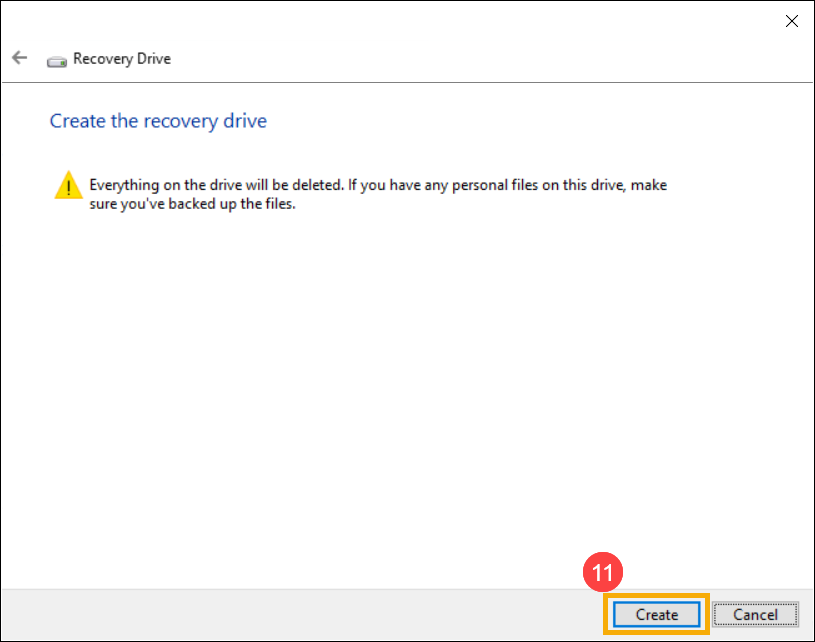
  6. This notification is the warning that everything will be deleted throughout the process. Please make sure the file has been backed-up. Click [Create]to proceed. 
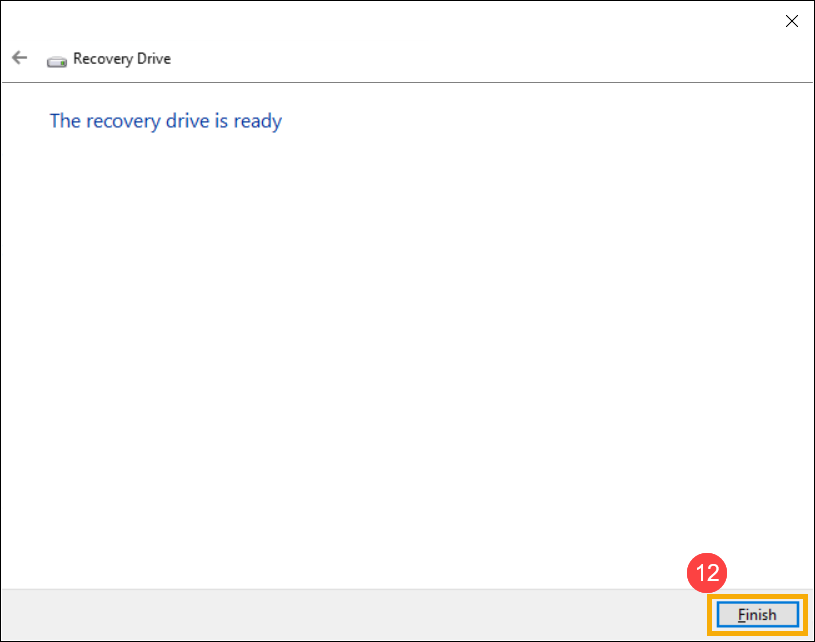
  7. Wait until the process is completed and click [Finish]to end the process. 

Back to Table of Contents


Download MyASUS now to experience perfect service. Click below!

Notice

Above information might be partly or entirely quoted from exterior websites or sources. please refer to the information based on the source that we noted. Please directly contact or inquire the sources if there is any further question and note that ASUS is neither relevant nor responsible for its content/service.
This information may not suitable for all the products from the same category/series. Some of the screen shots and operations could be different from the software versions.
ASUS provides the above information for reference only. If you have any questions about the content, please contact the above product vendor directly. Please note that ASUS is not responsible for the content or service provided by the above product vendor.