Note: The following method for reinstalling Windows is exclusively applicable to devices with x86/x64 architecture. For devices with ARM architecture (such as the Qualcomm® CPU platform), you can refer to this article for operating system reinstallation: Cloud Recovery within MyASUS in WinRE - Introduction.
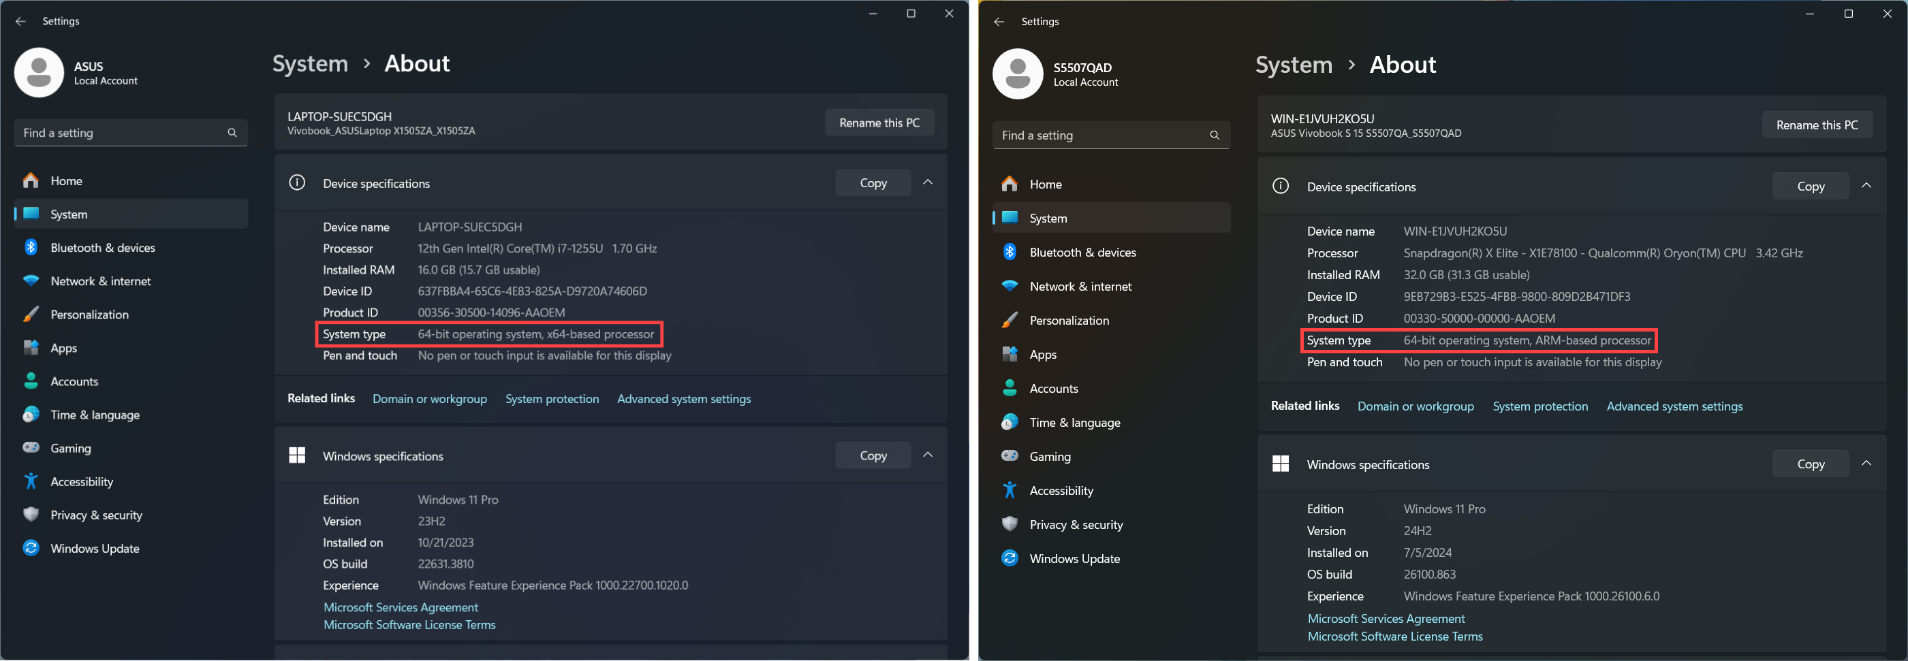
Navigate to Windows Settings > System > About. Here, you can view the architecture of your device under System type. (The image on the left shows an x64 architecture; the image on the right shows an ARM architecture.)
If your device encounters serious issues (such as being unable to enter the operating system) and you have not previously created a recovery drive (learn more about How to create and use Windows recovery drive), you can try using installation media to reinstall the Windows operating system. To use installation media for reinstalling Windows, you will need another device that can connect to the internet (if your device is unable to enter the operating system) and an empty USB flash drive (at least 8GB of space) to create the installation media for Windows.
Note: Reinstalling Windows using Microsoft's installation media will not retain personal files or ASUS bundled applications. Some programs may not be available for download from the ASUS website. If needed, please contact the ASUS service center for assistance. Learn more about How to search for and download utilities.
To provide you more detailed instruction, you can also click ASUS Youtube video link below to know more about How to create and use installation media to reinstall Windows 11/10 via USB drive:
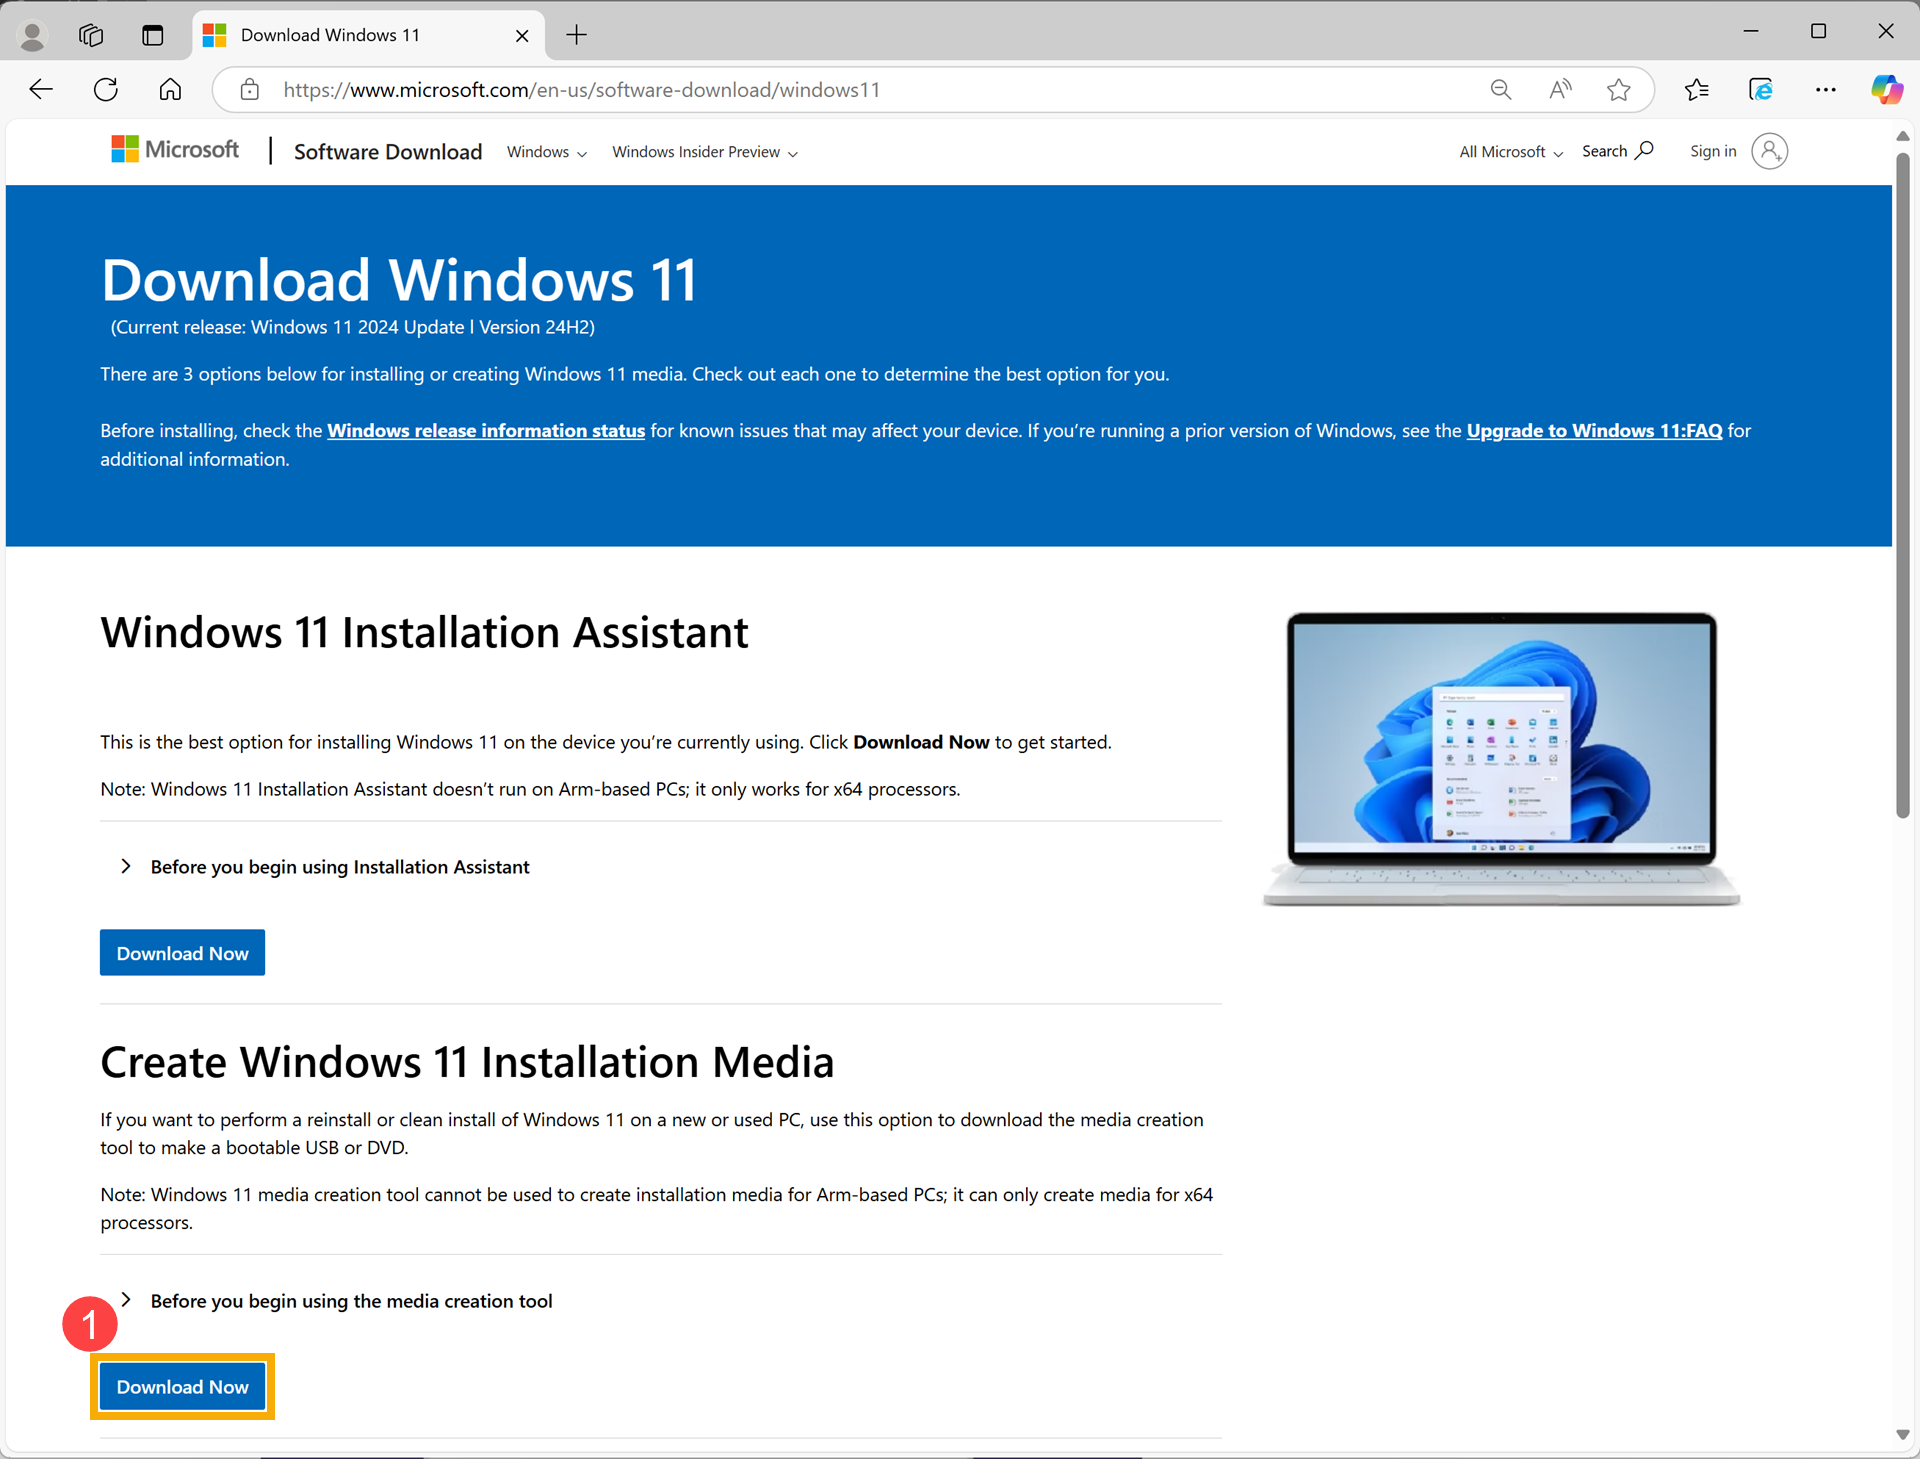
Go to Microsoft website, click [Download now]① in the Create Windows 11 Installation Media field.
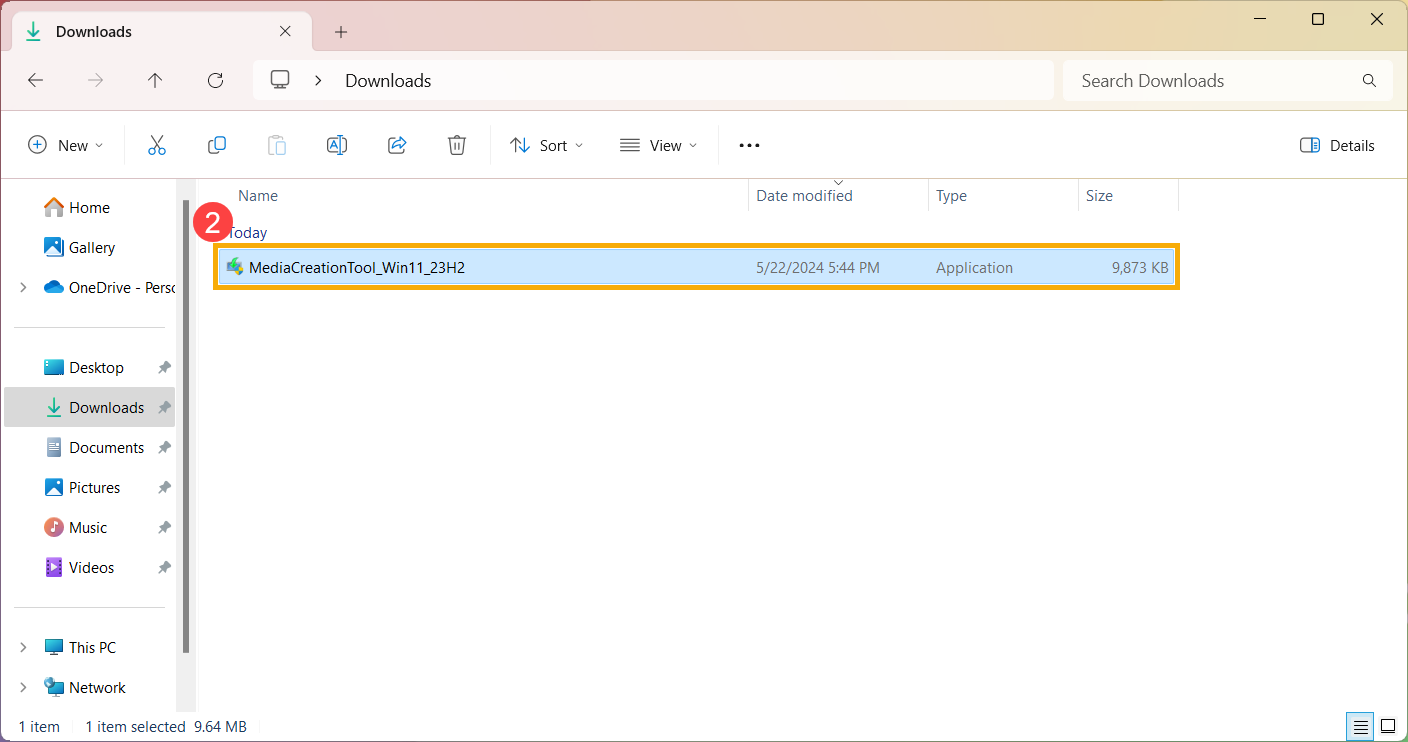
Go to the downloaded folder of the tool, then double-click [MediaCreationTool]② file to start the installation.
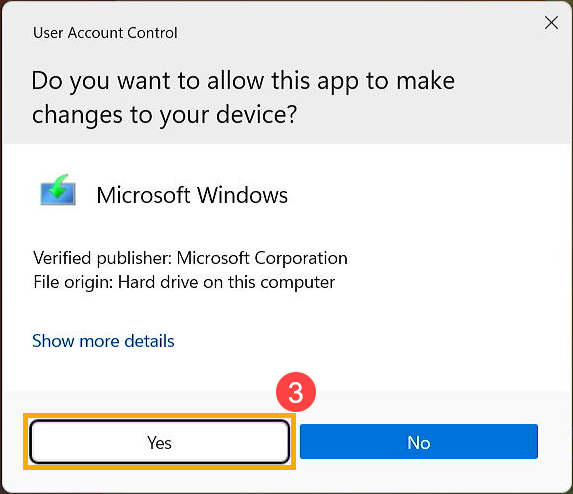
If the User Account Control window displayed, please select [Yes]③.
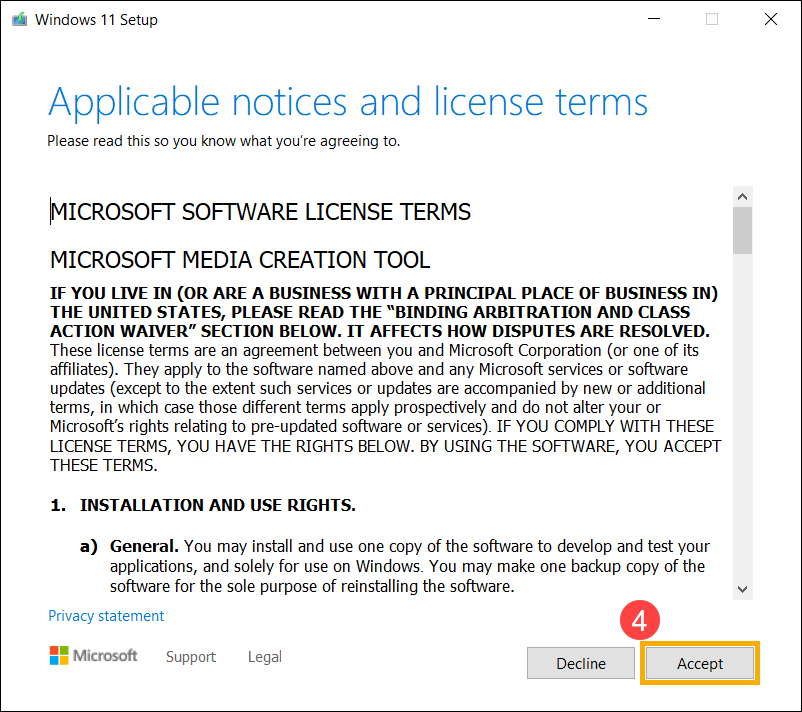
Please read the Microsoft software license terms and applicable notices, then select [Accept]④.
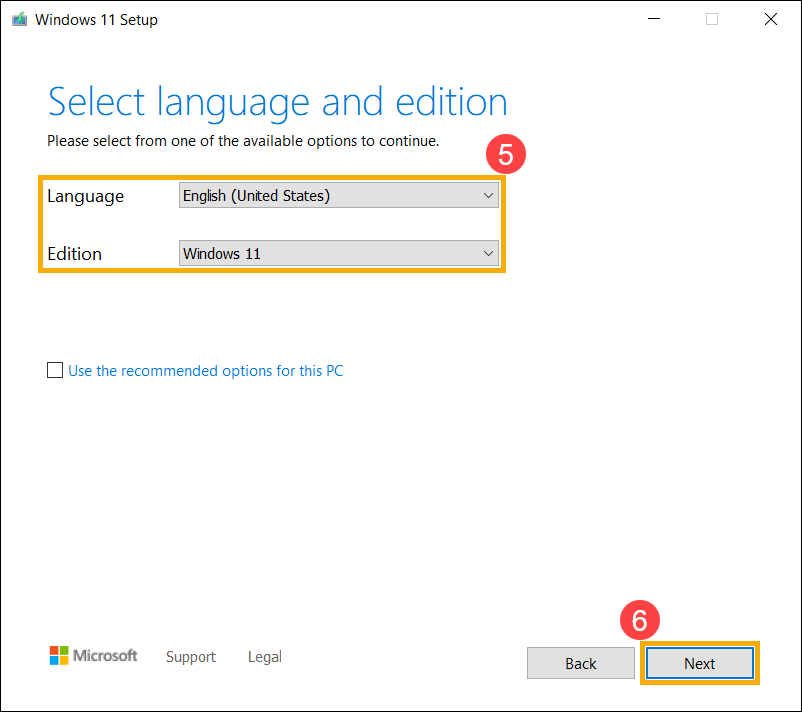
Select language and edition which you want to create for the Windows installation media⑤, then select [Next]⑥. Note: Please select the correct language and edition for your target unit to prevent any errors happened on the Windows activation afterward (if your device is with digital license, Windows OS will be automatically activated when it’s online after the installation is completed).
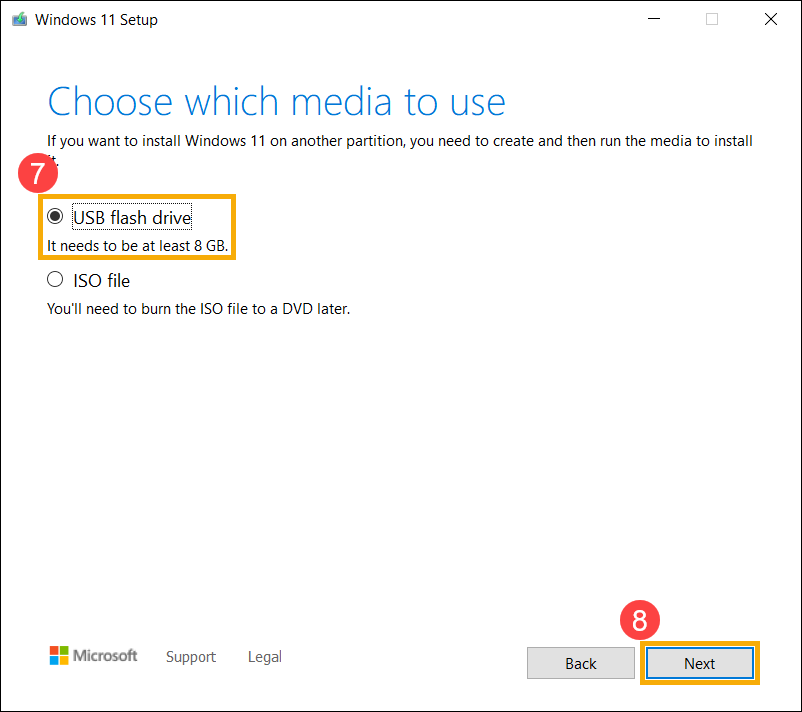
Connect the USB flash drive that you want to create as a Windows installation media to your device, select [USB flash drive]⑦ and then select [Next]⑧. Note: All files on the USB flash drive will be deleted during the process, so please back up your files first if you have data inside originally.
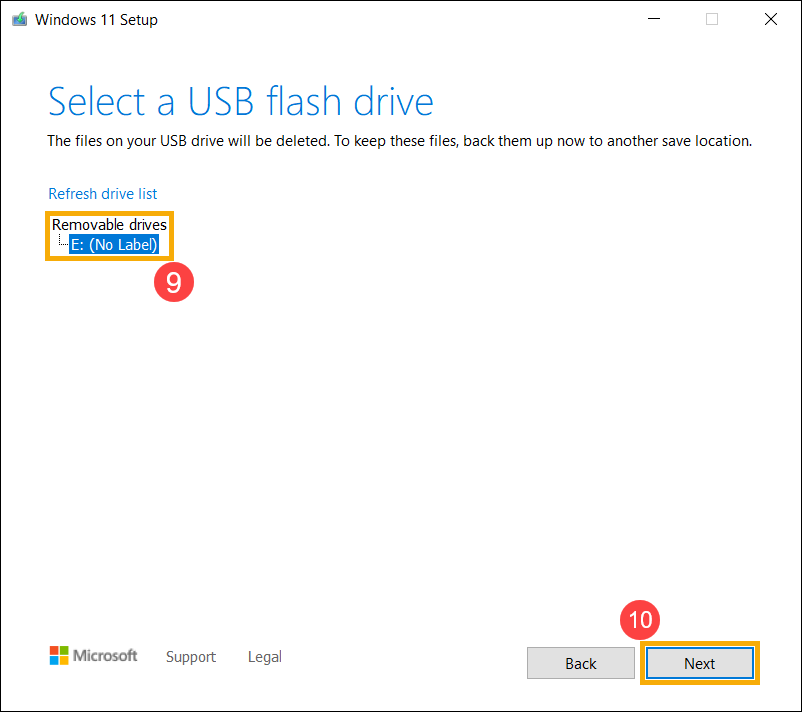
In removable drives, confirm and select the USB flash drive that you want to use⑨, then select [Next]⑩, and the system will start to download as well as create Windows installation media. The creation will take a while, which depends on your device and the internet connection. Note: Please make sure the AC adapter is connected as well as there is a stable internet connection during the process, and do not force to shut down to prevent the creation is incomplete.
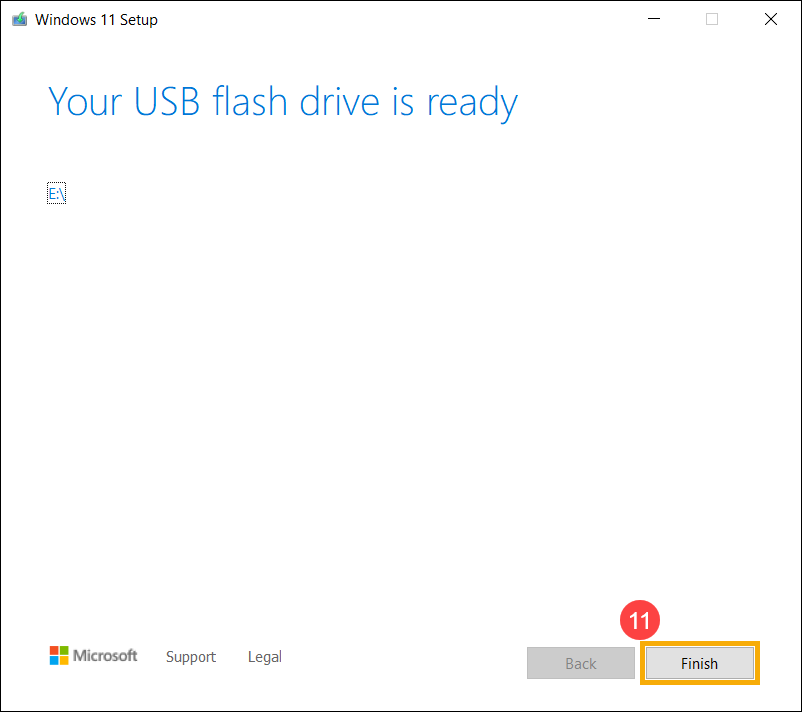
The installation media has been created, please click [Finish]⑪.
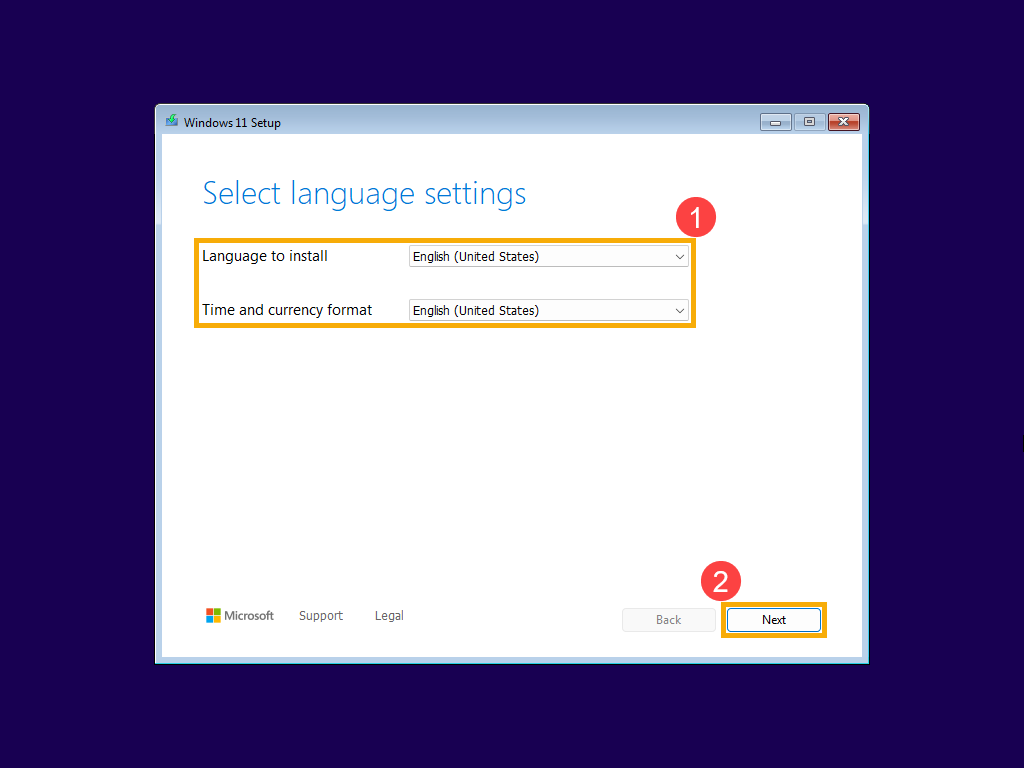
The device will enter Windows Setup. Please choose the Language, Time and currency format①, then click [Next]②.
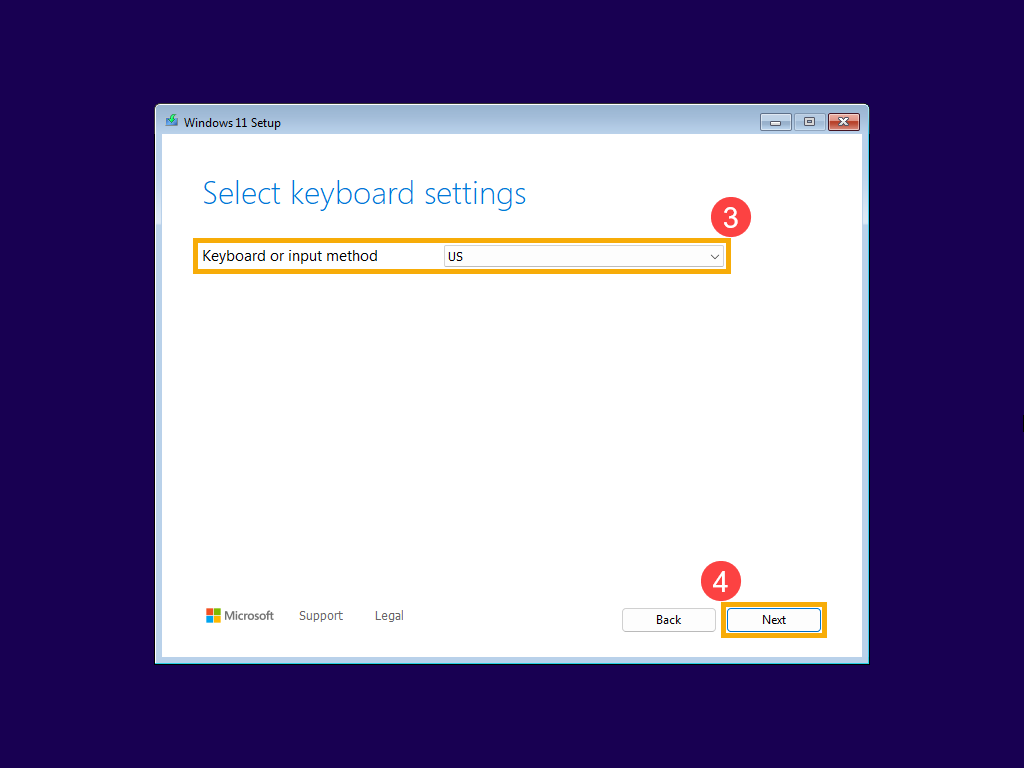
Please select the Keyboard or input method you wish to use③, and then click [Next]④.
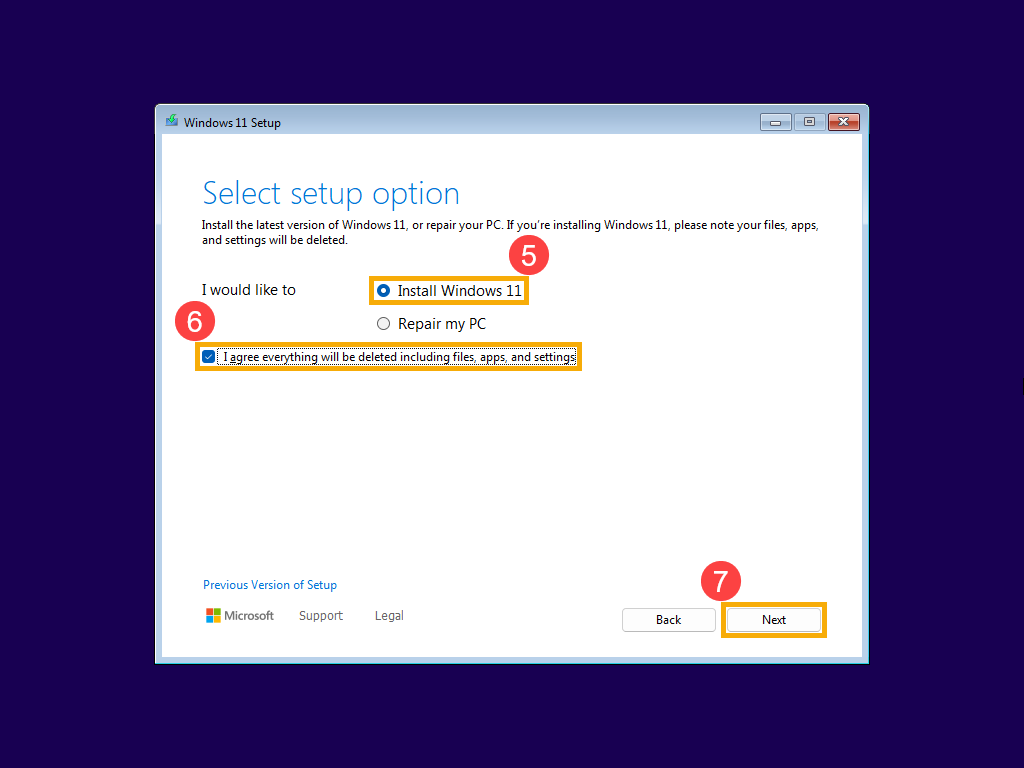
Select [Install Windows 11]⑤, check [I agree everything will be deleted including files, apps, and settings]⑥, and then click [Next]⑦.
Please read the Microsoft software license terms and applicable notices, then click [Accept]⑧.
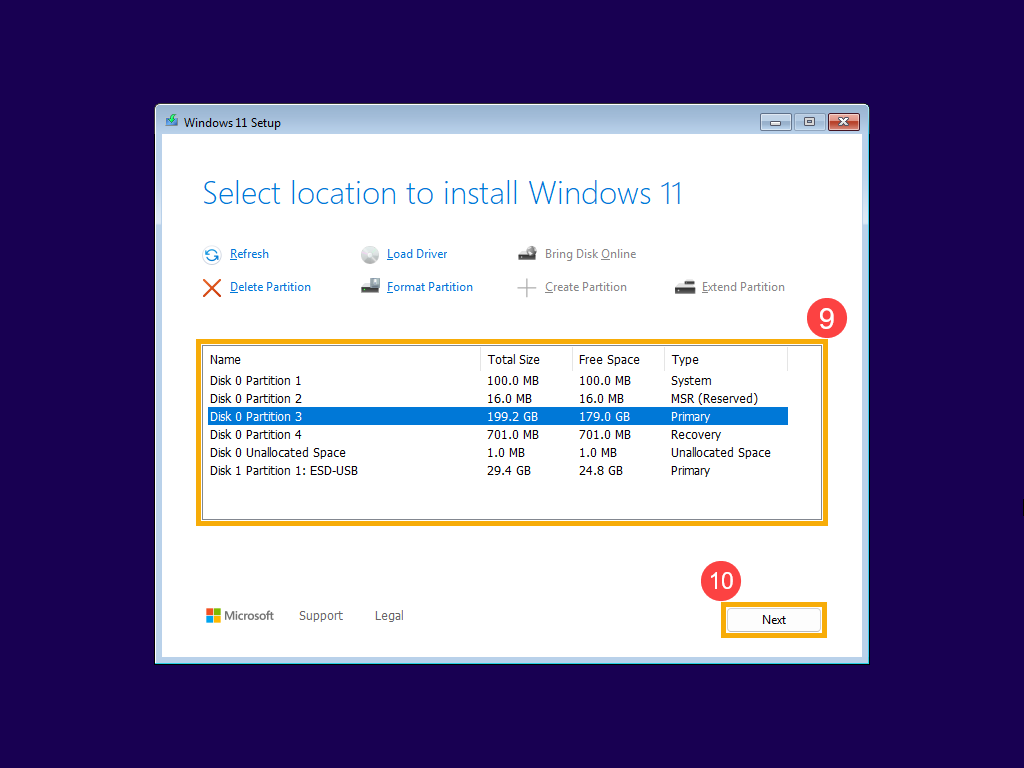
A list of disks and partitions on your device will be displayed. If multiple disks are shown, please select the location where you want to install Windows 11⑨, and then click [Next]⑩. Note: If you want to erase all data on the old drive, you can also click to delete the partition and then create a new partition.
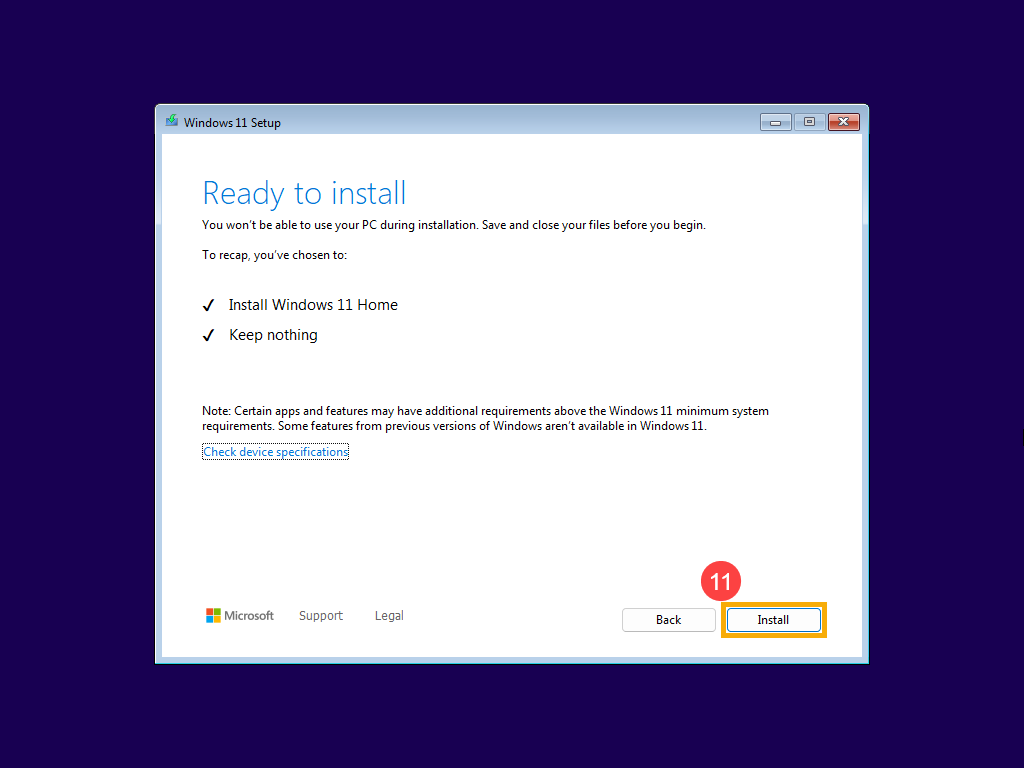
Click [Install]⑪ to begin the installation of the Windows operating system. Note: The installation process may take some time, depending on your device and USB drive performance. Ensure that your device is connected to a power source and do not force a shutdown during the installation to avoid any issues.
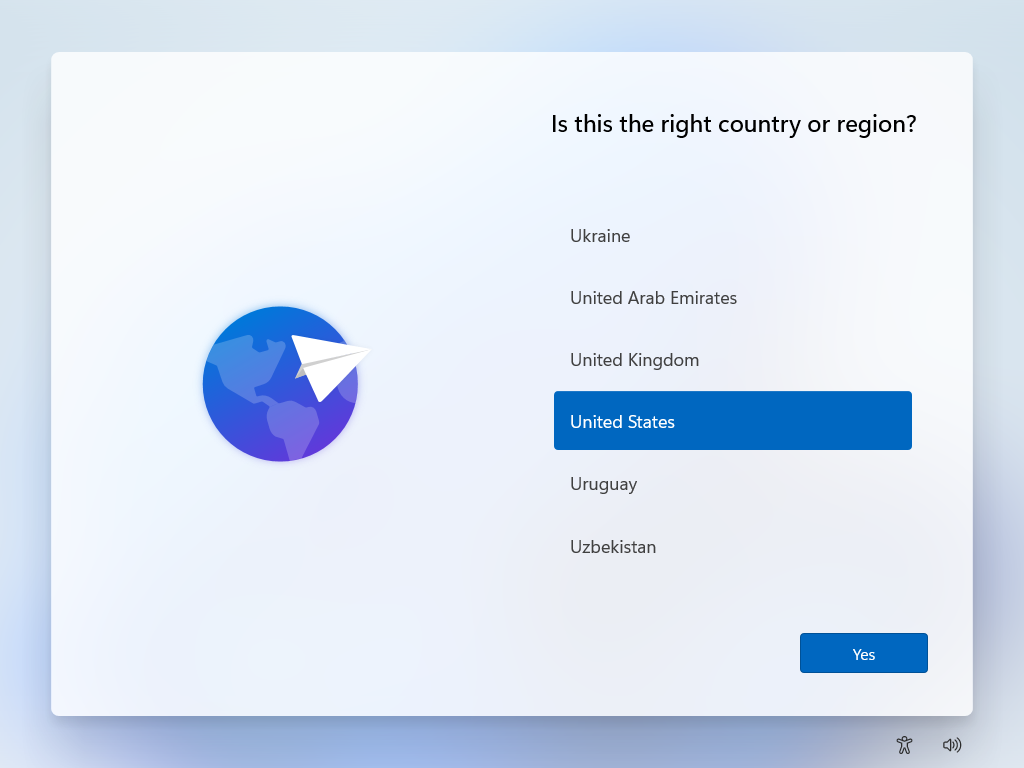
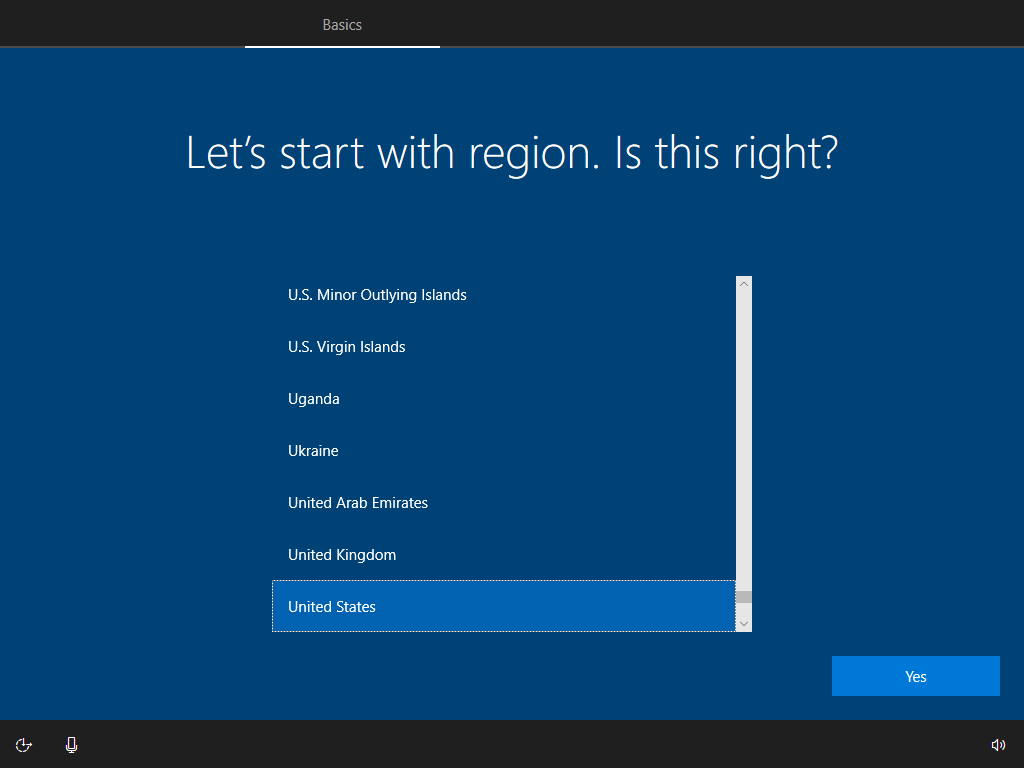
The device will restart and enter the basic setting page of Windows OS after the reinstallation is complete, here you can learn more about Windows - Start for the first time.
After completing the basic settings of Windows OS and enter desktop, you should go to ASUS support site to download drivers, here you can learn more about How to search for and download drivers.
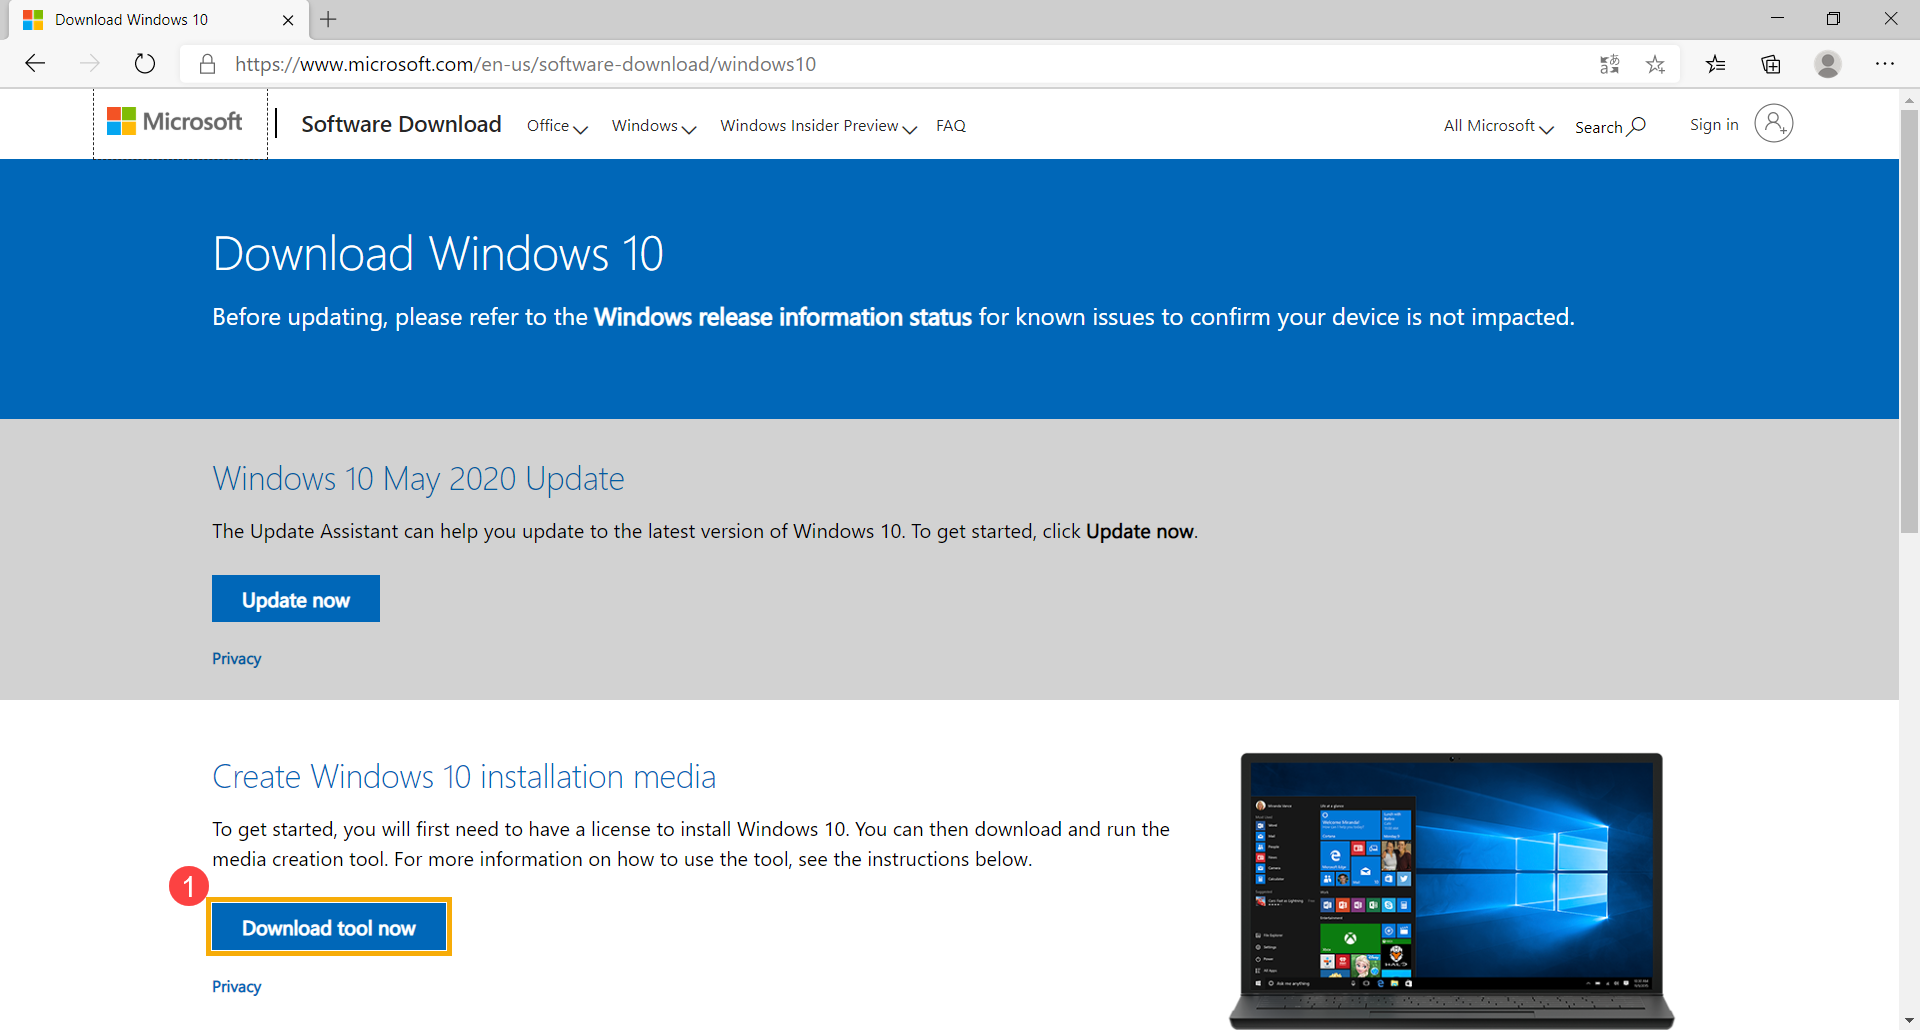
Go to Microsoft website, click [Download tool now]① to download Windows 10 installation media tool.
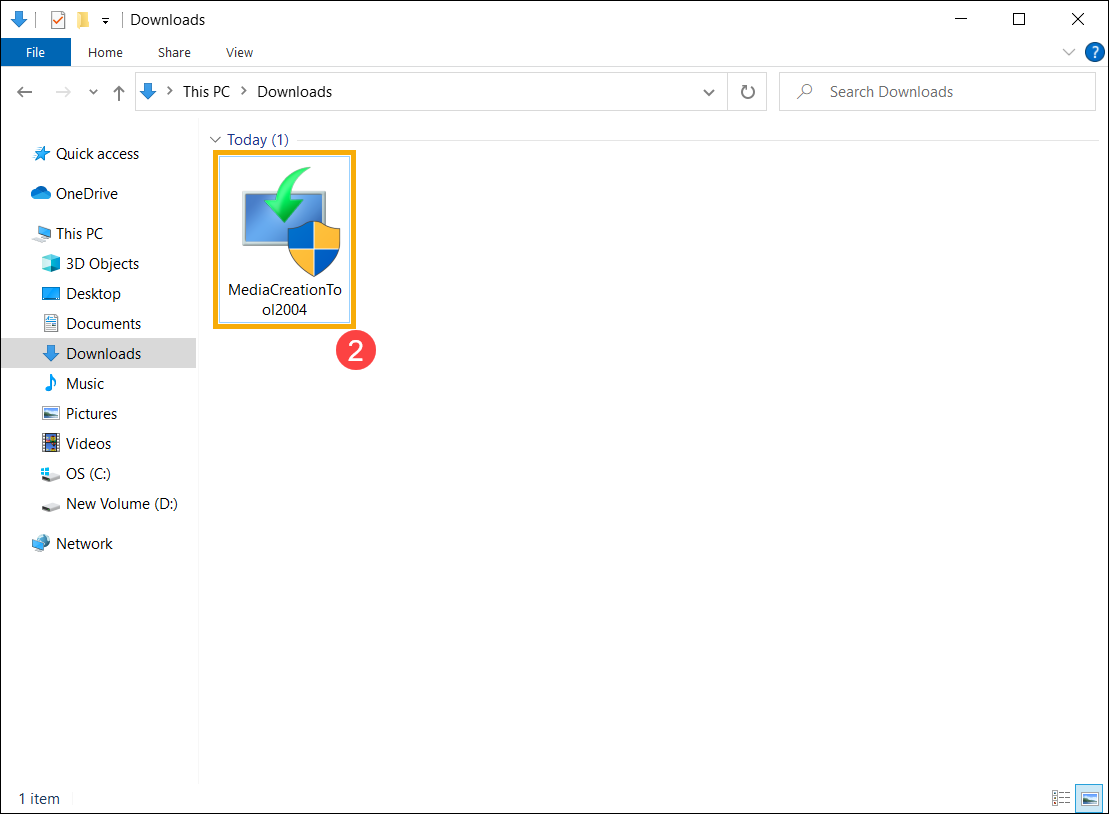
Go to the downloaded folder of the tool, then double-click [MediaCreationTool]② file to start the installation.
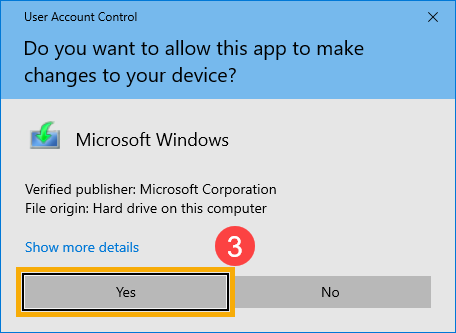
If the User Account Control window displayed, please select [Yes]③.
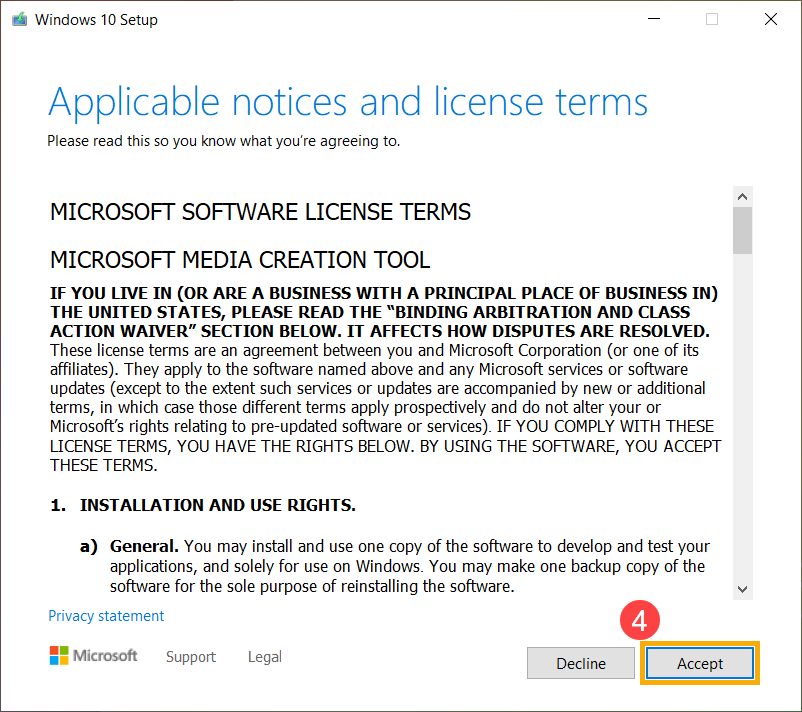
Microsoft software license terms and applicable notices, please select [Accept]④.
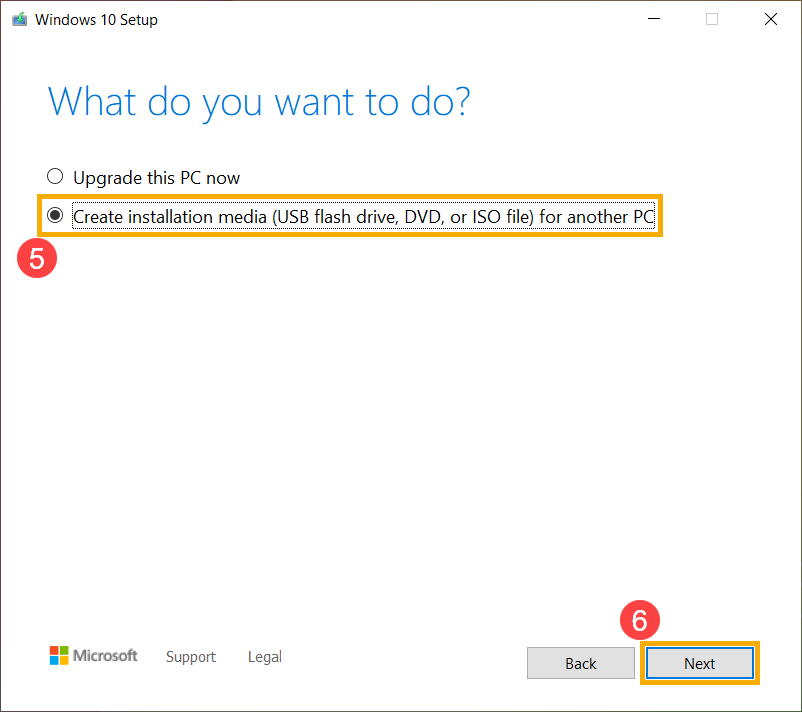
Select [Create installation media (USB flash drive, DVD, or ISO file) for another PC]⑤, then select [Next]⑥.
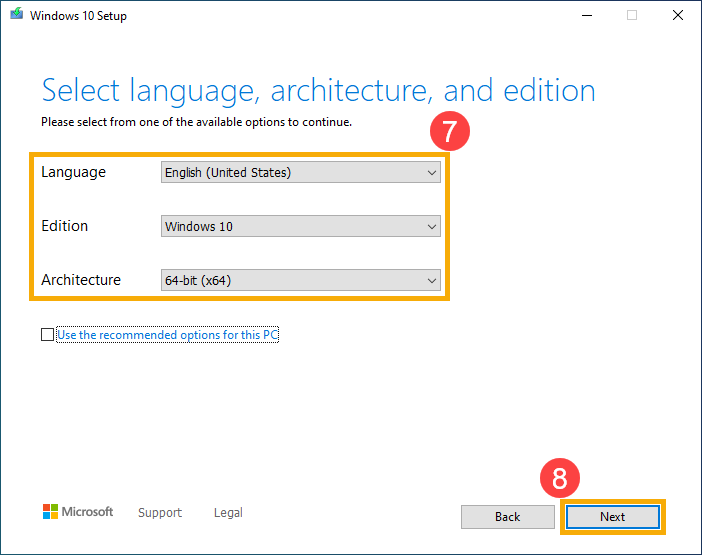
Select language, edition, and architecture (64-bit or 32-bit) which you want to create for the Windows installation media⑦, then select [Next]⑧. Note: Please select the correct language, edition, and architecture for your target unit to prevent any errors happened on the Windows activation afterward (if your device is with digital license, Windows OS will be automatically activated when it’s online after the installation is completed).
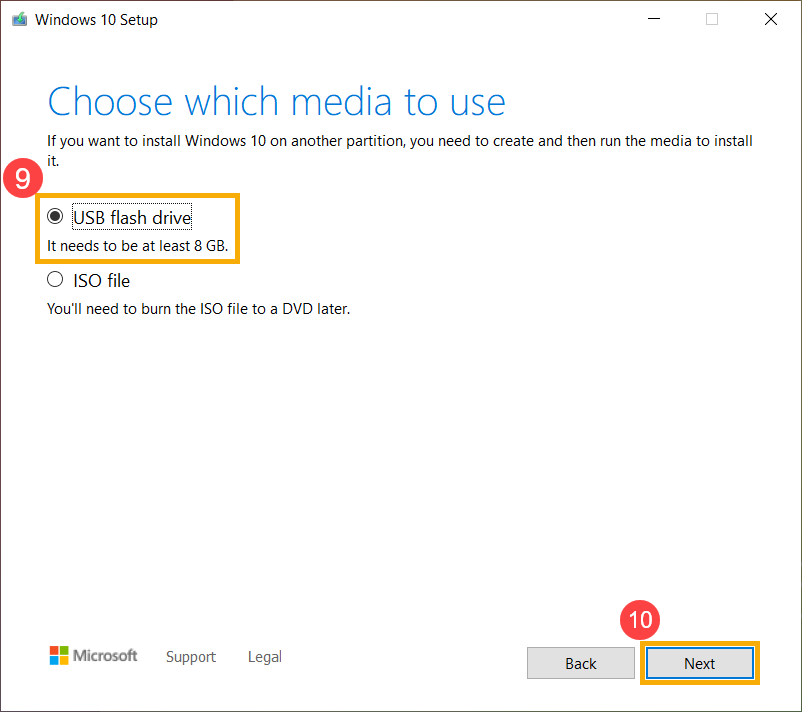
Connect the USB flash drive that you want to create as a Windows installation media to your device, select [USB flash drive]⑨ and then select [Next]⑩. Note: All files on the USB flash drive will be deleted during the process, so please back up your files first if you have data inside originally.
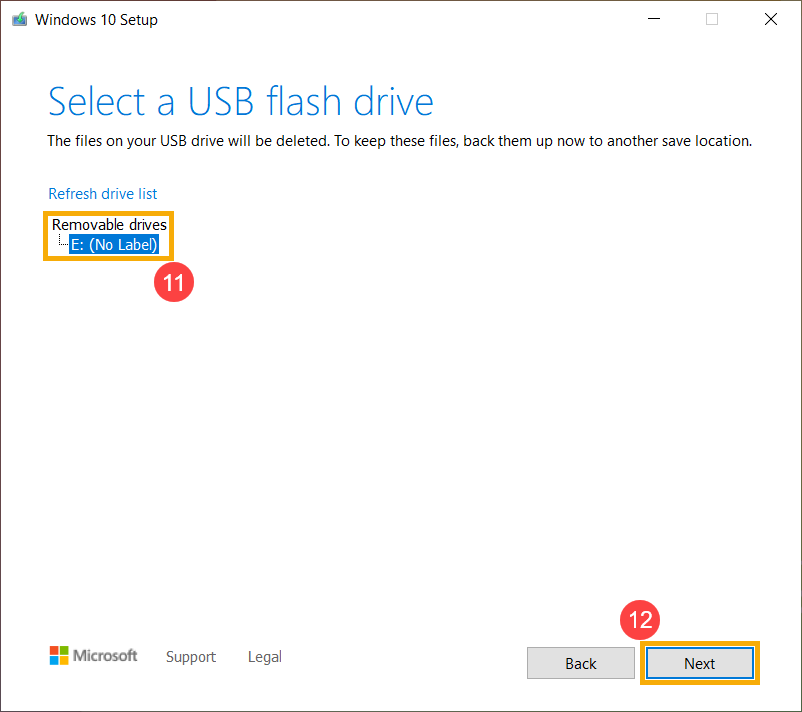
In removable drives, confirm and select the USB flash drive that you want to use⑪, then select [Next]⑫, and the system will start to download as well as create Windows installation media. The creation will take a while, which depends on your device and the internet connection. Note: Please make sure the AC adapter is connected as well as there is a stable internet connection during the process, and do not force to shut down to prevent the creation is incomplete.
The installation media has been created, please click [Finish]⑬.
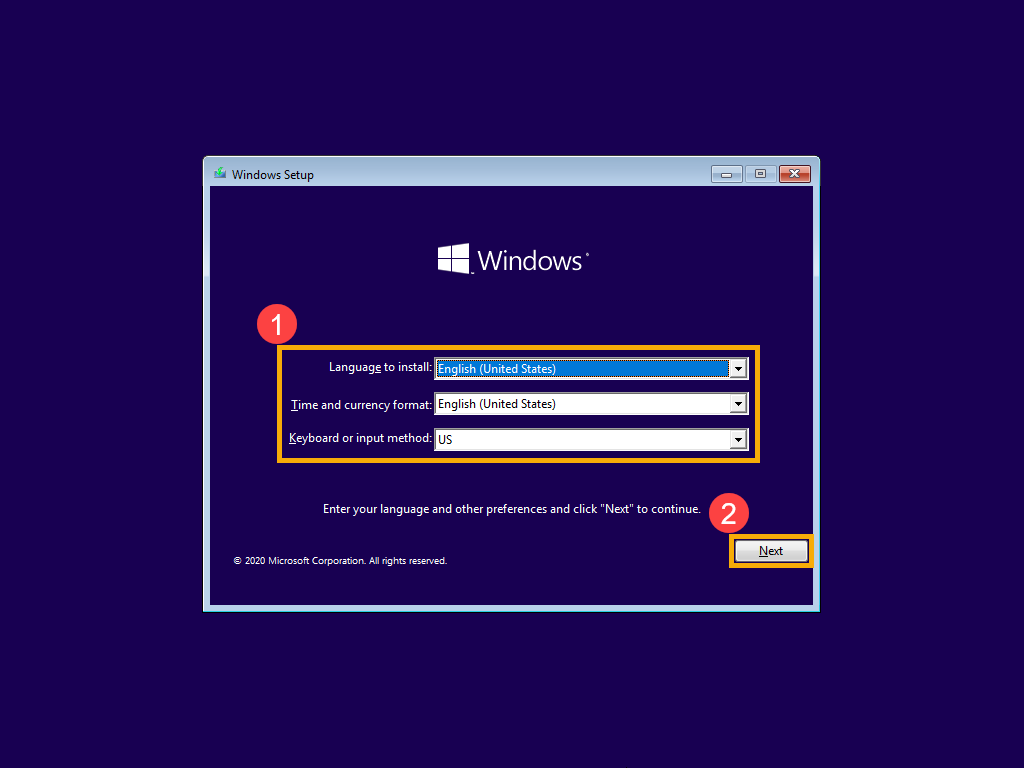
The device will enter Windows Setup. Please choose the language, time and currency format, and keyboard or input method①, then click [Next]②.
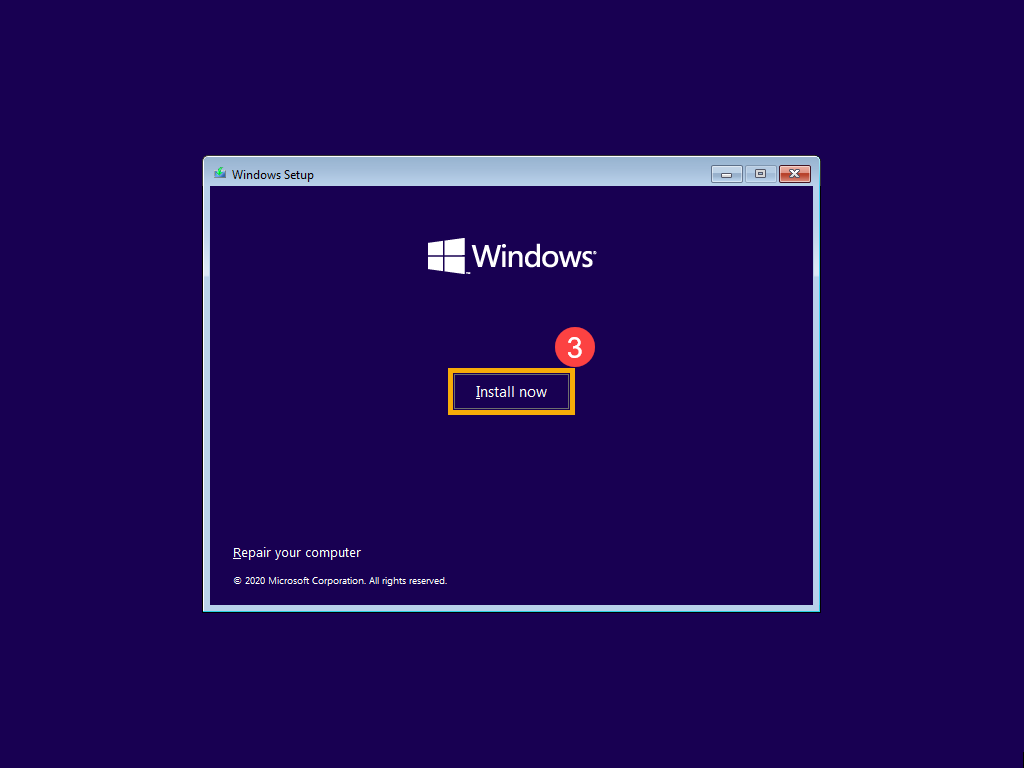
Click [Install now]③.
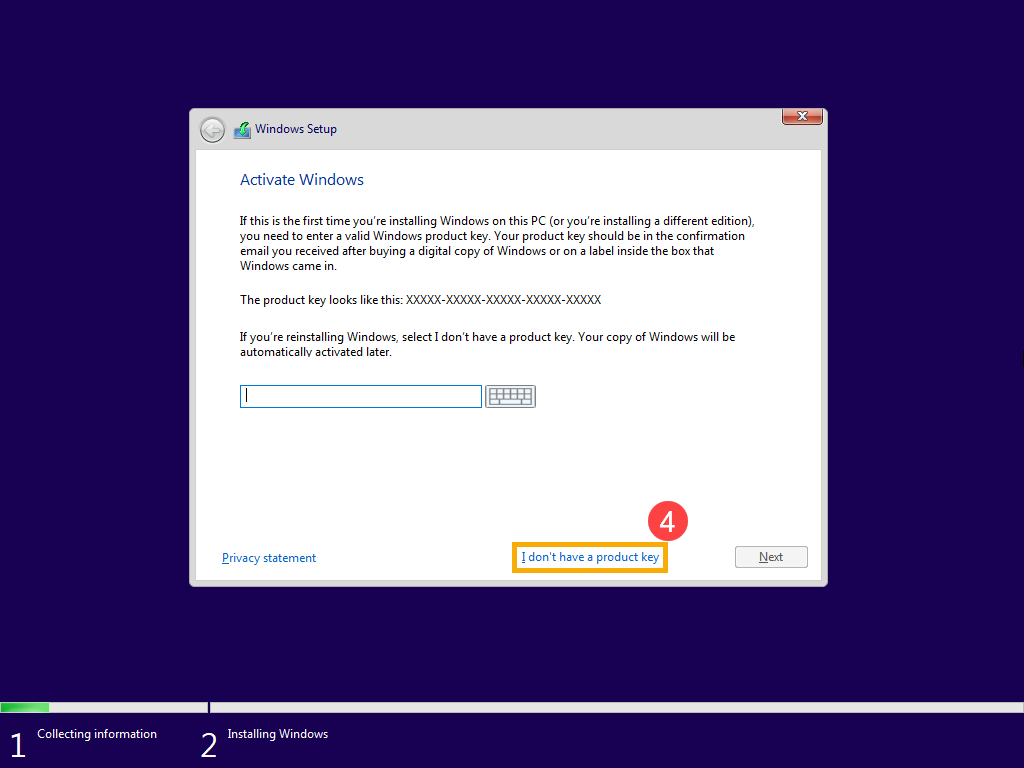
If your device was built-in Windows Operating System (which is a digital license), please select [I don’t have a product key]④. Windows OS will automatically be activated online after the installation is completed.
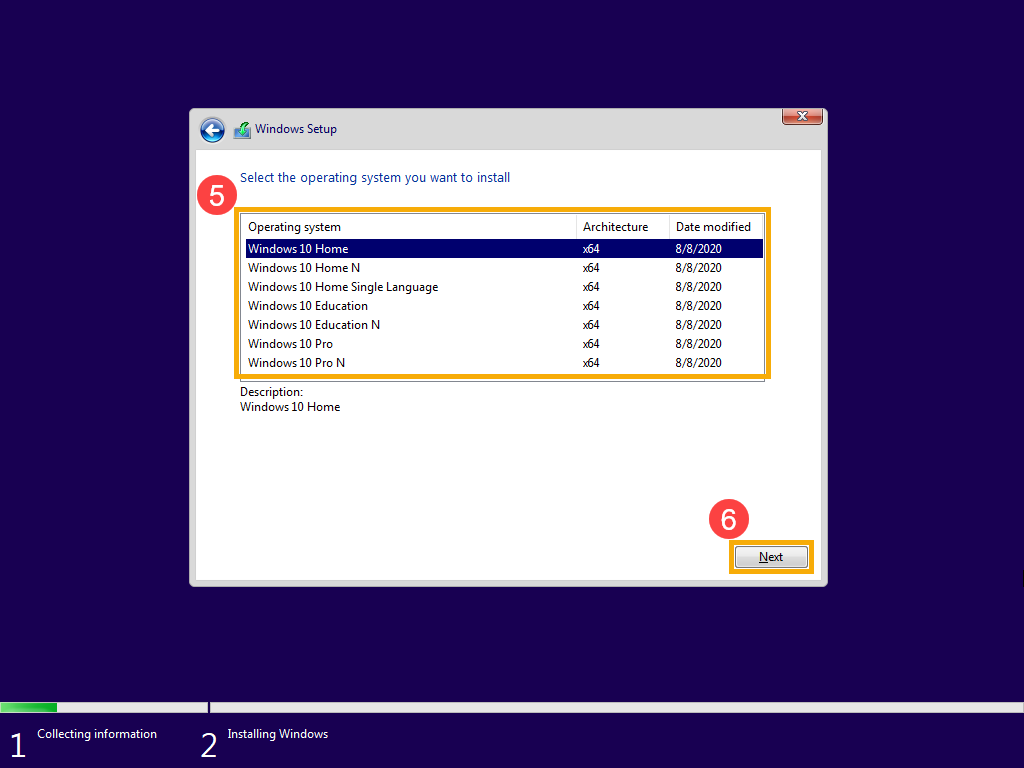
Please select the Operating System version which you want to install⑤, then click [Next]⑥. Note: Please select the version which your device originally had, otherwise, Windows activation will error if the version is not the same.
Microsoft software license terms and applicable notices, please check the box to [I accept the license terms]⑦, then click [Next]⑧.
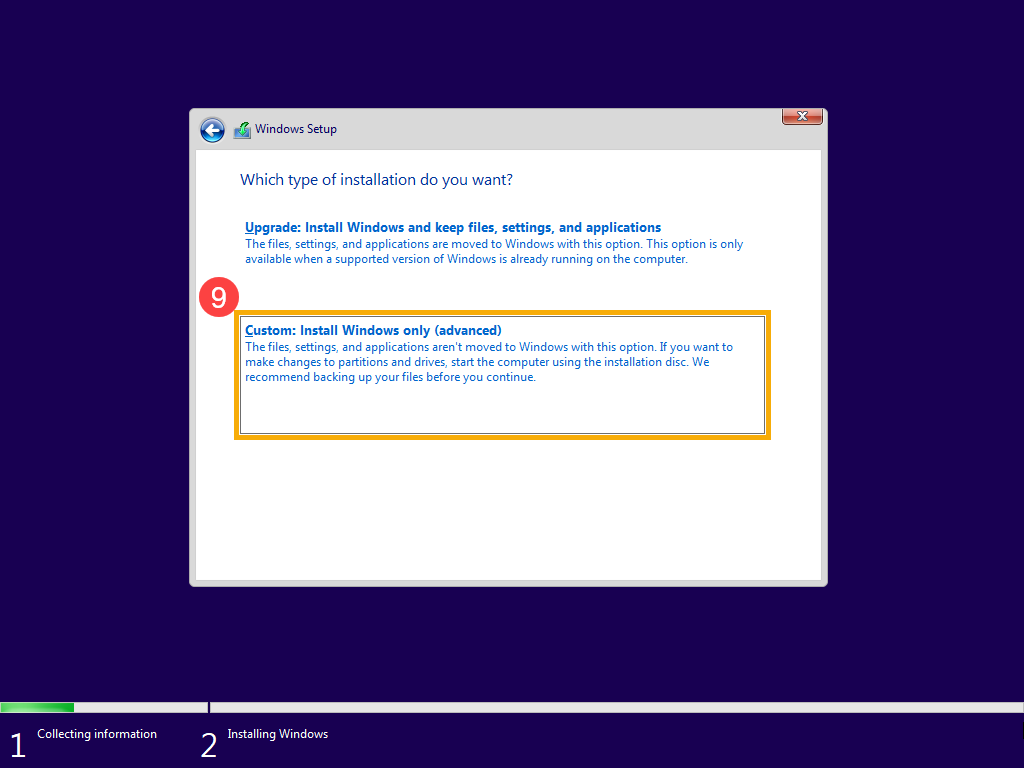
Select [Custom: Install Windows only (advanced) ]⑨.
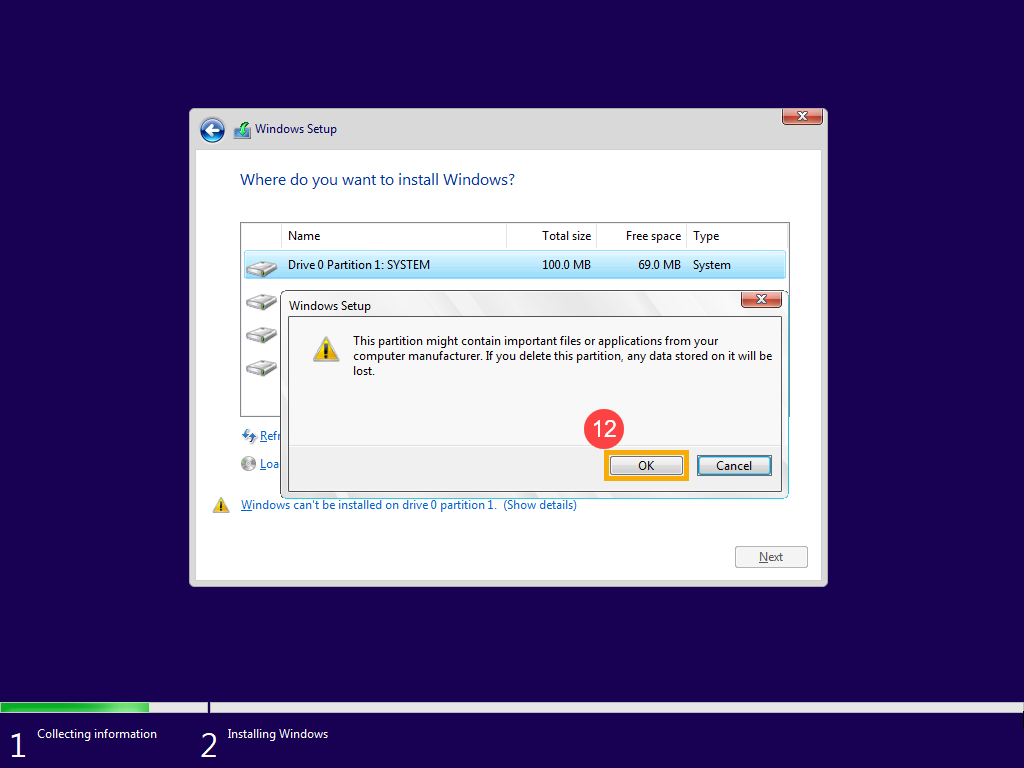
You will see the list of all drives and partitions on your device. If multiple disks are displayed, you will only need to delete all partitions from the disk where you want to install Windows. (Most Disk C locates as Drive 0, so let’s take Drive 0 as an example.) Select each partition of Drive 0 in the list⑩, then select [Delete]⑪. If the Windows Setup notification appears, please select [OK]⑫. Note: If you select Delete on other disks/drives, it will remove ones all data inside.
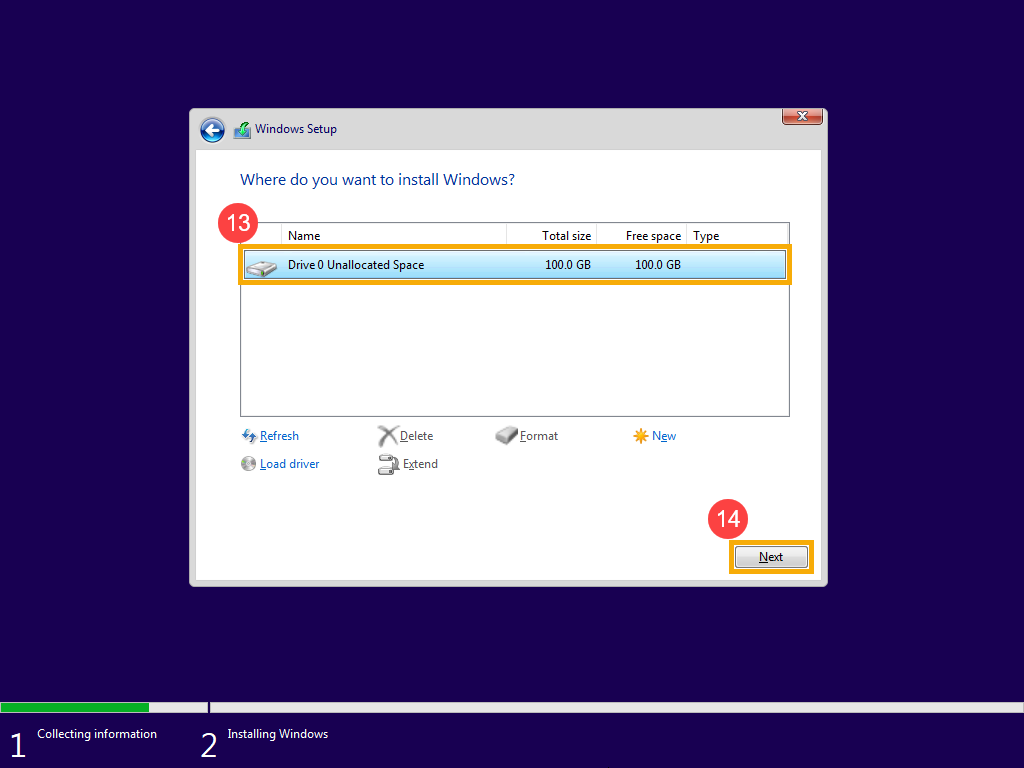
After reproducing step 9 to delete all partitions of Drive 0, only Drive 0 Unallocated Space should remain. Select [Drive 0 Unallocated Space]⑬, then click [Next]⑭ to reinstall Windows OS. Note: Please make sure the AC adapter is connected during the process, and do not force to shut down to prevent any issues.
The device will restart and enter the basic setting page of Windows OS after the reinstallation is complete, here you can learn more about Windows - Start for the first time.
After completing the basic settings of Windows OS and enter desktop, you should go to ASUS support site to download drivers, here you can learn more about How to search for and download drivers.
Above information might be partly or entirely quoted from exterior websites or sources. please refer to the information based on the source that we noted. Please directly contact or inquire the sources if there is any further question and note that ASUS is neither relevant nor responsible for its content/service. This information may not suitable for all the products from the same category/series. Some of the screen shots and operations could be different from the software versions.
ASUS provides the above information for reference only. If you have any questions about the content, please contact the above product vendor directly. Please note that ASUS is not responsible for the content or service provided by the above product vendor.