Leverage our innovations with new technologies to deploy intelligence and connectivity from core to cloud.
View All SolutionsView All Solutions
Accelerate workloads of different platform types and size with ASUS servers and workstations.
View All ProductsView All Products
Engage with us to find out our news, media, events and stories.
We offer a variety of ways to get support, including sales, products and technical issues.
Update : 2023/10/31 10:12
[Motherboard/Desktop] ASUS EZ Flash 3 - Introduction
To provide you more detailed instruction, you can also click ASUS Youtube video link below to know more about How to Update BIOS with EZ Flash
https://www.youtube.com/watch?v=Em7SRaG3L_0
Description:
ASUS EZ Flash 3 program allows you to easily update the BIOS version, save BIOS file to USB flash drive. You can update the UEFI BIOS tool of the motherboard.
Usage Scenario:
The current way for general users to update BIOS, usually by the Windows update Tool to update BIOS. But sometimes the operating system is poisoned, or there are a large number of resident programs and other unstable factors, may cause BIOS update to fail. Use ASUS EZ Flash 3 to update the BIOS version without entering the Windows operating system.
Table of Contents:
2-1. Update BIOS via USB flash drive
Step 1. Before updating the BIOS version, please back up all hard disk data.
Step 2. USB flash drives require a single sector in FAT 16/32 format, and 1GB or more is recommended.
Step 3. How to getting (BIOS)?
You can get the latest software, manuals, drivers and firmware at the ASUS Download Center.
If you need more information about ASUS Download Center, please refer to this link.
*How to check product model: https://www.asus.com/support/Article/565/
Operation method::
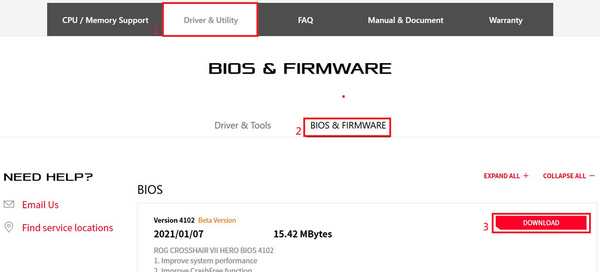
1. Download the latest BIOS file corresponding to your motherboard model from ASUS Download Center and save it in the USB flash drive.
Enter the model -> click on the driver and utility。
(Ex: ROG CROSSHAIR VII HERO)
2. Click Driver & Utility ->BIOS & FIRMWARE, select the required BIOS version and download it (it is recommended to use the latest version).
Step 4. After clicking the download button, save the BIOS to the USB flash drive, Then unzip (Windows 10 has its own unzip ZIP function), Check if there is a .CAP file in the root directory of the USB flash drive.
After unzip , a .CAP file will appear, this is the BIOS update file .
Step 5:Insert the USB flash drive into the USB port of the motherboard.
2.Update BIOS steps:
Please follow the steps as below to enter the BIOS
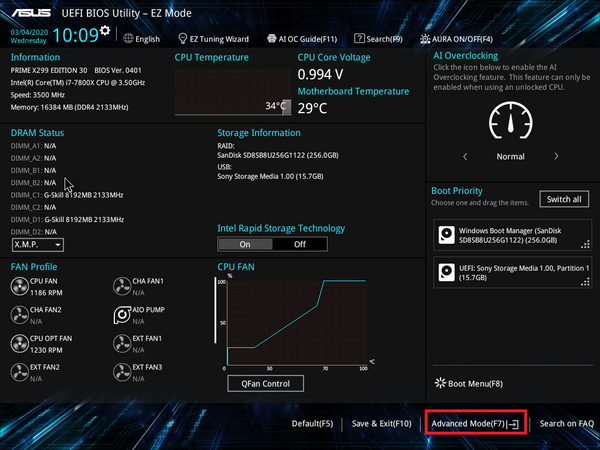
Step 1. After booting, when show ASUS LOGO, press the keyboard DEL key.
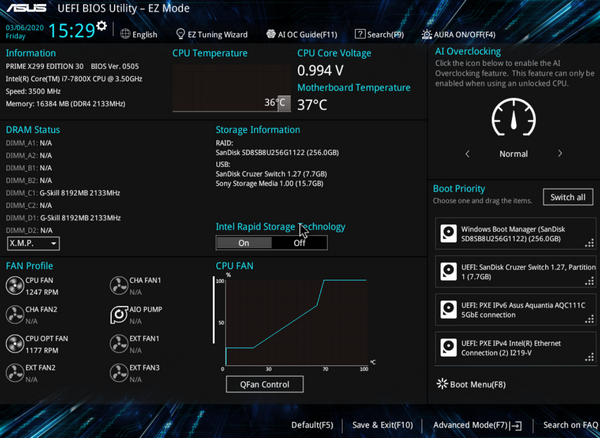
Step 2. When show the BIOS screen , press F7 or click Advance Mode with the mouse to enter the advanced mode.
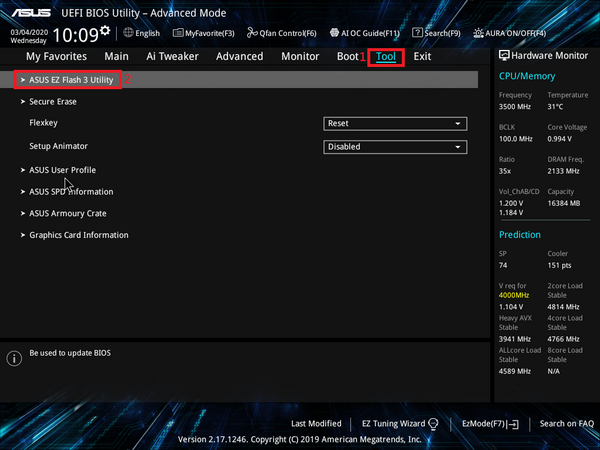
Step 3. Click the Tools page with the mouse, and then click ASUS EZ Flash 3 Utilities.
2-1. Update BIOS by USB flash drive
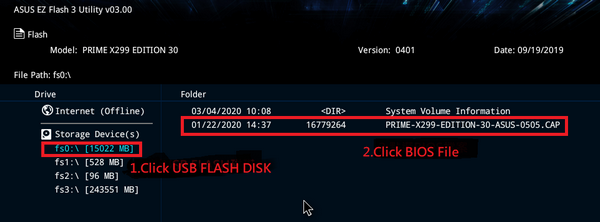
Click the disk the USB flash drive where is stored in the BIOS file, and click the BIOS file that you want to update.
Click YES.
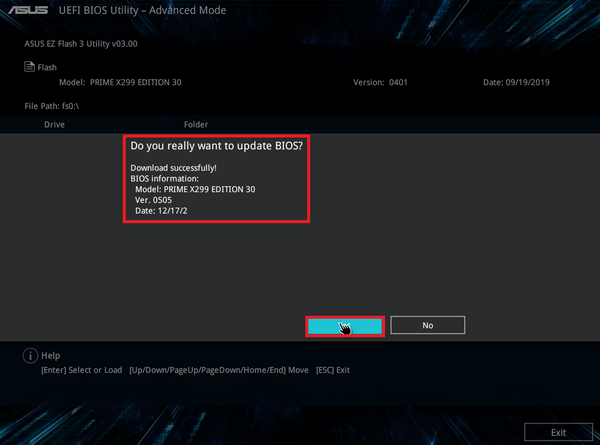
Confirm the BIOS information, click YES to start the update.
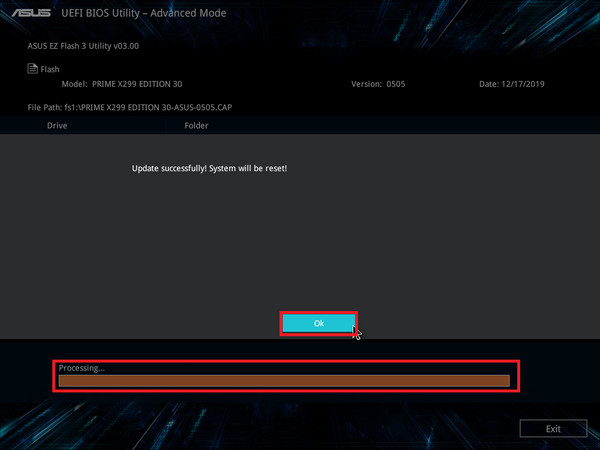
When the progress bar is completed, then show OK button, click it and it will reboot to complete the update.
Notice:1. This function only supports single-sector USB flash drives in FAT16/32 format.
2. When updating the BIOS, do not shut down or reset the system to avoid system boot failure.
3.Q &A
Q1: How to confirm whether my motherboard support ASUS EZ Flash 3?
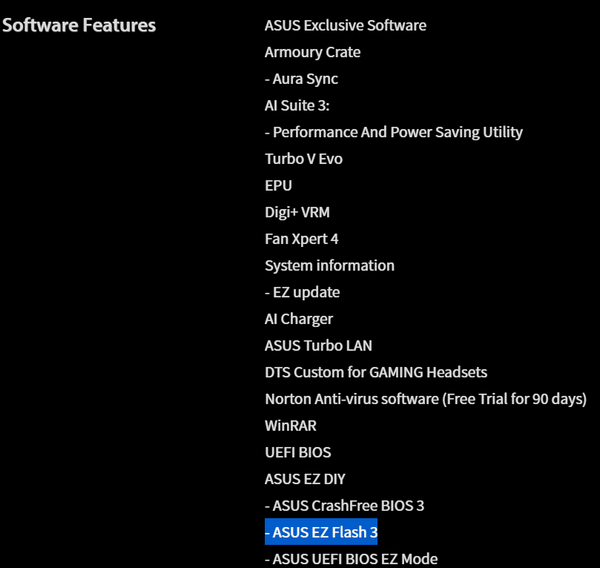
A1:ASUS EZ Flash 3 only applicable to UEFI BIOS motherboards with built-in ASUS EZ flash 3, you can confirm the product specifications from the official website.
On the product introduction page, click on product specifications.
You can check whether there is support in the Software Features.
Q2: After updating the BIOS, the system may become unstable or crash. What should I do?
A2:After updating the BIOS, it is recommended to follow the steps below to restore the BIOS default settings, to avoid system unstable caused by incorrect BIOS setting.
Please refer to the following steps:
1:Please enter the BIOS again and press the DEL key on the ASUS Logo.
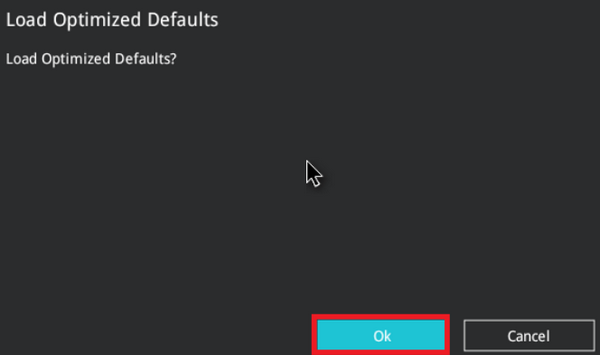
On the BIOS screen, press F5 key.
The following screen appears, click OK.
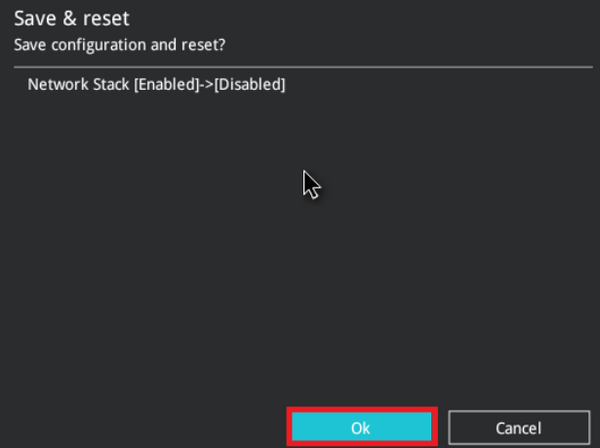
2. The following screen appears, click OK, Then the system restarts, you can restore the BIOS default settings .
Q3:How to make a FAT16 / 32 format USB flash drive?
A3: Please refer to the following steps:
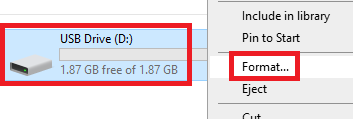
1. Format the USB flash drive. On the USB flash drive, right-click and select Format FAT16 / 32. *Formatting will delete all data in the USB flash drive.
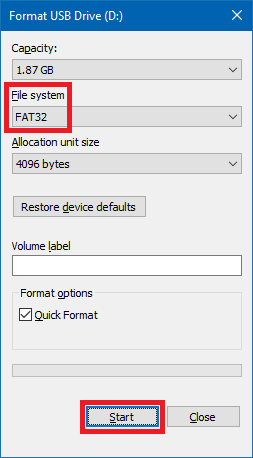
2. File system format, select FAT32, and then click start.
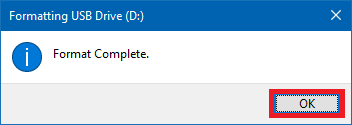
3. Formatting is complete.
Notice
Above information might be partly or entirely quoted from exterior websites or sources. please refer to the information based on the source that we noted. Please directly contact or inquire the sources if there is any further question and note that ASUS is neither relevant nor responsible for its content/service.
This information may not suitable for all the products from the same category/series. Some of the screen shots and operations could be different from the software versions.
ASUS provides the above information for reference only. If you have any questions about the content, please contact the above product vendor directly. Please note that ASUS is not responsible for the content or service provided by the above product vendor.